Autotask integration
NAVIGATION Admin Settings > Integrations > Autotask
The Autotask integration automatically creates and organizes tickets for every pentest finding directly in Autotask. Tickets are created only when the report is released, ensuring findings are finalized before tickets are sent to Autotask.
Benefits
- Eliminates manual work by automatically creating and organizing tickets for pentest findings.
- Prevents duplication and ticket clutter by detecting existing open tickets from previous assessments and updating them instead of creating new ones.
- Improves remediation speed with structured, severity-based tickets and direct links back to detailed vPenTest results.
Integration features
| Feature | Description |
|---|---|
| Automatic ticket creation | Creates tickets automatically for pentest findings after a report is released. |
| Priority mapping | Maps vPenTest severity levels to Autotask ticket priorities. |
| Duplicate handling | Updates existing open tickets or creates new tickets with a cross-reference to older ones. |
| Organization mapping | Maps vPenTest organizations to Autotask organizations for ticket synchronization. |
| Manual ticket creation | Allows users to manually create tickets for findings after the report has been released. |
How to...
BEFORE YOU BEGIN In Autotask, create a ticket category for your vPenTest tickets. If you already have a preconfigured ticket category in Autotask, you can use it instead of creating a new one.
 Enable the integration
To enable the Autotask integration, complete the following steps in vPenTest:
- In the left navigation menu, click Admin Settings.
- Click the Integrations tab.
- Click Enable in the Autotask tile.
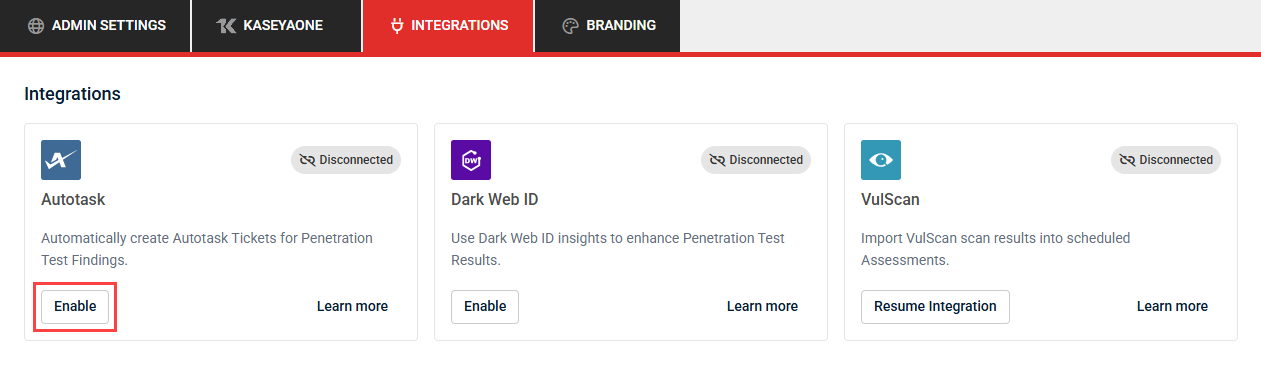
When the integration is enabled, a three-step setup form appears. You can click Save or Close at any point if you do not want to complete setup immediately.
Step 1: Details
- Click Authenticate with Autotask.
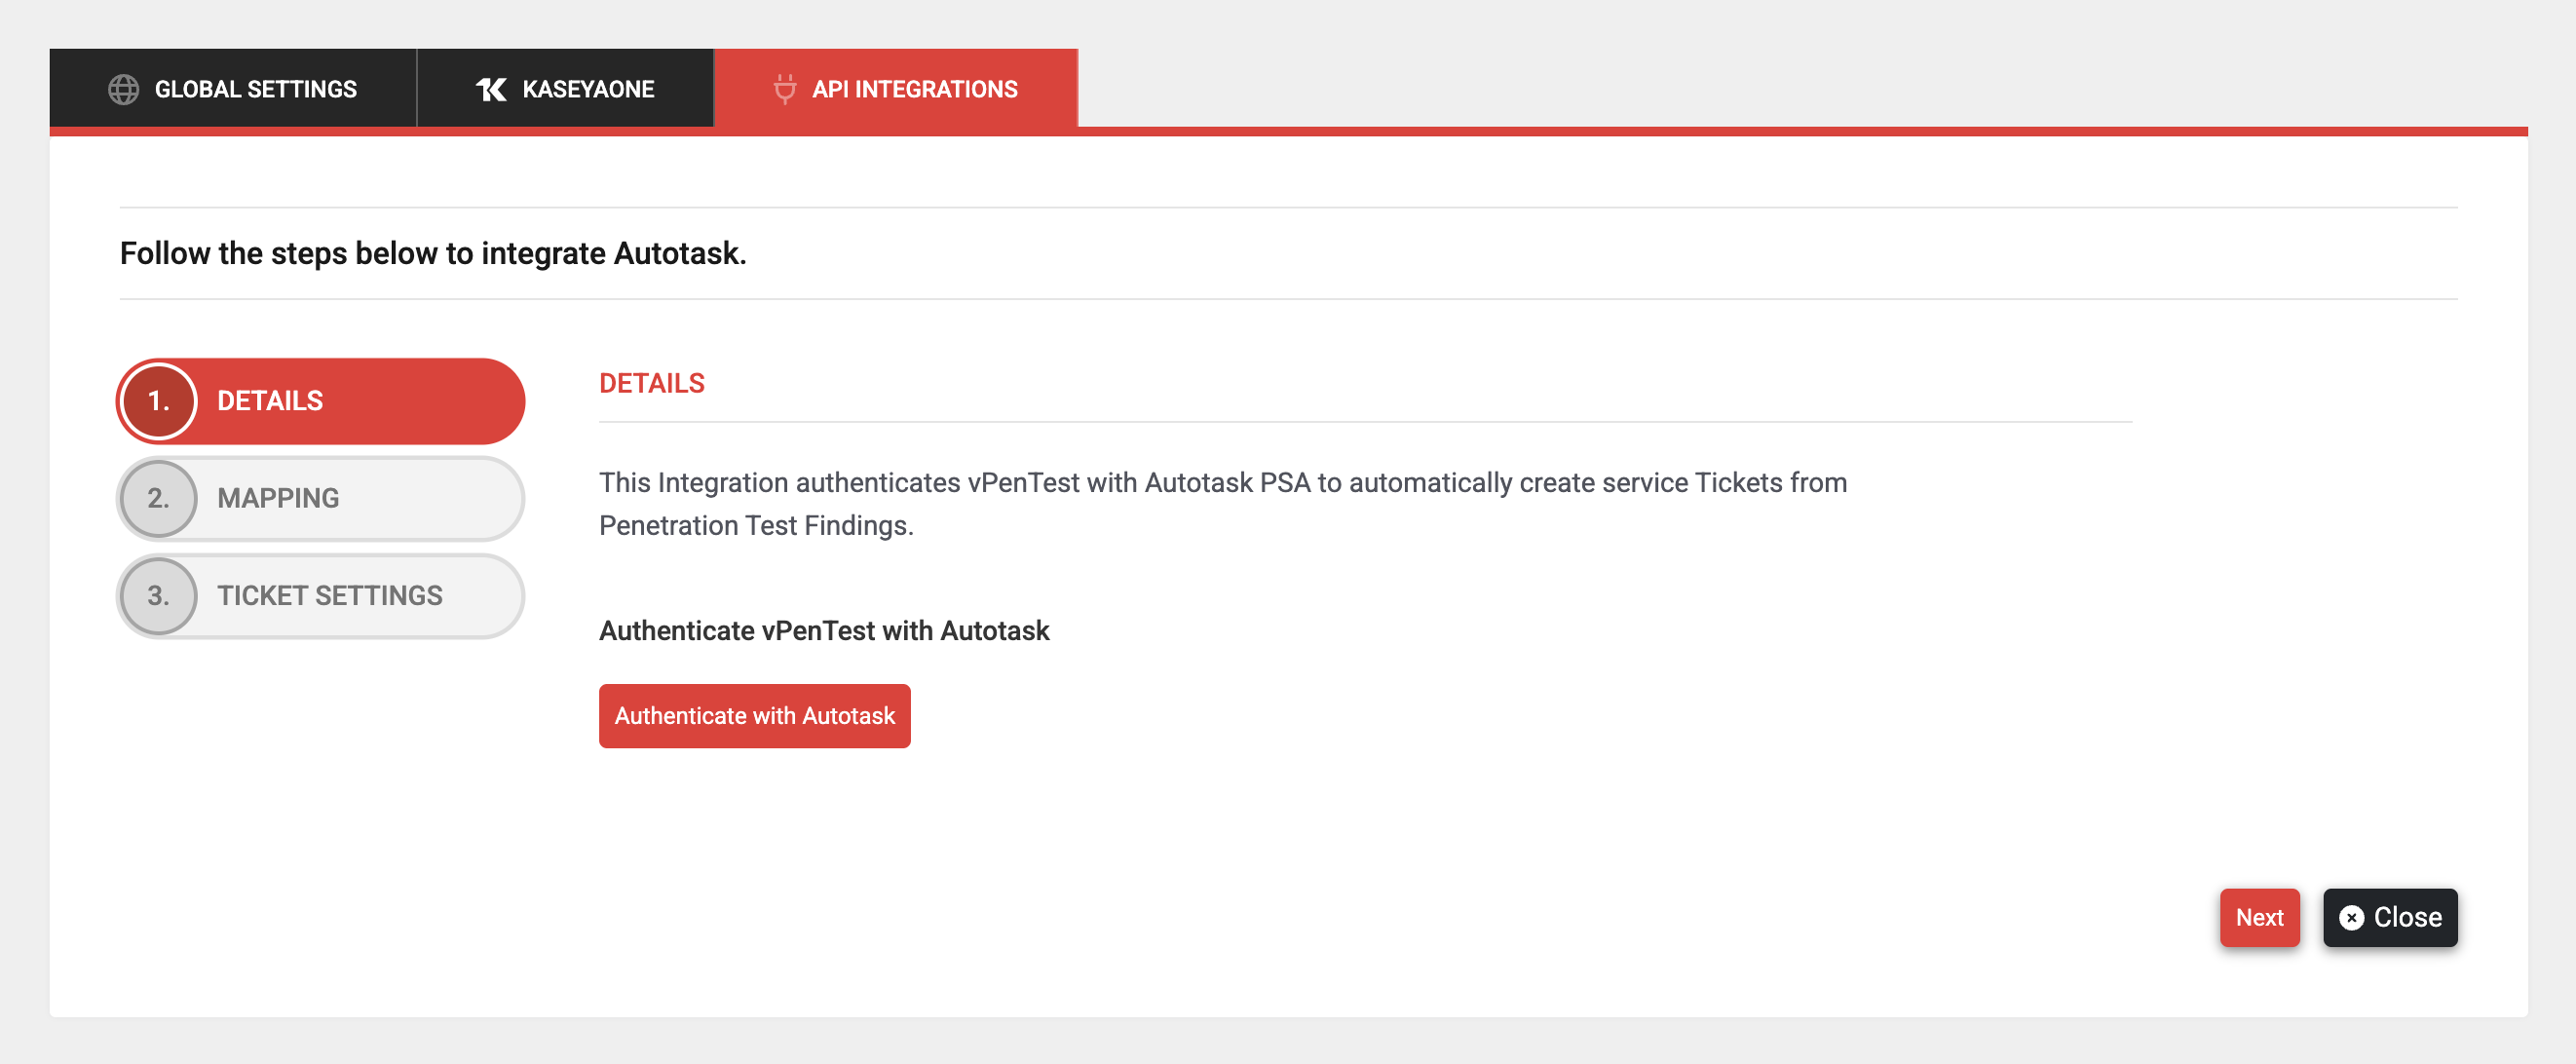
- Click Continue to Autotask.
- Once redirected to Autotask, log in if not already logged in, and click Authorize to grant vPenTest access.
After authentication is successful, the button changes to Authenticated. This status is visible to all users in the account.
Step 2: Mapping
This step displays all organizations available in vPenTest for the logged-in user. Refer to Creating and managing organizations. The user can map these vPenTest organizations to their corresponding Autotask organizations using the drop-down menus in the Existing Organization in Autotask column.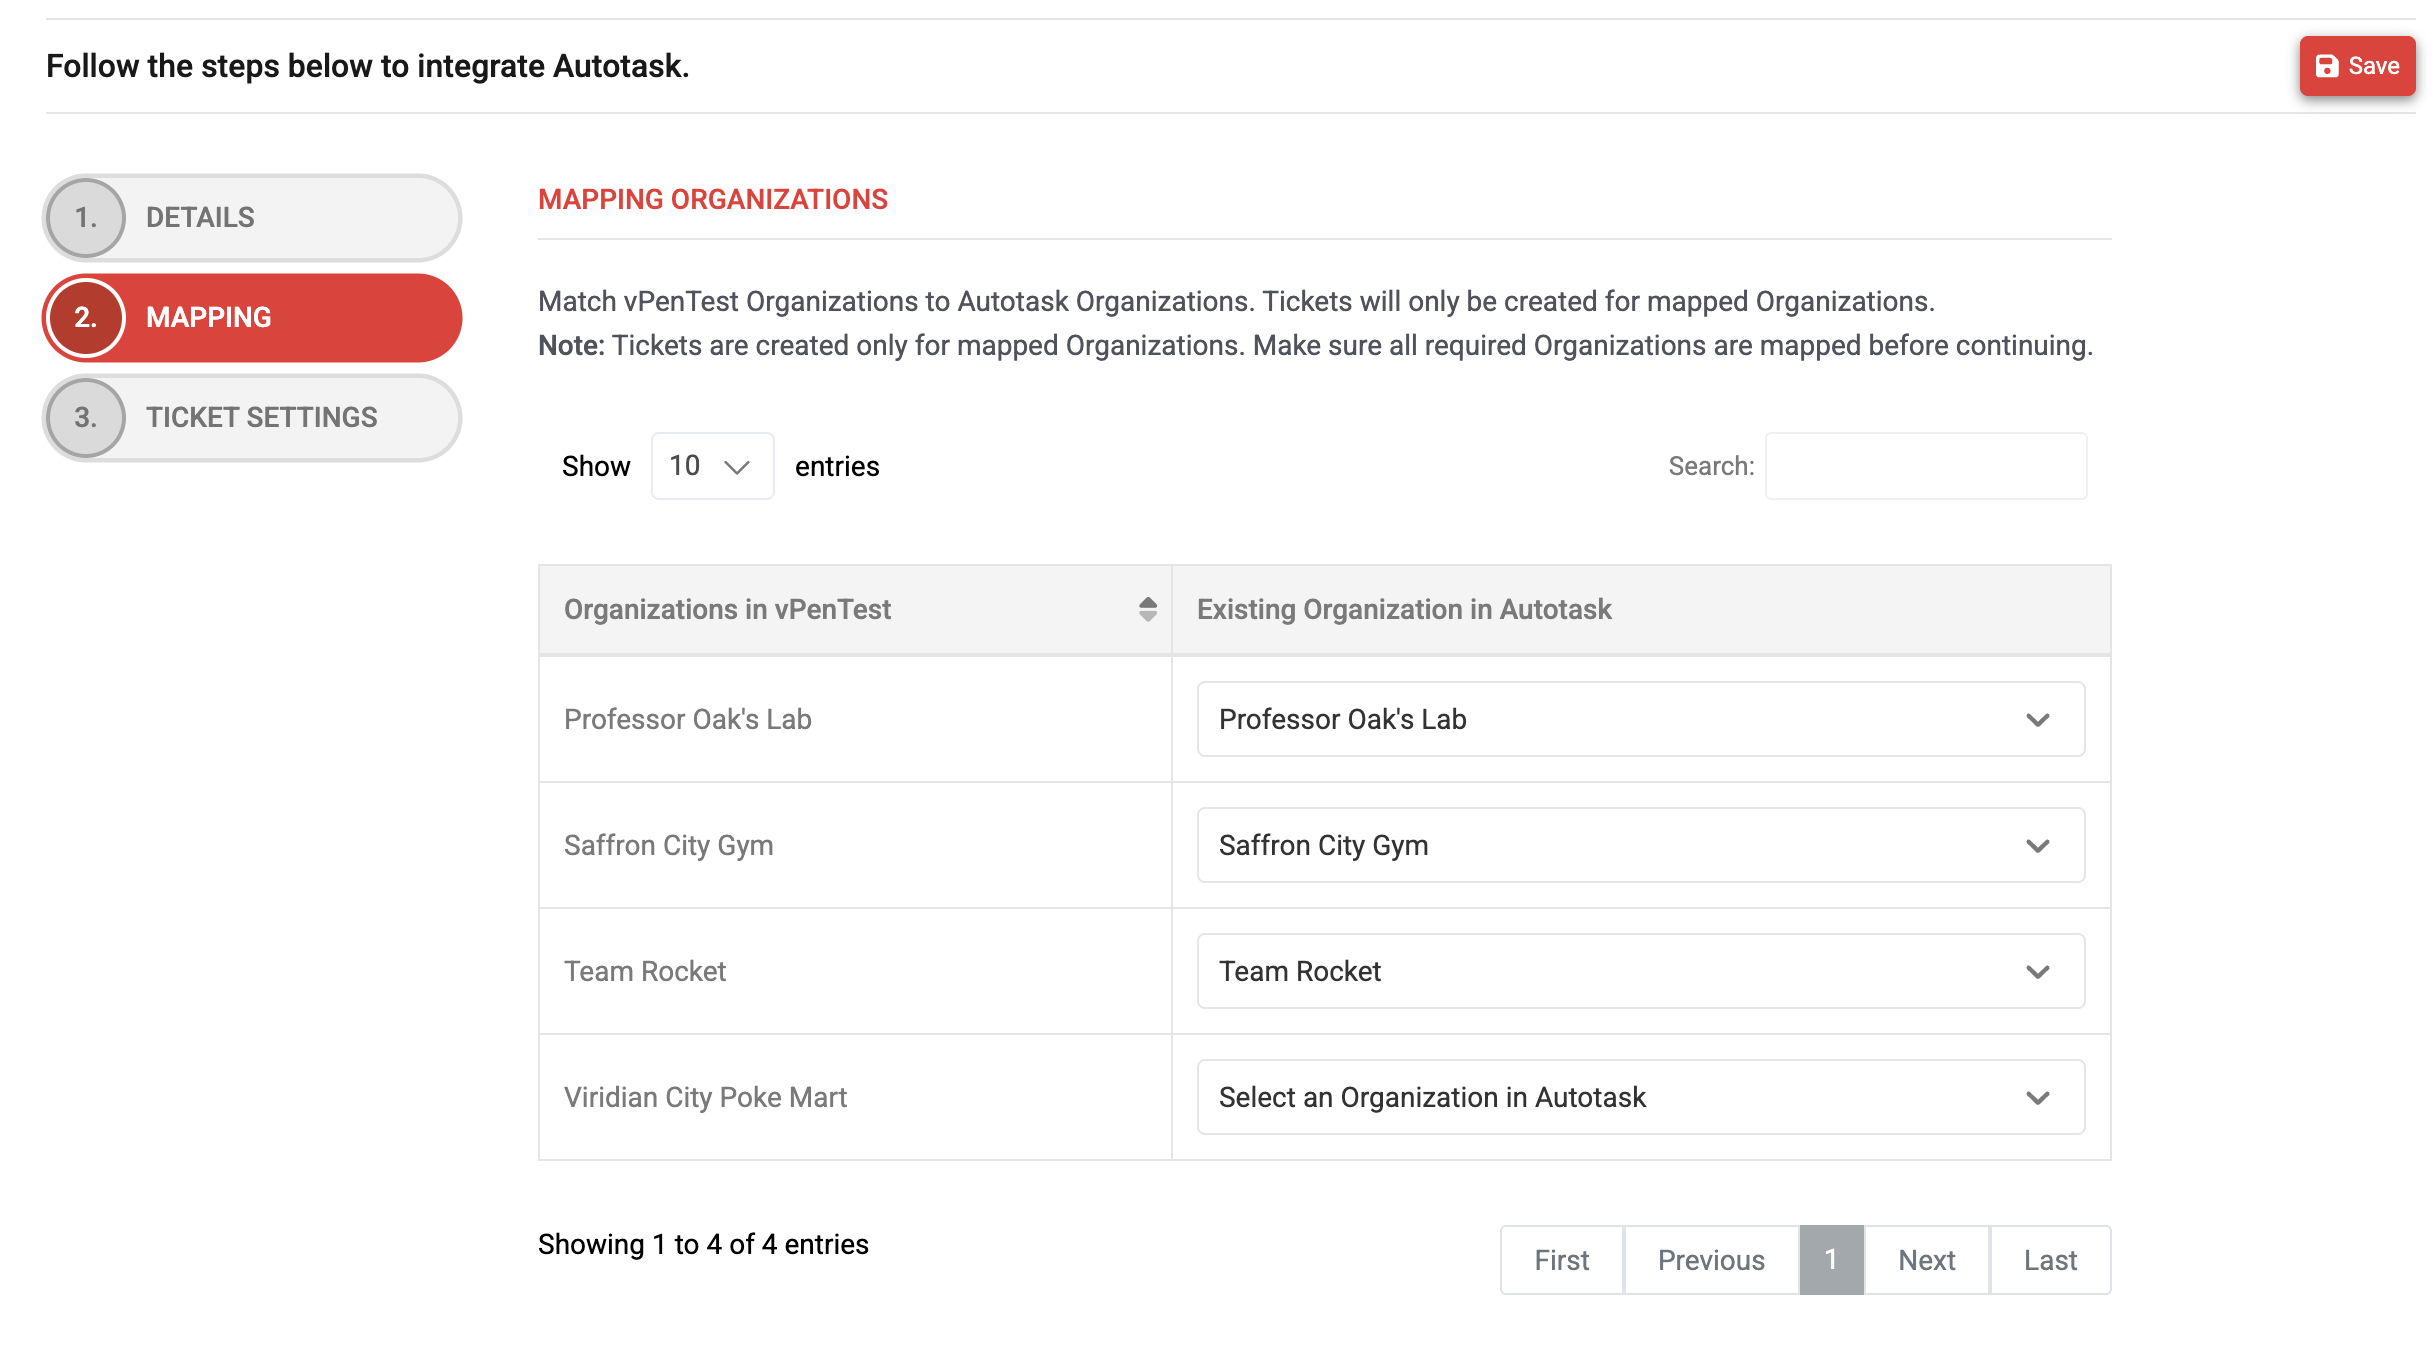
Once mapped, organizations show an Autotask icon on the List of Organizations page in vPenTest.
Step 3: Ticket Settings
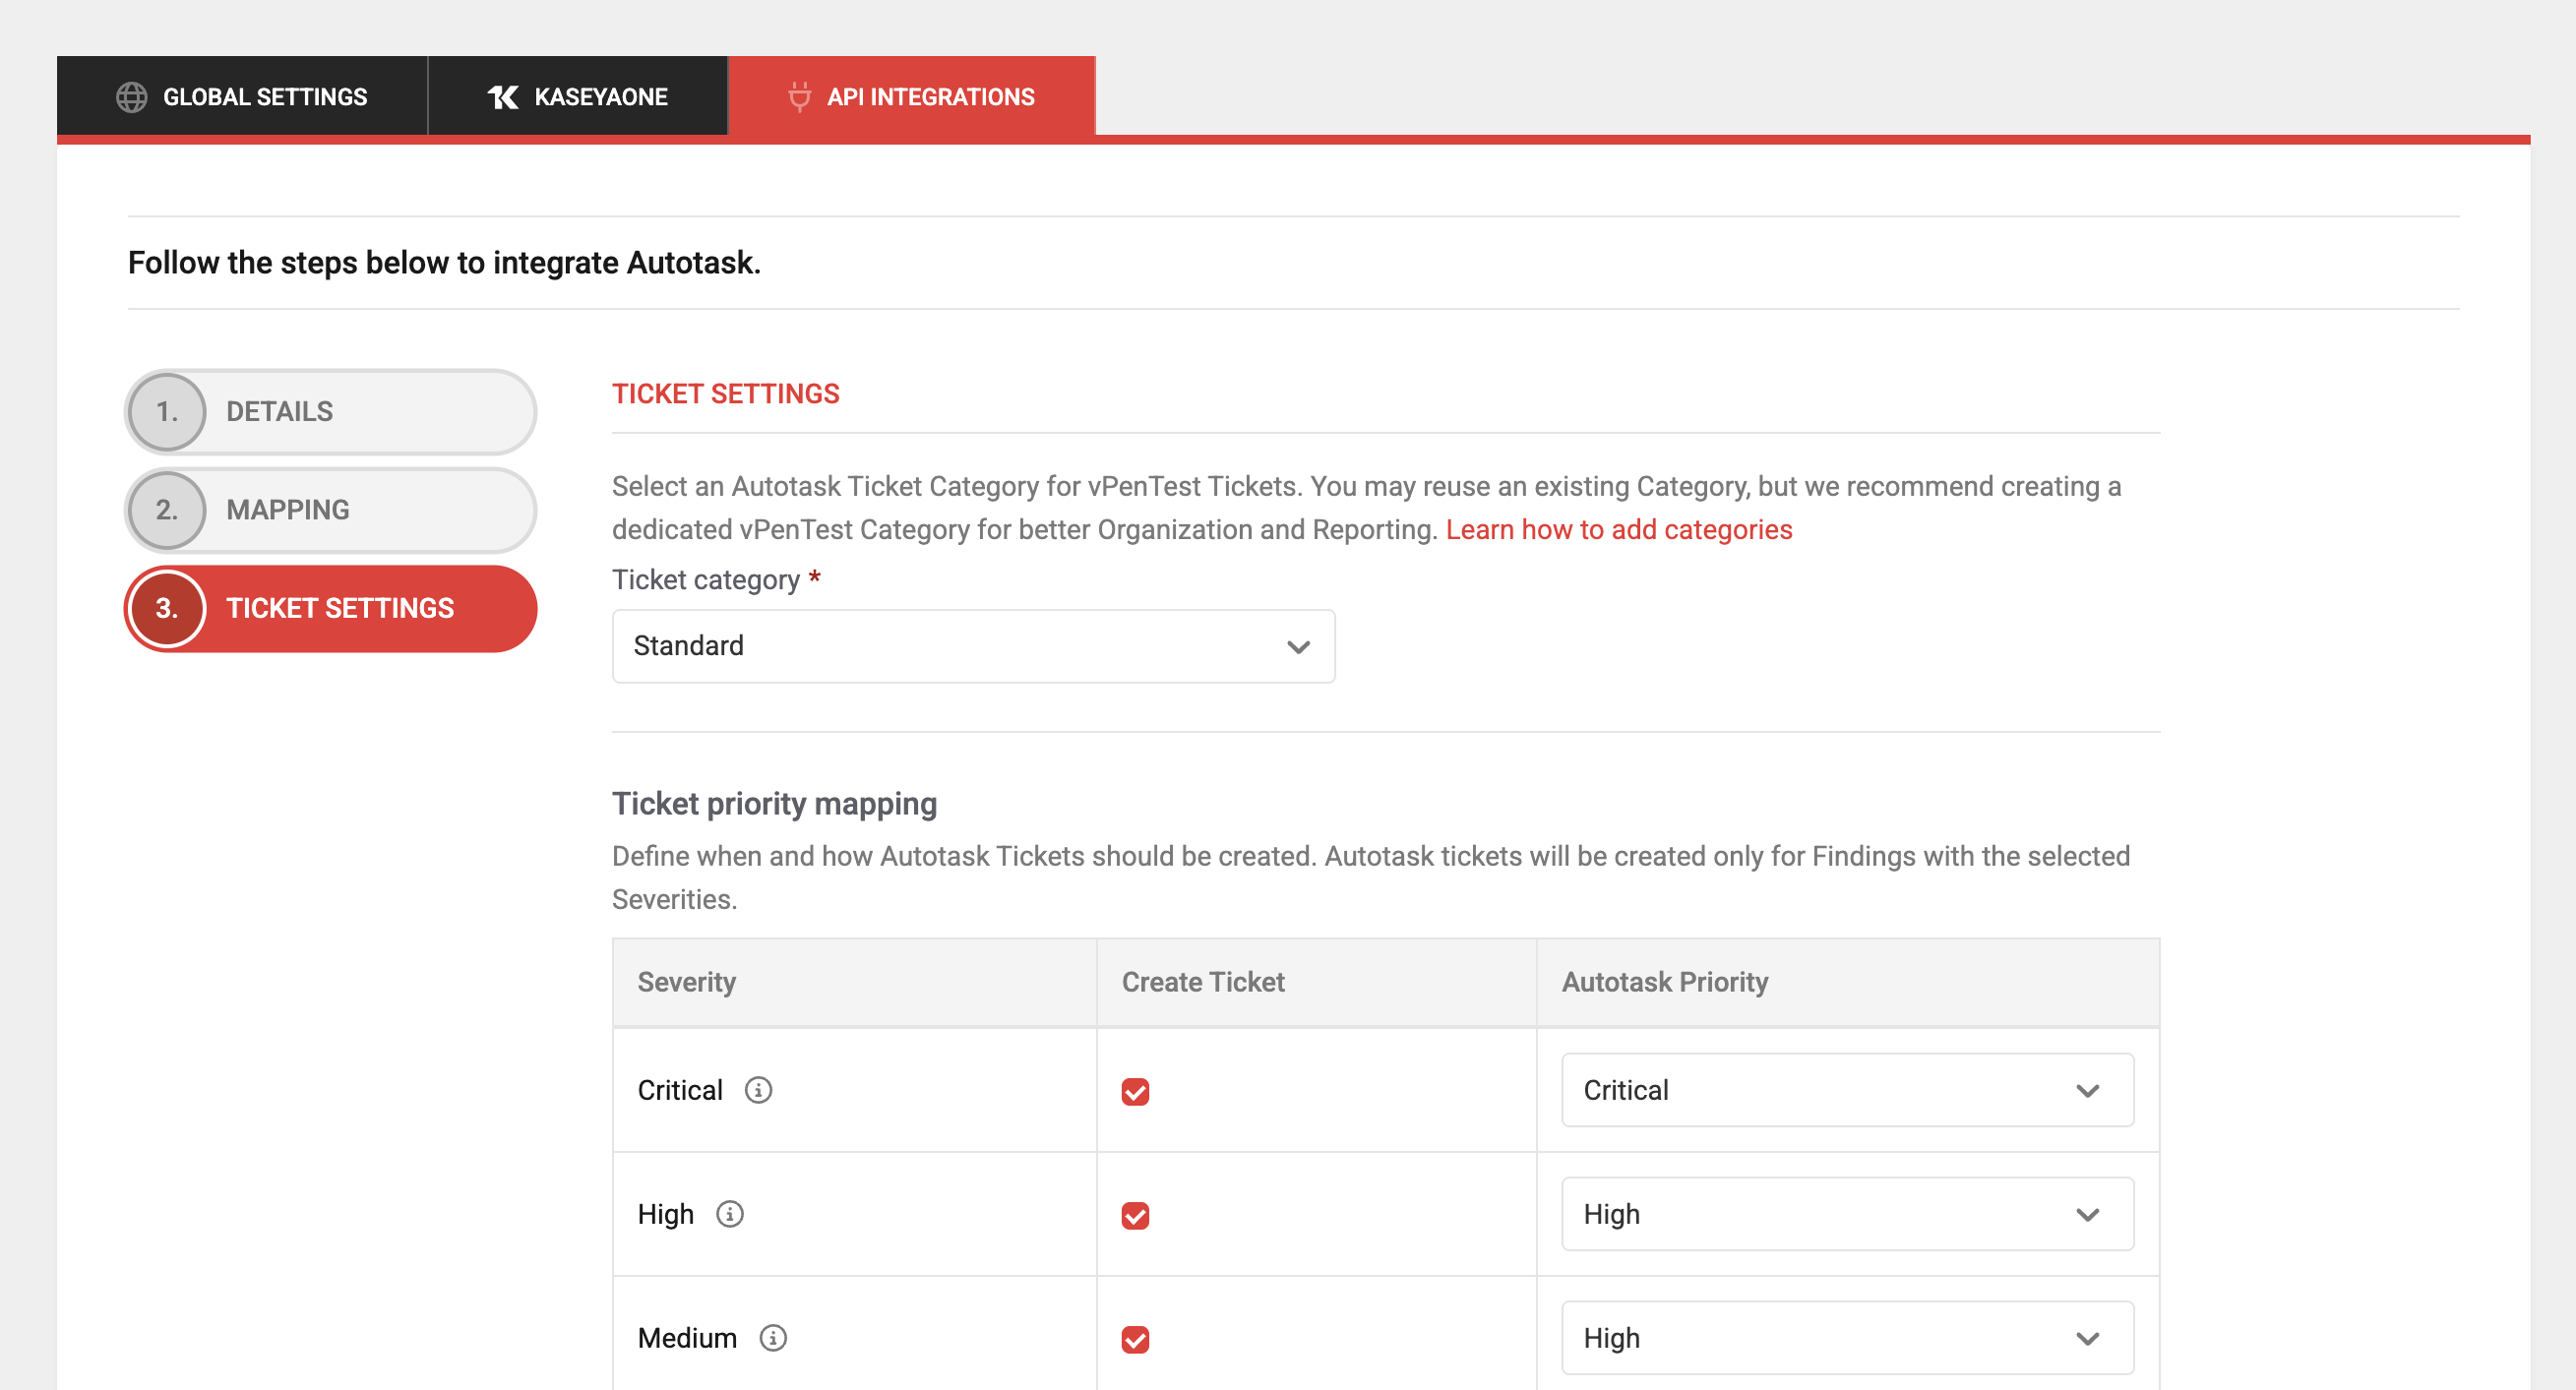
- From the Ticket category drop-down menu, select the ticket category you created in Autotask.
- In the Ticket priority mapping section, select which severities should trigger automatic ticket creation and map them to Autotask priorities using the drop-down menus in the Autotask Priority column.
- Select which reports to attach to created tickets, if needed.
- In the existing ticket settings, choose whether vPenTest should add a comment to an existing open ticket or create a new ticket with a cross-reference to the previous one.
- Click Complete Integration.
NOTE If you haven't already done so, review the Autotask instructions for creating a ticket category and create the category at this time.
Edit the automatic ticket creation settings
To edit your automatic ticket creation settings at any time, complete the following steps:
- In the left navigation menu, click Admin Settings.
- Click the Integrations tab.
- From the Manage drop-down menu in the Autotask tile, select Edit integration details.
- Click Next until you reach the Ticket Settings step.
- Make the required changes.
- Click Complete Integration.
Manually create a ticket
If automatic ticket creation did not create a ticket for a specific finding, you can create one manually after the report has been released as follows:
- Navigate to the assessment and open the findings table.
- Click the three-dot actions menu for the finding you want to create a ticket for.
- Select Create Ticket.
NOTE The Create Ticket option is available only after the report has been released. If a ticket already exists for the finding, this option does not appear.
The ticket is created in Autotask using the same settings configured in your integration.
View the ticket status
The findings table includes an Autotask Ticket column that displays the current ticket status with color-coded indicators:
- Blue: New
- Green: Completed
- Gray: Any other status
Click the status or the open icon to navigate directly to the ticket in Autotask.
Identify organizations with Autotask enabled
An organization that is mapped to an Autotask organization displays an Autotask icon on the List of Organizations page. This helps you quickly identify which organizations are synced. Refer to Creating and managing organizations.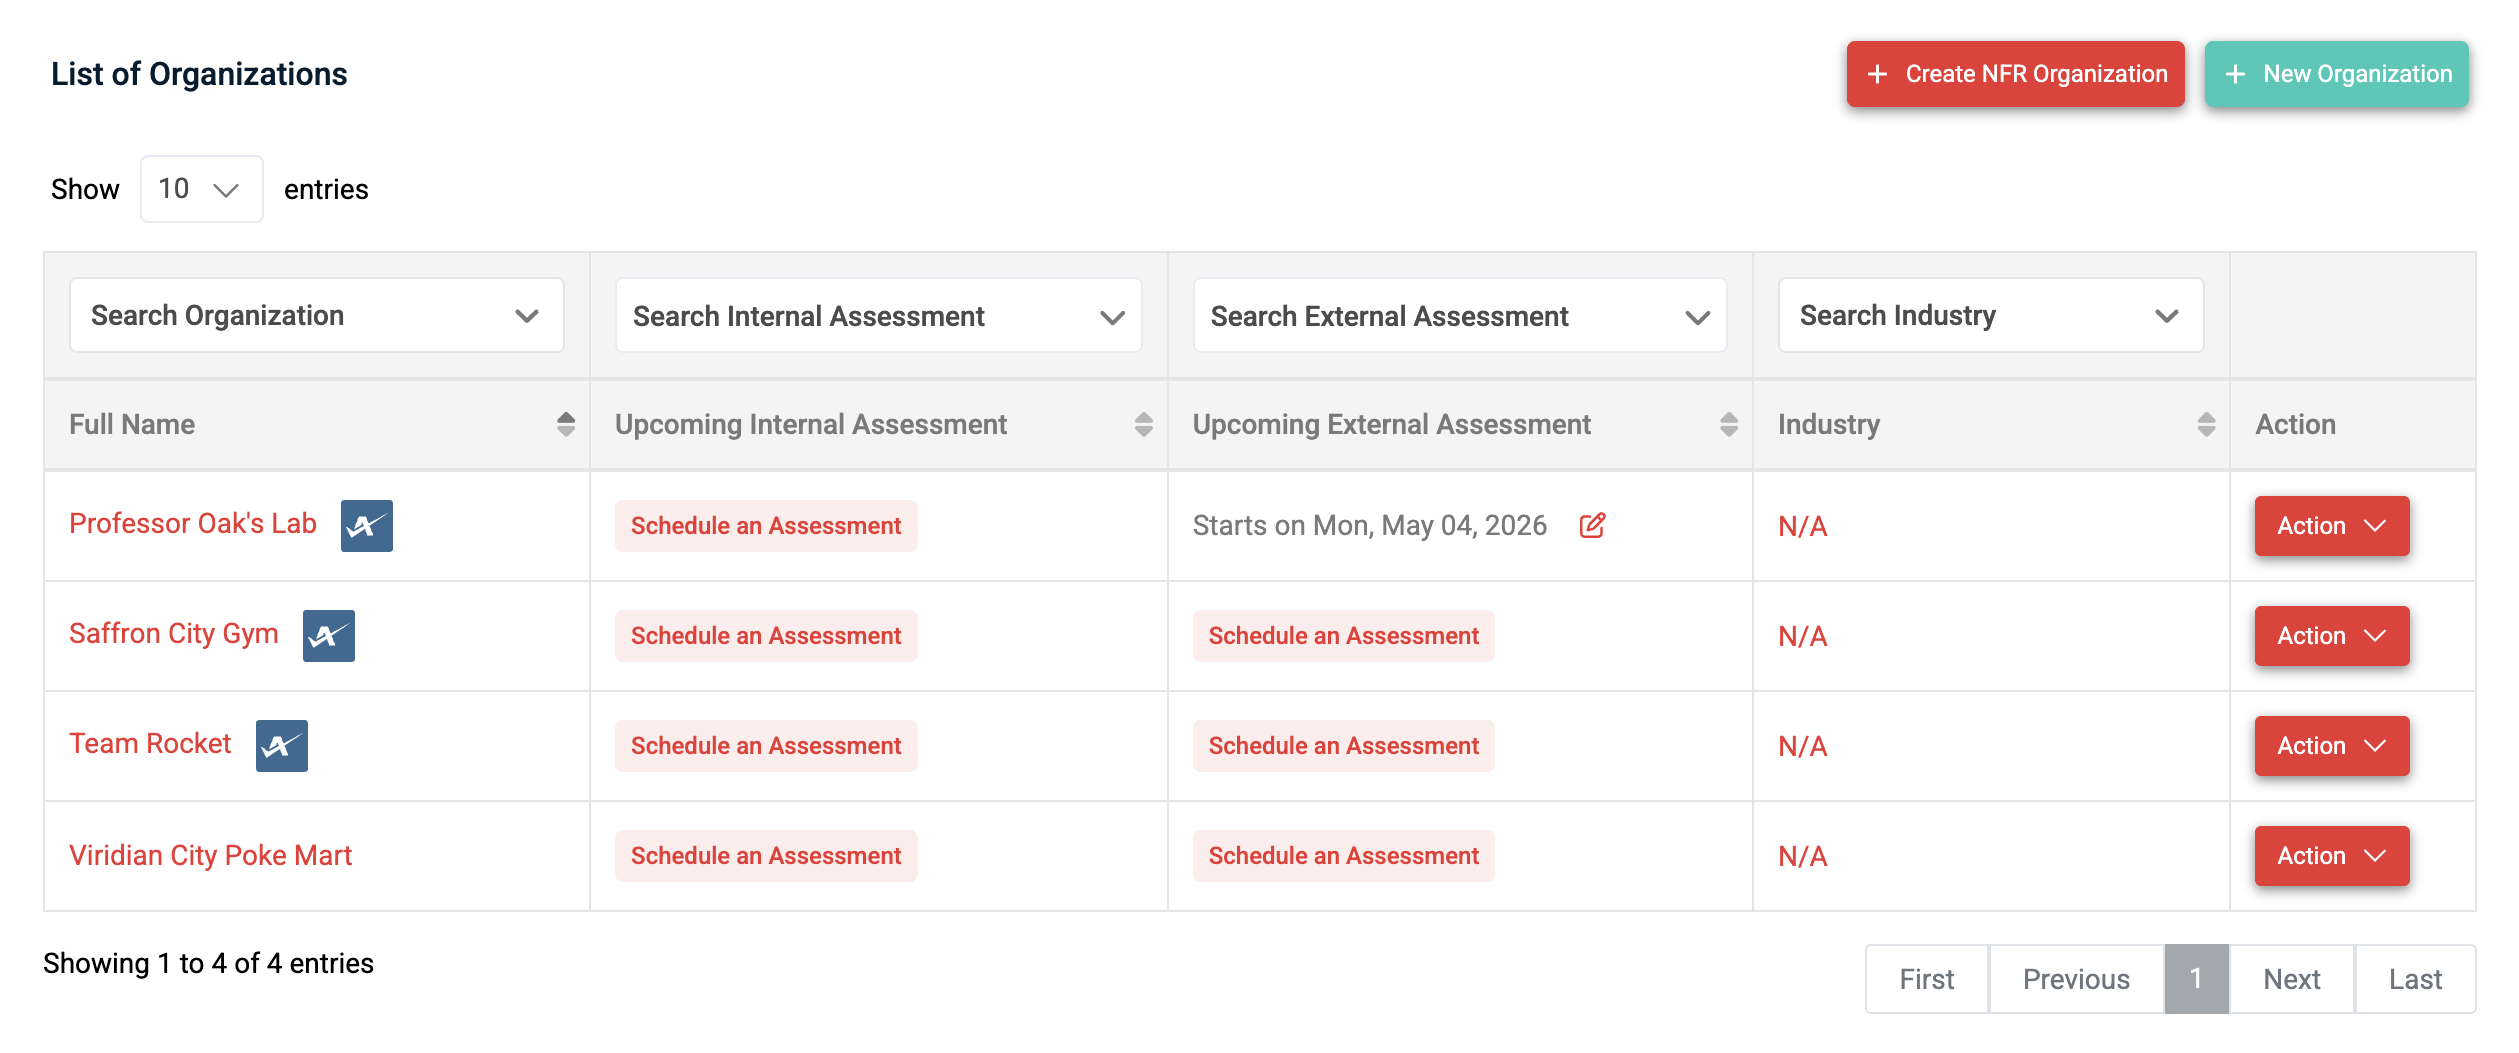
View and change synced organizations
If an organization in vPenTest is mapped to an Autotask organization, the organization profile page displays the sync details. Locate the Autotask Integration row in the Details for [Organization] section in the upper-left corner of the Profile Details tab. Refer to Managing an organization profile in Creating and managing organizations.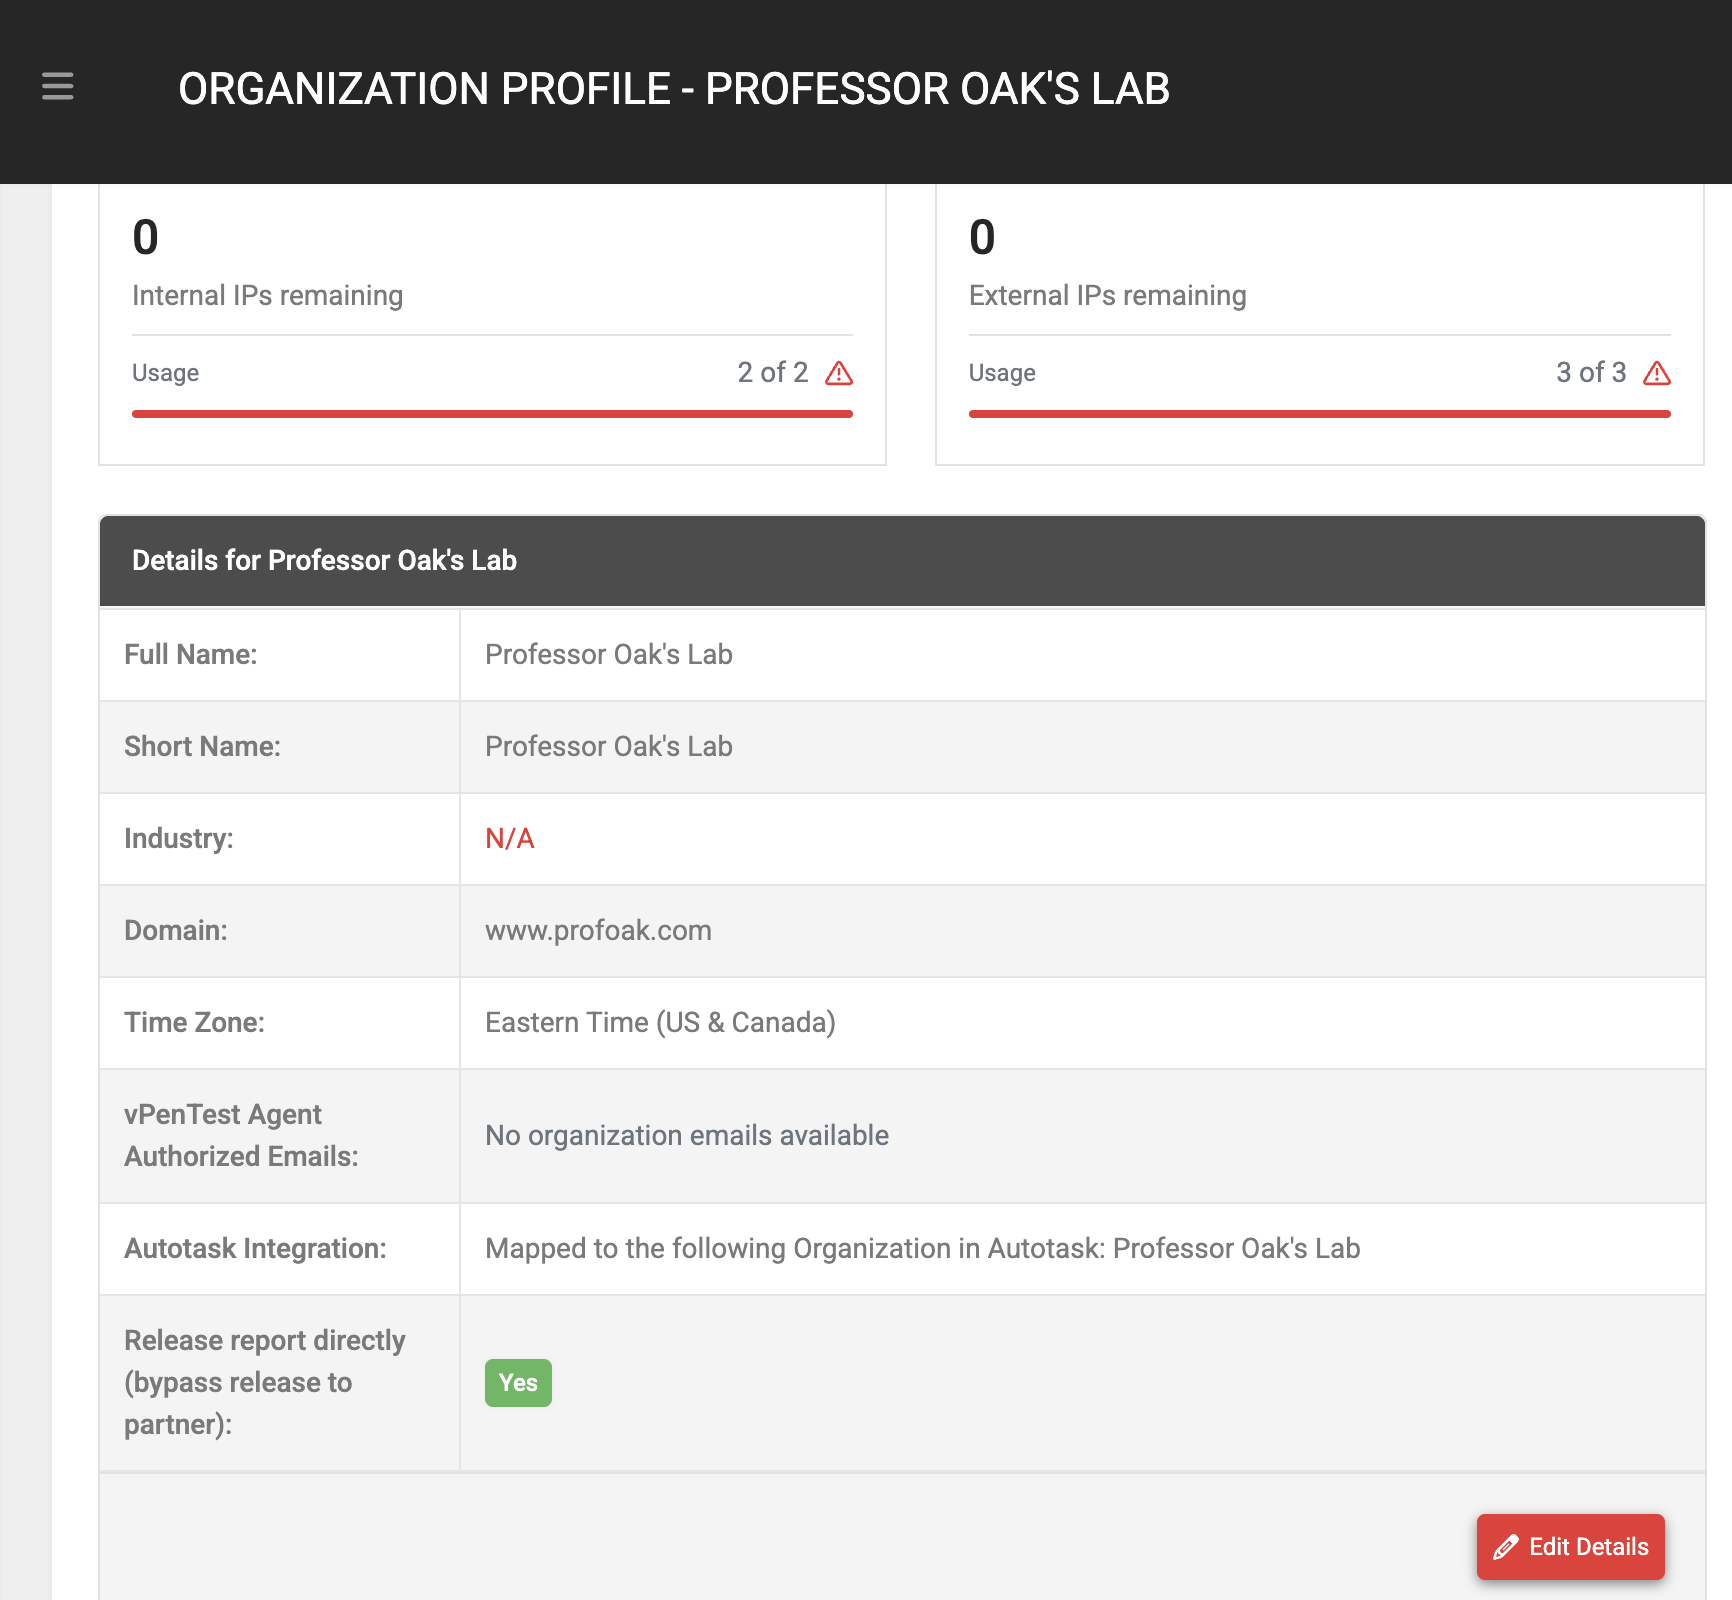
If the organization is not already mapped and the Autotask integration is enabled, this row displays a Map to an Autotask Organization option.
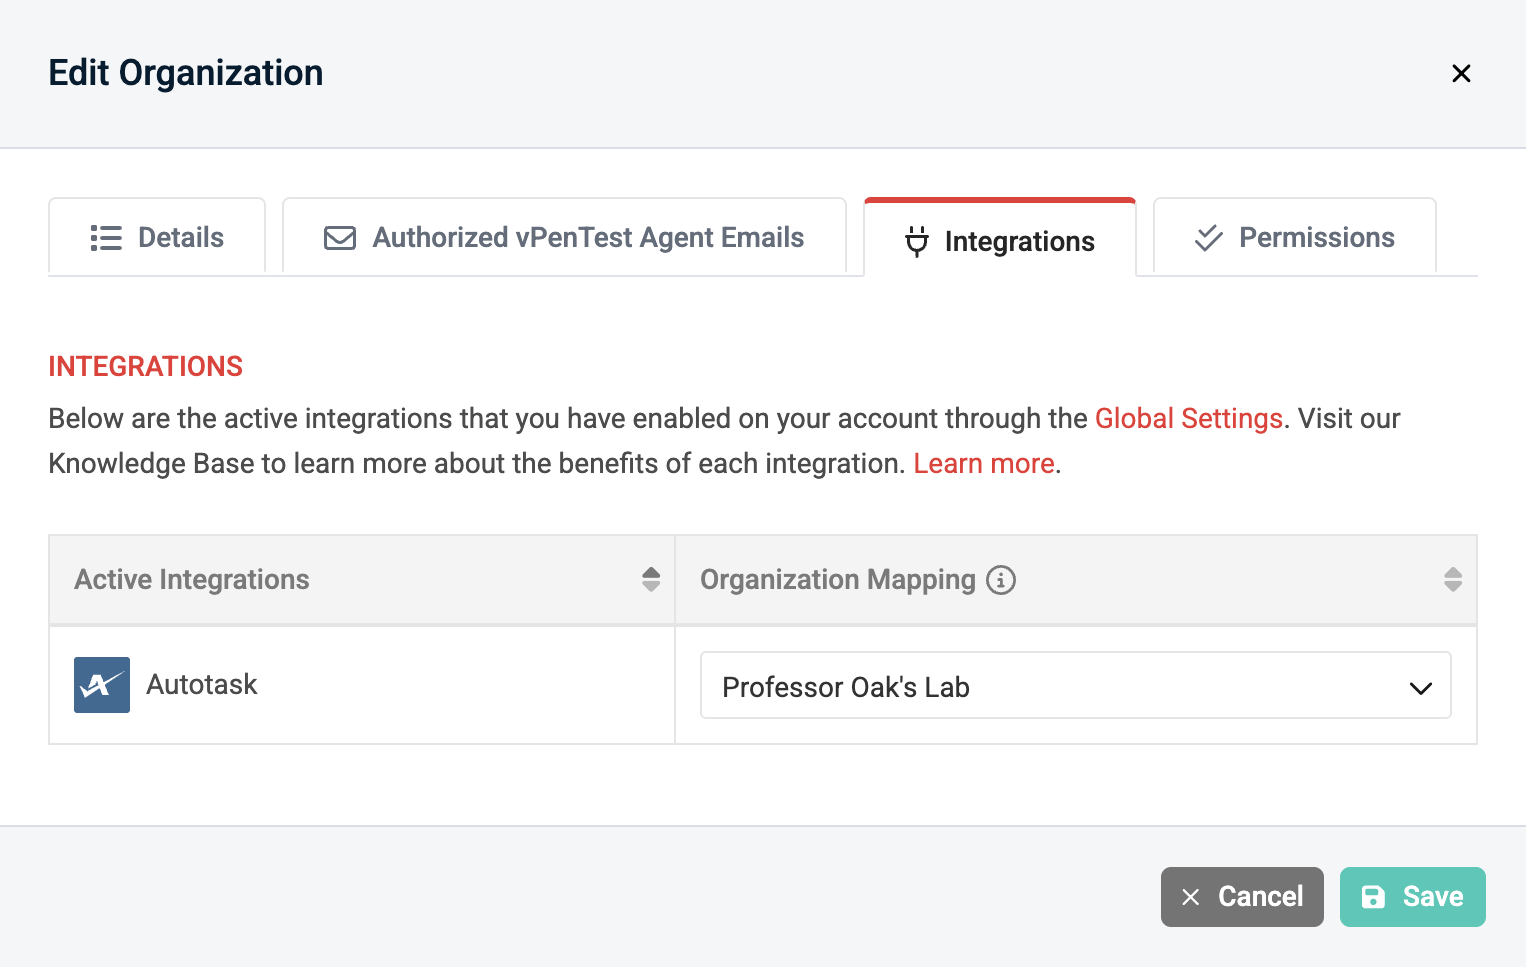
To change the mapped organization, complete the following steps:
- In the left navigation menu, click Organizations.
- Select the organization you want to update.
- Click Edit Details.
- Click the Integrations tab.
- From the drop-down menu in the Organization Mapping column, select the Autotask organization you want to sync with the vPenTest organization.
Disable the integration
To disable the Autotask integration, complete the following steps in vPenTest:
- In the left navigation menu, click Admin Settings.
- Click the Integrations tab.
- Click Disable in the Autotask tile.
- In the confirmation pop-up window, click Disable Integration to execute the disabling.
NOTE If you re-enable the integration later, previously mapped organizations remain mapped. You only need to map new organizations.


