Creating and managing organizations
NAVIGATION Create (+) > Organization
NAVIGATION Organizations
What is an organization?
In vPenTest, organizations refer to the clients you are running assessments for.
EXAMPLE If you are an MSP who wants to run an assessment for your client ABC Inc., you will create an organization named ABC Inc. in the vPenTest portal before scheduling an assessment for the organization.
Creating an organization
IMPORTANT When creating an organization, it’s important to populate as many details as possible. Details such as the organization’s domain name can be used for open source intelligence (OSINT) gathering.
Follow these steps to create an organization:
- From the left navigation menu, click Organizations. Alternatively, from the Create menu in the upper-right corner of the header (+ icon), select Organization and proceed to step 3.
- On the List of Organizations page, click New Organization.
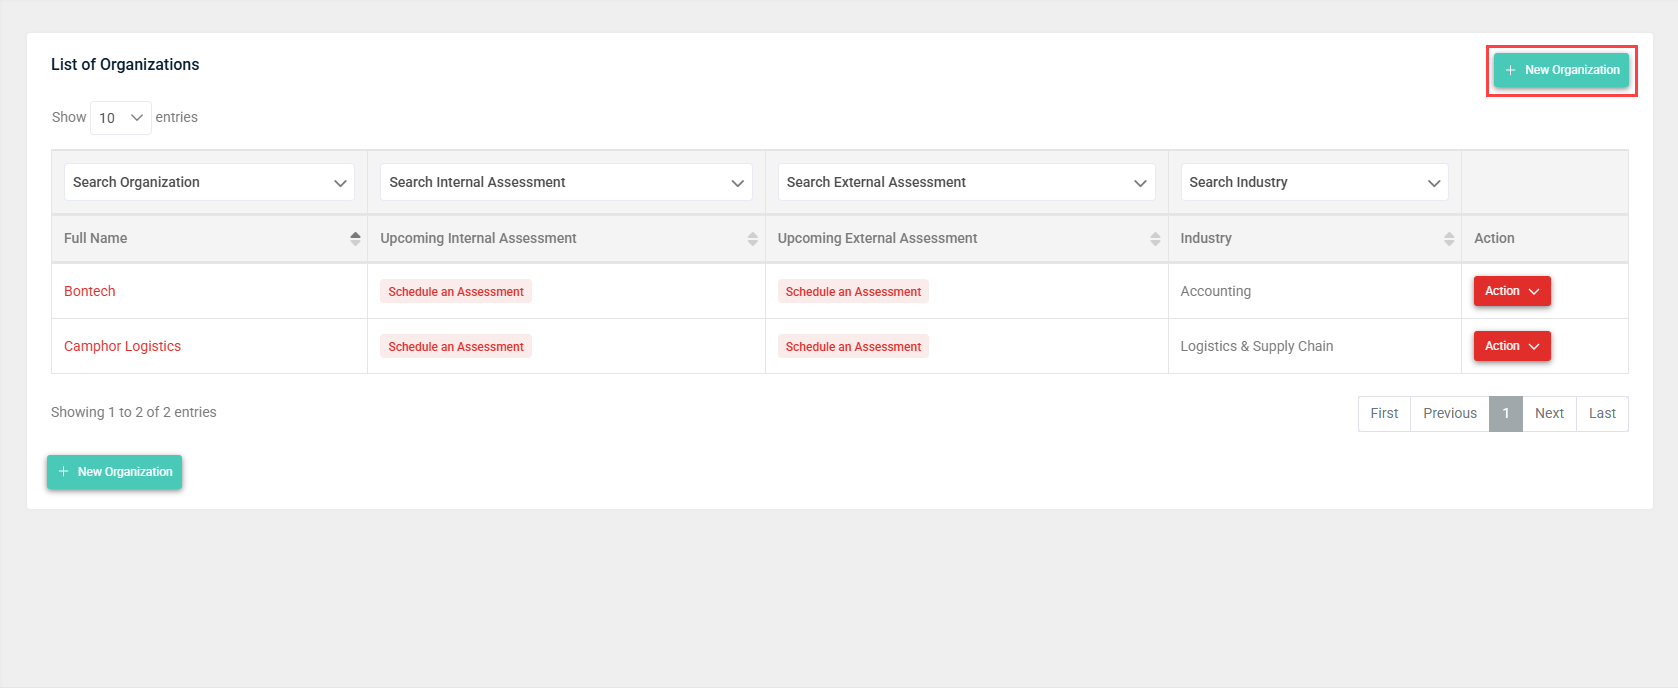
- In the New Organization window, fill in the organization information in each tab, detailed below. Be sure to click each tab to complete all fields before clicking Save, which closes the window, creates the organization, and automatically opens the organization profile page for further configuration.

NOTE The option to edit these organization details after creation is available from the Action column on the List of Organizations page. Click the Action drop-down menu for the organization and select Edit Organization. Alternatively, click Edit in the Profile Details tab on the organization profile page, detailed in the next section.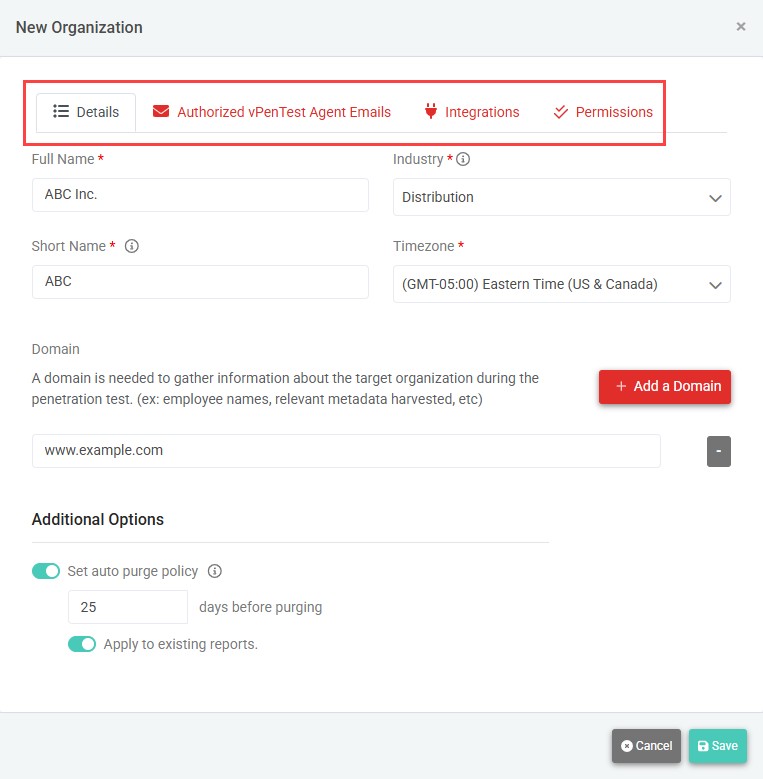
Organization settings
Details
| Field | Description |
|---|---|
| Full Name | Enter the full name of the organization. |
| Short Name | Enter the abbreviation or short version of the organization name, which will be used in final reports generated after a penetration test. If no short name exists, enter the full organization name. |
| Industry | From the drop-down menu, select your client's industry category. Industry information will be used for comparisons of security threats and vulnerabilities. |
| Timezone | From the drop-down menu, select your client's time zone. |
| Domain | Enter your client's web domain, which will be used for open source intelligence gathering during a penetration test (for example, employee names, relevant metadata harvested, and so forth). To add more than one domain, click Add a Domain. To remove a domain, click the minus sign next to the domain. NOTE You must enter at least one domain in order to create the organization. |
| Set auto purge policy | Optionally, turn on this toggle to set the number of days vPenTest will keep the assessment data and reports for this organization before automatically purging the data from the platform. Enter a value of at least 1 day. Entering a value of 9 or fewer days produces a warning notification indicating that the data cannot be recovered following the brief interval you have configured. Optionally, turn on the Apply to existing reports toggle to apply the auto-purge policy you have configured to reports that have already been generated. For more details about global and organization-level automatic purge policy configurations, refer to Data retention and purge options. |
Authorized vPenTest Agent Emails
Review the note provided in this tab. Optionally, enter an alias to associate an agent to this organization's profile. This alias serves as an authorized vPenTest agent email address for internal assessments. If you plan to conduct internal assessments, providing an alias as opposed to memorizing a UUID generated by the agents may be useful.
NOTE This value must be unique per organization to ensure the agent is registered only with the intended organization.
EXAMPLE You could create the alias vpentest@organizationa.com for organization A and vpentest@organizationb.com for organization B. When you register an agent, you'll simply provide these email addresses for the respective organizations, and vPenTest will automatically associate the agents to the appropriate organizations.
To add more than one alias, click Add organization email. To remove an alias, click Remove.
Integrations
This tab displays active integrations in the vPenTest account and provides the option to connect this organization to the integration. From the Organization Mapping column, you can map the organization to its corresponding organization in the integrated product, enabling seamless data synchronization.
You can manage integrations in vPenTest from the Integrations tab on the Admin Settings page. For a list of available integrations, refer to Integrations.
Permissions
Select these options according to your preferences.
Managing an organization profile
An organization profile page exists for each organization, which allows you to manage the organization's data and activity.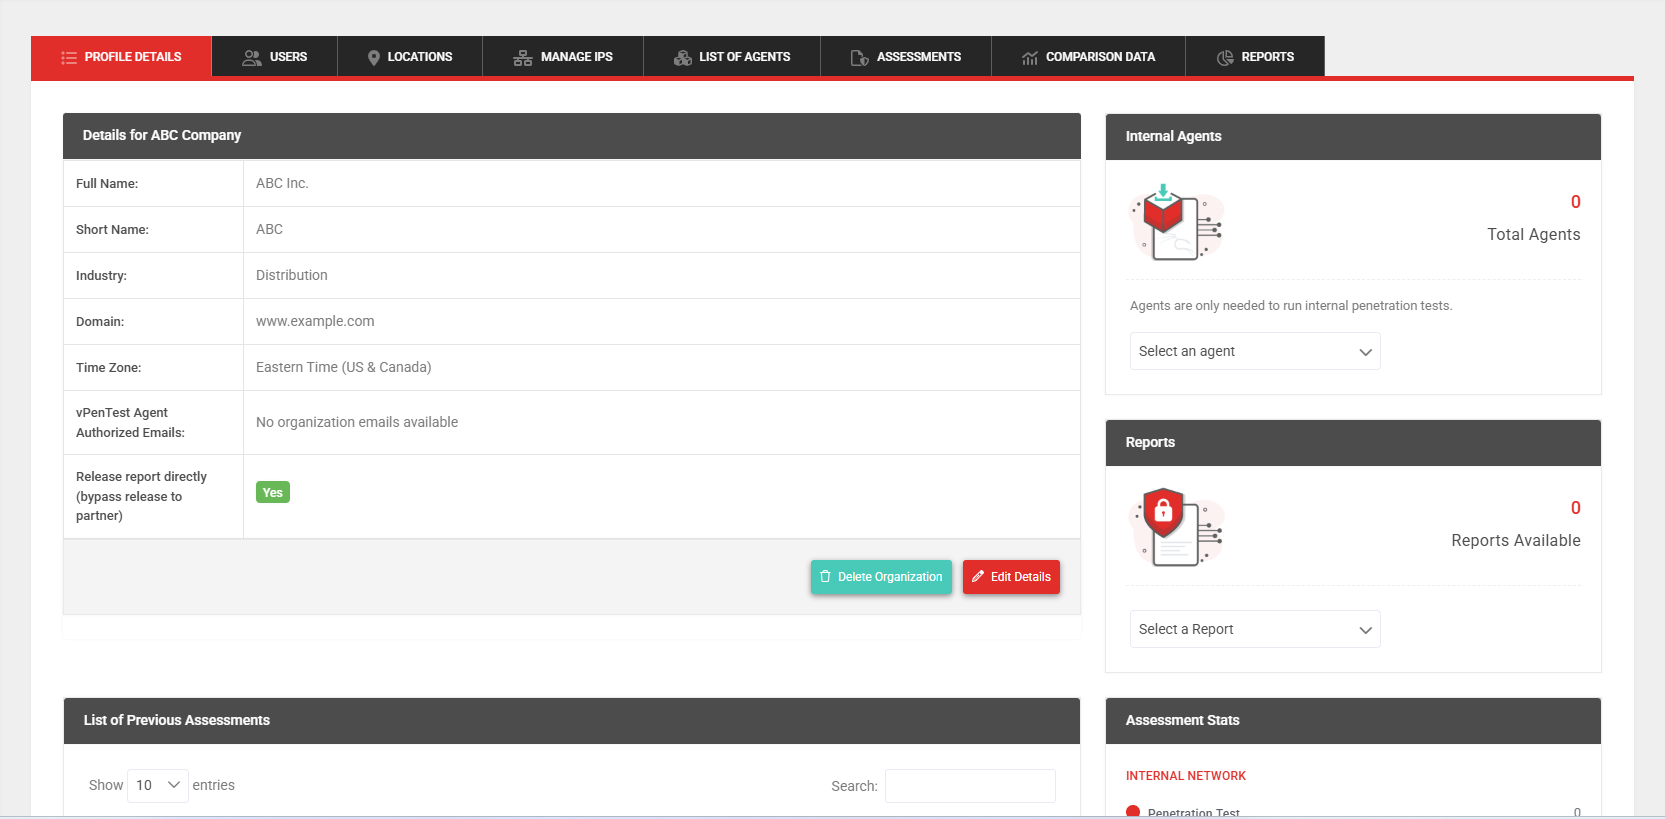
To open the organization profile page for a certain organization, complete the following steps:
- From the left navigation menu, click Organizations.
- On the List of Organizations page, click the organization name link in the Full Name column. Alternatively, in the Action column, click the Action drop-down menu for the organization and select Manage Organization Profile.

Organization profile tabs
Expand the following drop-down sections for descriptions of the tabs available on the organization profile page.
The Profile Details tab provides a summary of information about the organization.
The page contains the following widgets:
| Widget | Description |
|---|---|
| Details for [Full Name] | View information about the organization, including full name, short name, industry, domain, time zone, whether any vPenTest agent authorized emails are configured, active integrations, and whether reports can be released directly. To edit these details, click Edit Details. Refer to Organization settings. To delete the organization and all its data, click Delete Organization. |
| Internal Agents | Manage any agents associated with the organization. After selecting an agent from the drop-down menu, clicking the Action drop-down menu allows you to edit or view agent details, delete the agent, or subscribe to agent notifications. |
| Reports | Review reports that belong to the organization. |
| List of Previous Assessments | See previously run assessments for the organization. The details in the list are updated after every assessment. |
| Assessment Stats | See the number of assessments of each type that have been run for the organization. |
The Users tab allows you to view, invite, and manage the users that belong to the organization. Creating an organization user account in vPenTest provides that user with access to their organization data.
You can also manage these users from the Organization Users tab on the User List page.
For details about users and inviting them to the account, refer to Adding and managing user accounts.
The Locations tab allows you to add locations to the organization and associate IP addresses and agents to that location.
For more information, refer to Creating and managing locations.
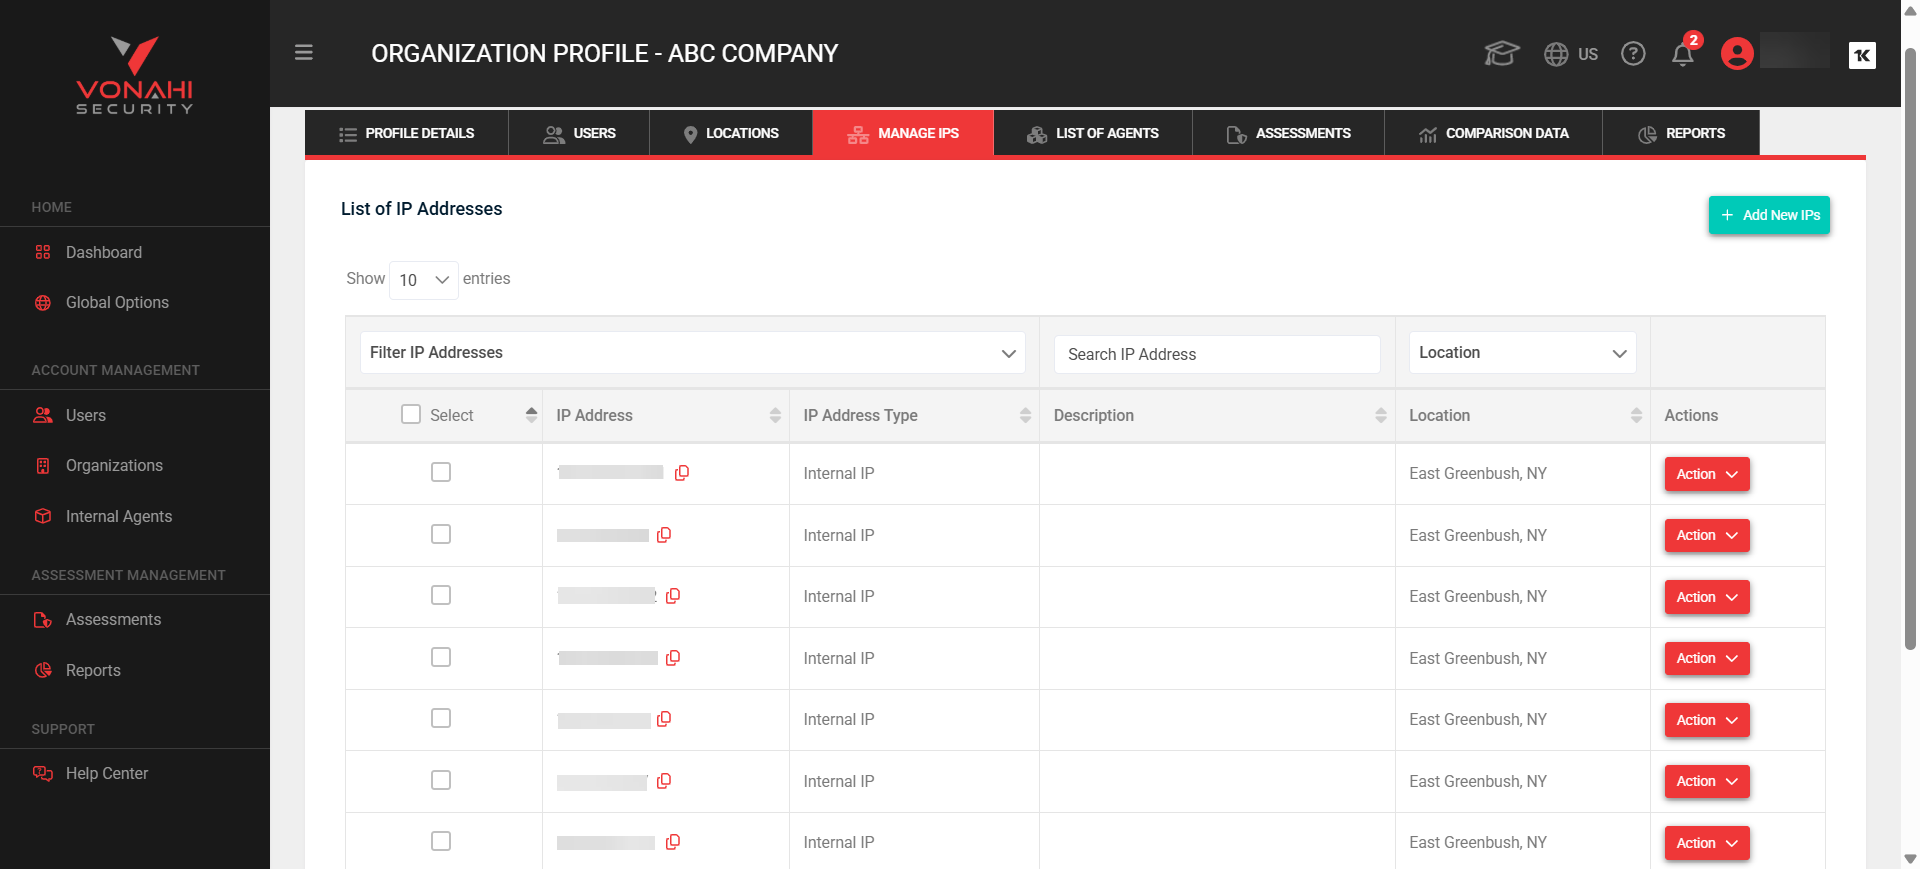
The Manage IPs tab lists the different types of IP addresses used by the organization and the locations they are associated with. Refer to What is considered as an IP address?
The IP addresses added here can be automatically imported when scheduling an assessment for the organization. Refer to Scheduling an assessment.
You can take the following actions in this tab:
- Import CSV: Import a list of IP addresses for the organization by uploading a CSV file that contains one IP address or range per row. Configure your CSV file with the following headers: IP Address, IP Address Type, and Description.
- Add New IPs: Manually add one or more IP addresses.
You have the option to filter the list by internal or external IP addresses, search for specific IP addresses in the list, select the number of entries displayed per page, and use the pagination controls to cycle through pages of entries.
Action menu
In the Action column, clicking the Action drop-down menu for an IP address allows you to select from the following options:
- Edit: Edit the IP address and its details.
- Delete: Delete the IP address.
Bulk actions
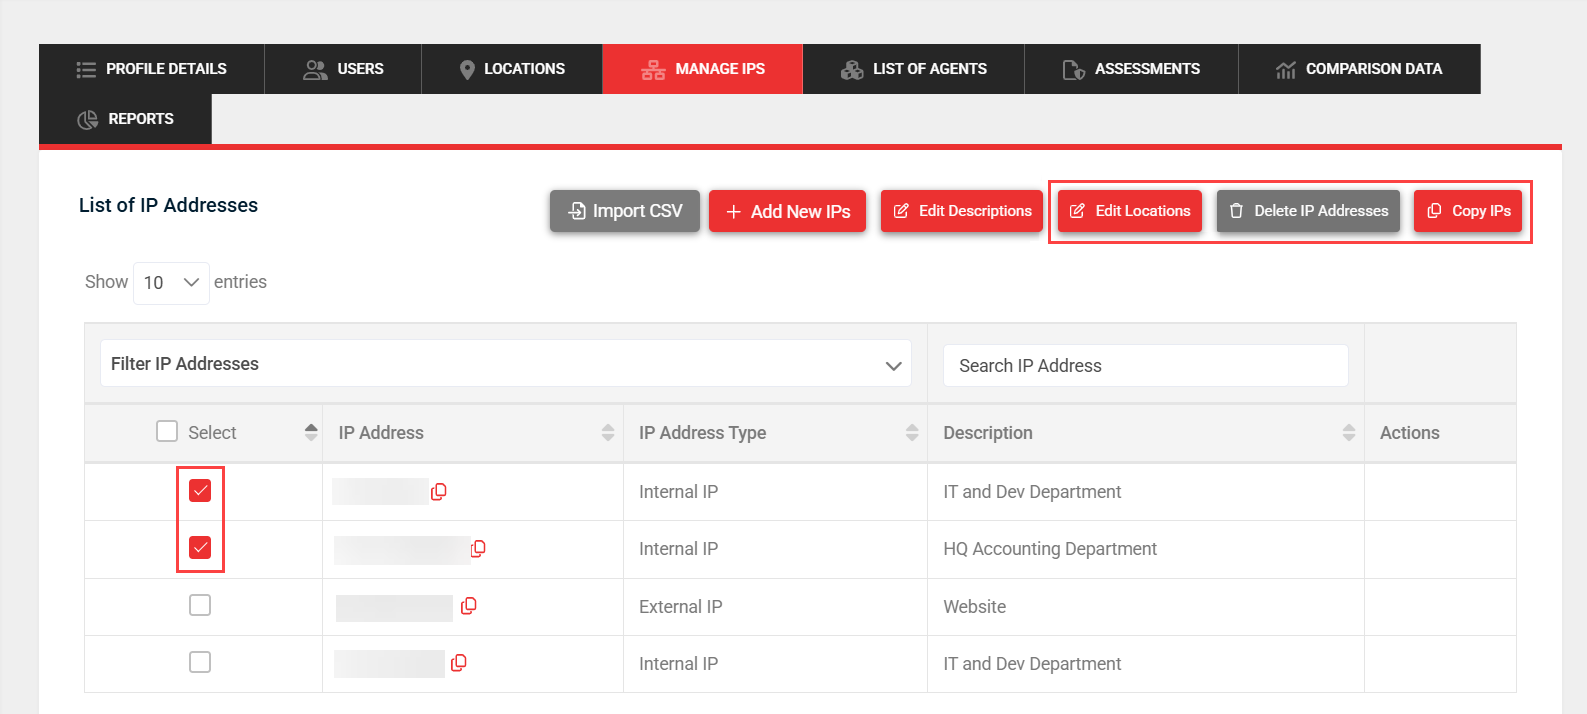
Select multiple IP address checkboxes (or the Select checkbox in the header row to select all IP addresses at once) to access the following options in the upper-right corner of the page:
- Edit Descriptions: Allows you to apply the same description to all selected IP addresses in bulk.
- Edit Locations: Allows you to apply the same location to all selected IP addresses in bulk.
- Delete IP Addresses: Allows you to delete all selected IP addresses in bulk.
- Copy IPs: Allows you to copy all selected IP addresses in bulk.
The List of Agents tab lists the details of the internal agents associated with the organization. The agents added here are available for selection when scheduling an assessment for the organization and when using the IP Estimator tool. Refer to Scheduling an assessment and IP Estimator.
These details are also available on the List of Agents page. For more details, refer to Managing agents.
The Assessments tab lists in-progress assessments in the Running tab, upcoming assessments in the Scheduled tab, completed assessments in the Completed tab, and all assessments in a calendar view in the Calendar tab.
These details are also available on the List of [Status] Assessments page. For more details, refer to Managing assessments.
For details about scheduling assessments and the IP Estimator tool, refer to Scheduling an assessment and IP Estimator.
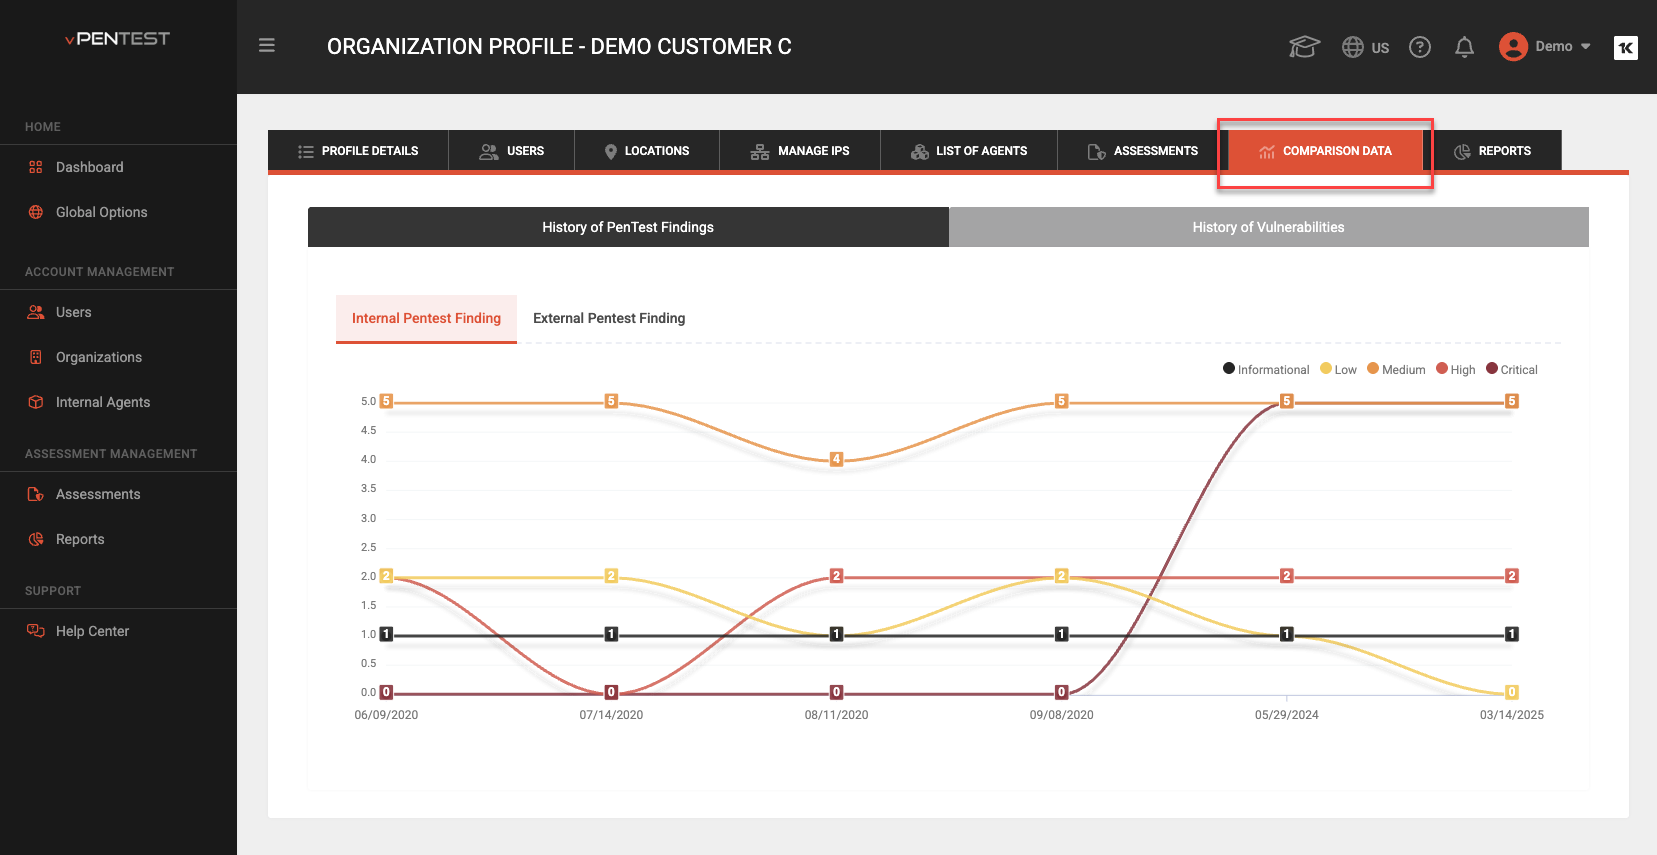
The Comparison Data tab graphically compares internal and external data from both pentest findings and network vulnerabilities for the organization.
The History of PenTest Findings tab shows a history of internal and external pentest findings in separate tabs. The History of Vulnerabilities tab shows a history of internal and external network vulnerabilities in separate tabs.
Data in both tabs is delineated by date and result: Informational, Low, Medium, High, and Critical. Hovering over a date displays a summary of the results for that date.
The Reports tab lists the details of reports that have been generated for this organization following assessments.
These details are also available on the List of Reports page. For more details, refer to Accessing your reports.
Scheduling an assessment for an organization
The option to schedule an assessment for an organization is available on both the List of Organizations page and the organization profile page. To learn how to schedule an assessment, refer to Scheduling an assessment.


