Adding and managing user accounts
NAVIGATION Users
NAVIGATION Organizations > (select an organization) > Users
Types of users
Two types of users exist in vPenTest:
Admins
An admin is a user who belongs to your company. An admin account is able to manage multiple organizations, add new admins or organization users, and use all features in the account.
Organization Users
An organization user is a user who belongs to one of your clients (organizations). An organization user account has access to only their own organization data and can optionally be granted permission to schedule assessments for their organization.
To learn how to create organizations to which you can add organization users, refer to Creating and managing organizations.
Inviting users
To invite an admin user, complete the following steps:
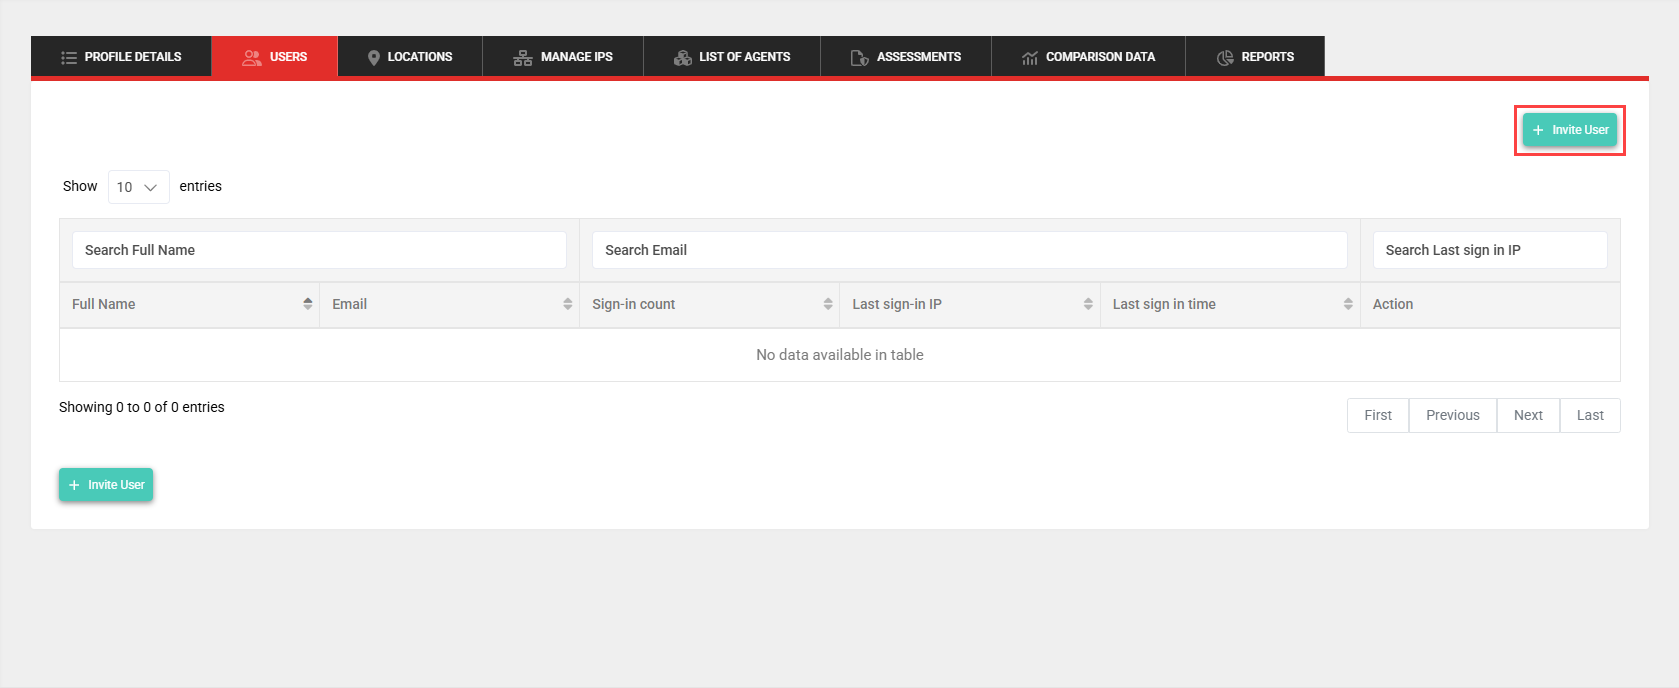
- From the left navigation menu, click Users.
- In the Admins tab, selected by default, click Invite User.
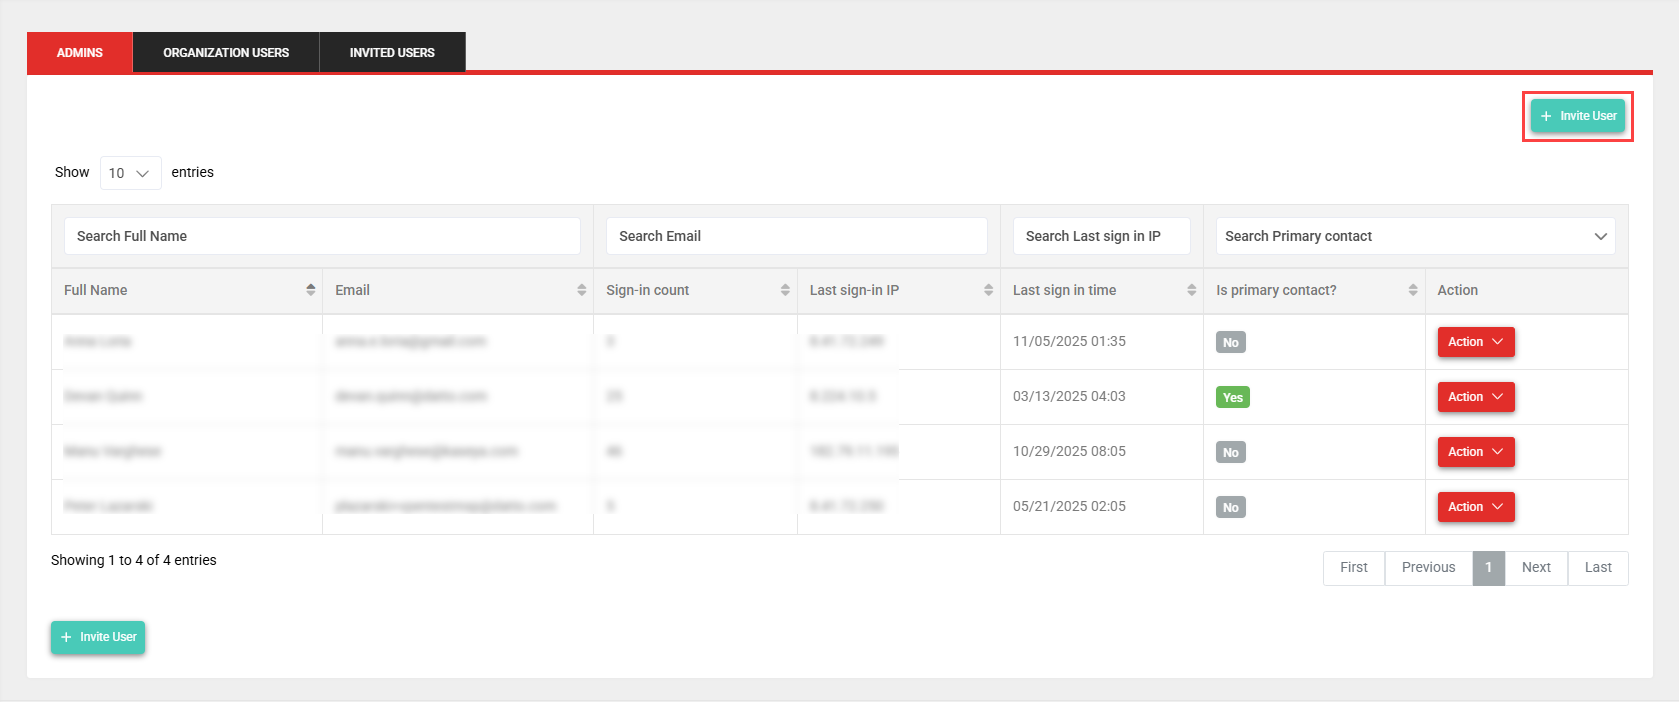
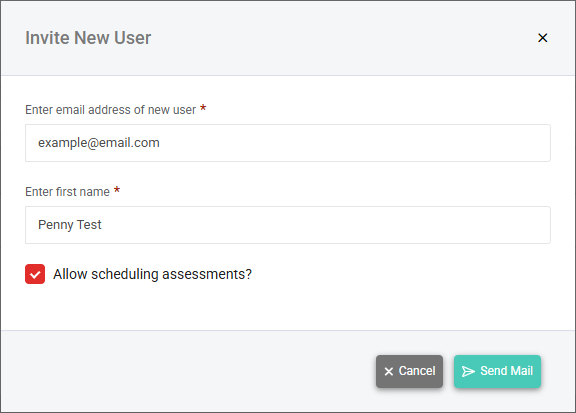
- In the Invite New User window, enter the email address and first name of the user you are inviting to the portal.
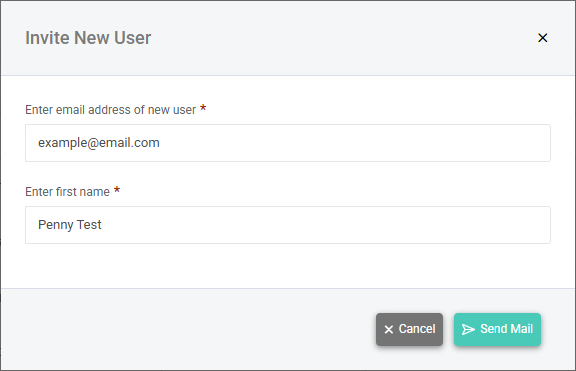
- Click Send Mail to send a user account creation invitation to the invited user.
The invitee will receive an email to confirm their email address for account creation. Upon logging in, they'll be prompted to change their password.
The option to invite an organization user is available from both the list of users and the organization profile page.
List of users
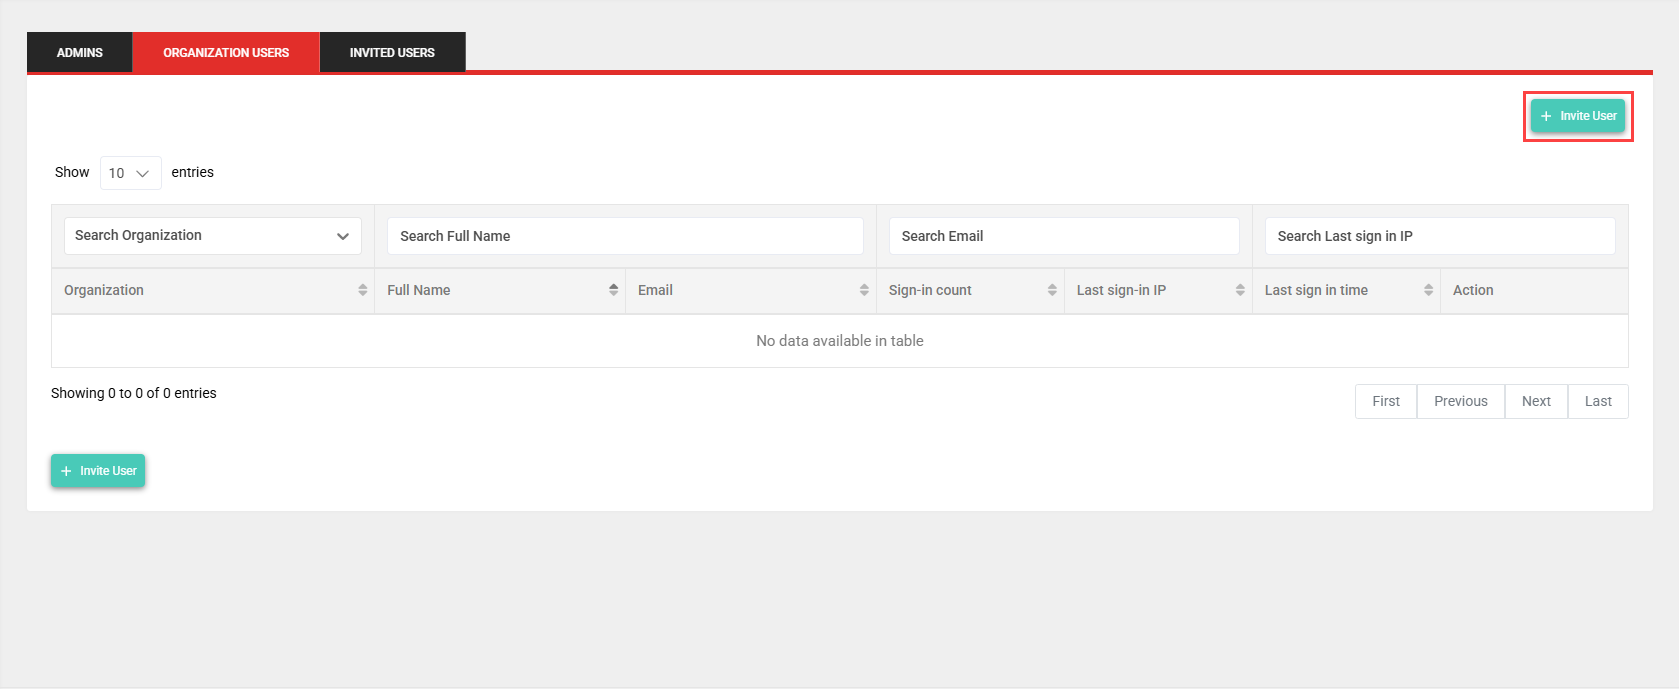
Complete the following steps to invite an organization user from the list of users:
- From the left navigation menu, click Users.
- Click the Organization Users tab.
- Click Invite User.
- In the Invite New User window, enter the email address and first name of the user you are inviting to the portal.
- From the Organization drop-down menu, select the organization this user will be added to upon account creation.
- Optionally, select the Allow scheduling assessments checkbox to grant this user permission to schedule assessments for their organization. Refer to Scheduling an assessment.
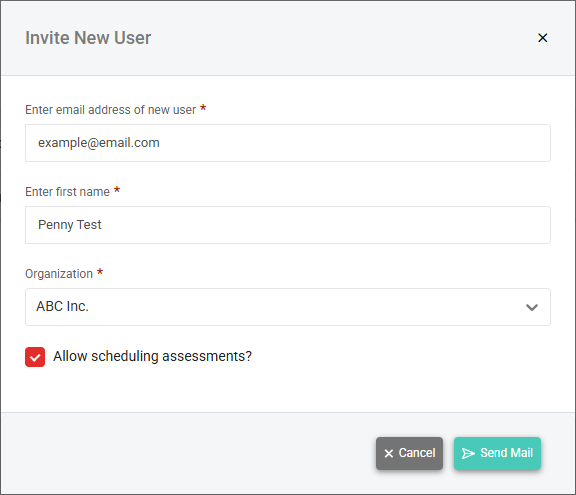
- Click Send Mail to send a user account creation invitation to the invited user.
The invitee will receive an email to confirm their email address for account creation. Upon logging in, they'll be prompted to change their password.
Organization profile page
Complete the following steps to invite an organization user from the organization profile page of the organization they should be added to:
- From the left navigation menu, click Organizations.
- On the List of Organizations page, click the organization name link in the Full Name column. Alternatively, in the Action column, click the Action drop-down menu for the organization and select Manage Organization Profile.

- Click the Users tab.
- Click Invite User.
- In the Invite New User window, enter the email address and first name of the user you are inviting to the portal. After account creation, the user will be automatically added to the organization you selected on the List of Organizations page.
- Optionally, select the Allow scheduling assessments checkbox to grant this user permission to schedule assessments for their organization. Refer to Scheduling an assessment.
- Click Send Mail to send a user account creation invitation to the invited user.
The invitee will receive an email to confirm their email address for account creation. Upon logging in, they'll be prompted to change their password.
Managing primary contacts
Primary contacts are admin users who receive email notifications about reports being purged, QA testing notifications, subscription upgrades, and other account-wide related activities. An account can have multiple primary contacts, and at least one primary contact is required.
You can manage primary contacts by clicking Users in the left navigation menu to navigate to the Admins tab.
A user is a primary contact if Yes is displayed in the Is primary contact? column for that user.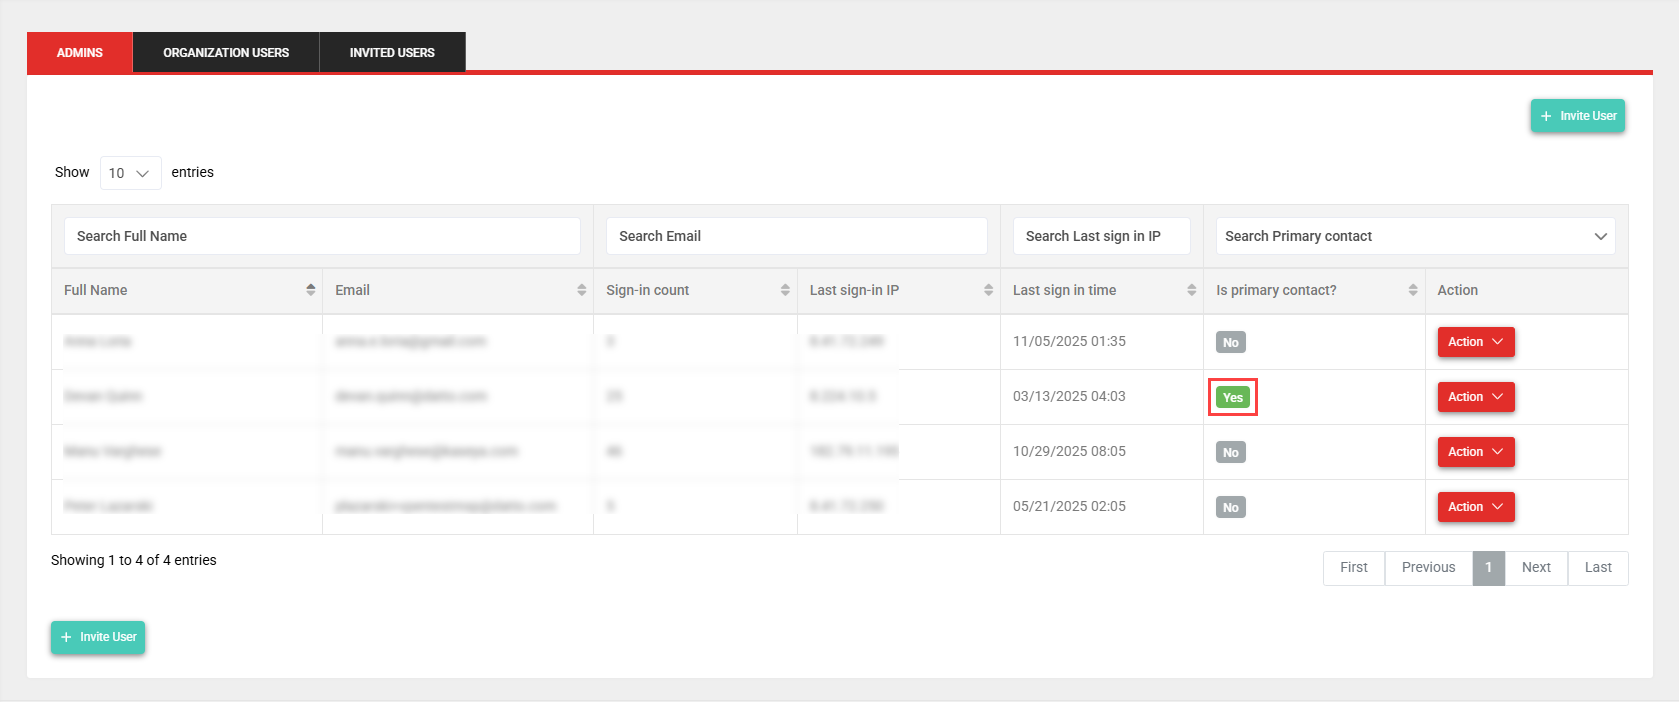
Adding or removing a primary contact
Add or remove an admin user as a primary contact as follows:
- From the list of users, click the Action drop-down menu for a user and select Edit user details.
- In the Is this user the primary contact? field, select Yes or No to make this user a primary contact or remove this user as a primary contact, respectively.
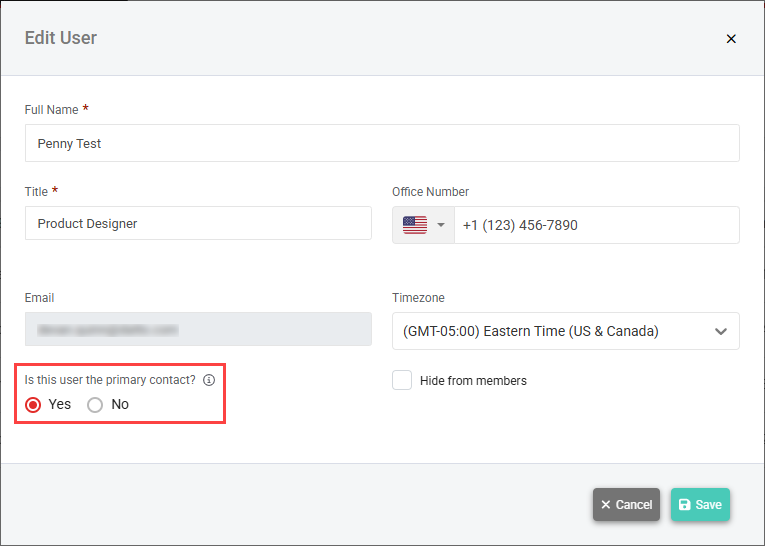
NOTE An error message is displayed if you attempt to remove the only primary contact in the account. First assigning another user as a primary contact will eliminate this error message.
Resetting a user's password
You may need to send another user a password reset link if they forget their password, suspect it has been compromised, or are otherwise unable to log in to their account.
Complete the following steps to reset an admin user's password:
- From the left navigation menu, click Users. The Admins tab is selected by default.

- In the Action column, click the Action drop-down menu for the user and select Send reset password link.
The user may then complete the following steps:
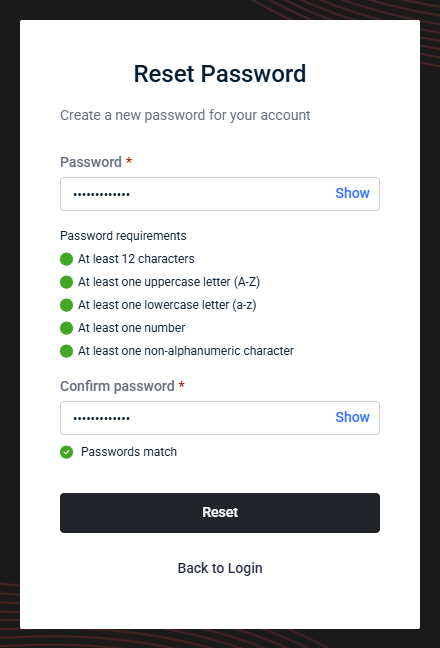
- Navigate to your email inbox, open the password reset email from vPenTest, and click the link in the email to change your password.
- Enter a new password in both the Password and Confirm Password fields.
- Click Reset.
The option to reset an organization user's password is available from both the list of users and the organization profile page.
List of users
Complete the following steps to reset an organization user's password from the list of users:
- From the left navigation menu, click Users.
- Click the Organization Users tab.
- In the Action column, click the Action drop-down menu for the user you want to delete and select Send reset password link.
The user may then complete the following steps:
- Navigate to your email inbox, open the password reset email from vPenTest, and click the link in the email to change your password.
- Enter a new password in both the Password and Confirm Password fields.
- Click Reset.
Organization profile page
Complete the following steps to reset an organization user's password from the organization profile page of the organization the user belongs to:
- From the left navigation menu, click Organizations.
- On the List of Organizations page, click the organization name link in the Full Name column. Alternatively, in the Action column, click the Action drop-down menu for the organization and select Manage Organization Profile.
- Click the Users tab.
- In the Action column, click the Action drop-down menu for the user you want to delete and select Send reset password link.
The user may then complete the following steps:
- Navigate to your email inbox, open the password reset email from vPenTest, and click the link in the email to change your password.
- Enter a new password in both the Password and Confirm Password fields.
- Click Reset.
Deleting users
NOTE You cannot delete your own account, and one admin user must exist on all active accounts.
To delete an admin user, complete the following steps:
- From the left navigation menu, click Users. The Admins tab is selected by default.
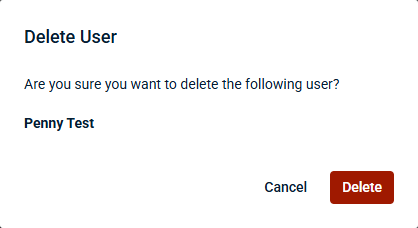
- In the Action column, click the Action drop-down menu for the user you want to delete and select Delete user.
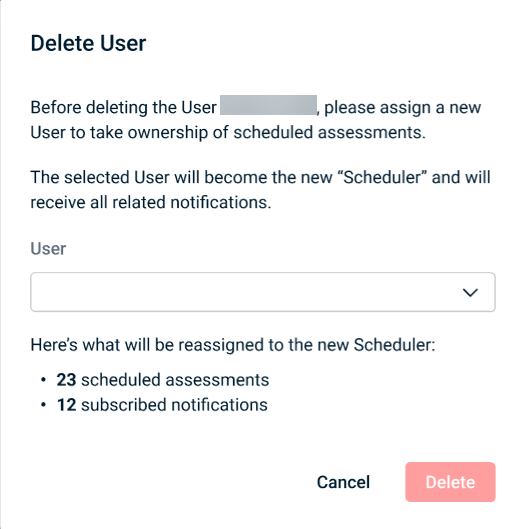
- If the user is associated with any currently scheduled assessments, you must select a different user from the User drop-down menu to take ownership of these scheduled assessments and receive the related notifications. This information is not displayed for users without scheduled assessments.
- Click Delete.
The option to delete an organization user is available from both the list of users and the organization profile page.
List of users
Complete the following steps to delete an organization user from the list of users:
- From the left navigation menu, click Users.
- Click the Organization Users tab.
- In the Action column, click the Action drop-down menu for the user you want to delete and select Delete User.
- If the user is associated with any currently scheduled assessments, you must select a different user from the User drop-down menu to take ownership of these scheduled assessments and receive the related notifications. This information is not displayed for users without scheduled assessments.
- Click Delete.
-
Organization profile page
Complete the following steps to delete an organization user from the organization profile page of the organization the user belongs to:
- From the left navigation menu, click Organizations.
- On the List of Organizations page, click the organization name link in the Full Name column. Alternatively, in the Action column, click the Action drop-down menu for the organization and select Manage Organization Profile.
- Click the Users tab.
- In the Action column, click the Action drop-down menu for the user you want to delete and select Delete User.
- If the user is associated with any currently scheduled assessments, you must select a different user from the User drop-down menu to take ownership of these scheduled assessments and receive the related notifications. This information is not displayed for users without scheduled assessments.
- Click Delete.


