vPenTest Agent Installation Guide
The vPenTest Agent is equivalent to a pentester’s laptop containing the tools and software necessary to perform internal testing such as internal pentests and IP Estimator. The agent software is installed on a full instance of Ubuntu 24.04 on a device of your choice. The agent is essentially a docker host used to pull a custom Kali Linux container to perform testing.
Prerequisites
- A host to run Ubuntu 24.04 as the operating system (mini-pc, virtual machine, cloud server, and so forth).
- Ensure the internal agent is allowed unrestricted outbound connectivity to the vPenTest endpoints. Refer to Permitting access for the agent (allowlist).
- An agent UUID from vPenTest.
- The installation command:
- US instance: app.vpentest.io
- EMEA instance: emea.app.vpentest.io
- APAC instance: apac.app.vpentest.io
1. curl -L https://app.vpentest.io/getting_started.sh | bash1. curl -L https://emea.app.vpentest.io/getting_started.sh | bash1. curl -L https://apac.app.vpentest.io/getting_started.sh | bash
Minimum requirements for the host
System
| Component | Requirement |
|---|---|
| CPU | 2 cores |
| Memory | 8 GB RAM |
| Storage | 80 GB total disk space (minimum 55 GB usable) IMPORTANT LVM must not be enabled. |
| Storage (if cohosting the VulScan agent) | 120 GB total disk space |
| Network interface | 1 Gbps wired Ethernet |
| Internet bandwidth | 10 Mbps |
Networking
- Virtual machines must use bridged networking.
- Unrestricted outbound access over TCP port 443 to AWS endpoints is required.
NOTE Hypervisor NAT is not supported and may cause connectivity issues.
NOTE SSL inspection, DPI, and content filtering may interfere with connectivity.
Quick installation steps
Perform the following steps:
- Download the Ubuntu 24.04 Server ISO.
- Retrieve your agent UUID from vPenTest.
- Select a host to run Ubuntu 24.04.
-
Boot to the ISO, go through the installation steps, and configure the pre-installation settings.
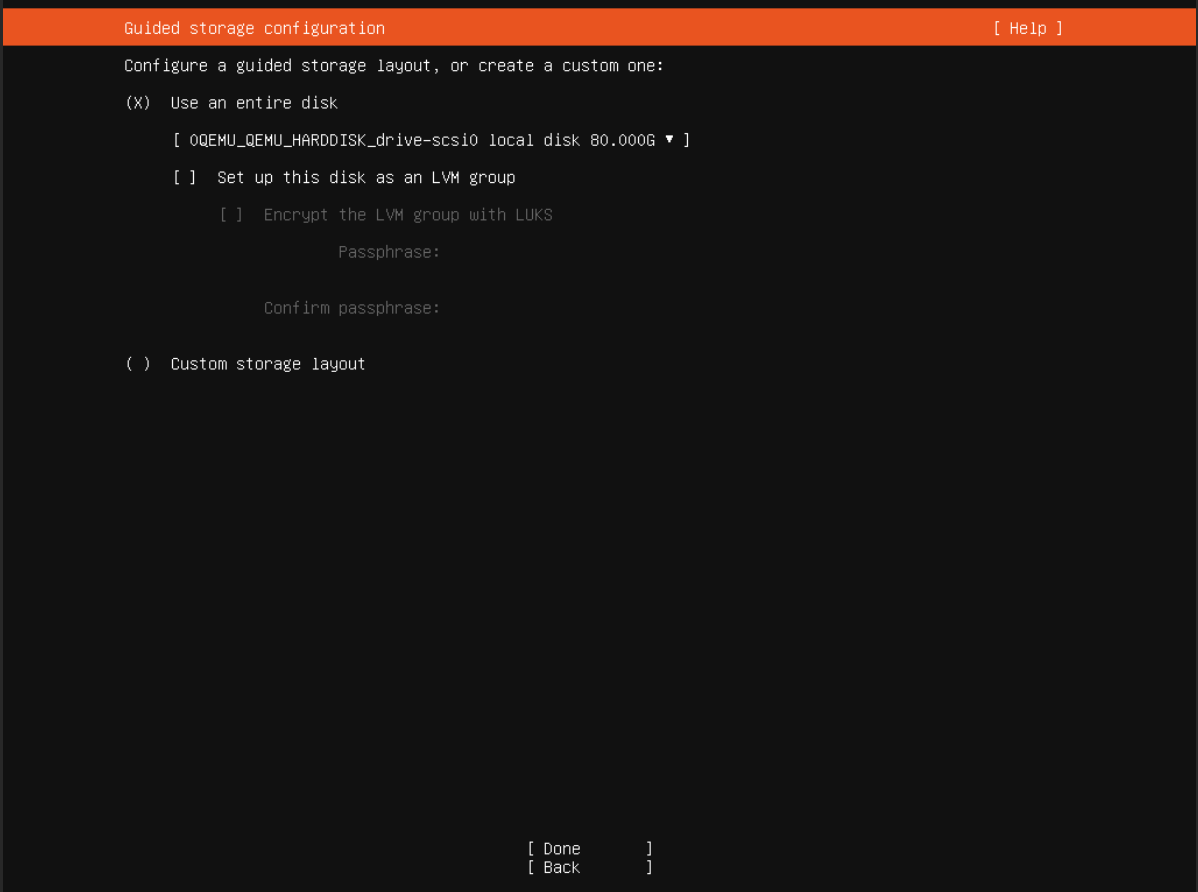
IMPORTANT Use default settings except for clearing the option Set up this disk as an LVM group.
- On the software selection page, press Enter. The vPenTest Agent will install the required prerequisites.
-
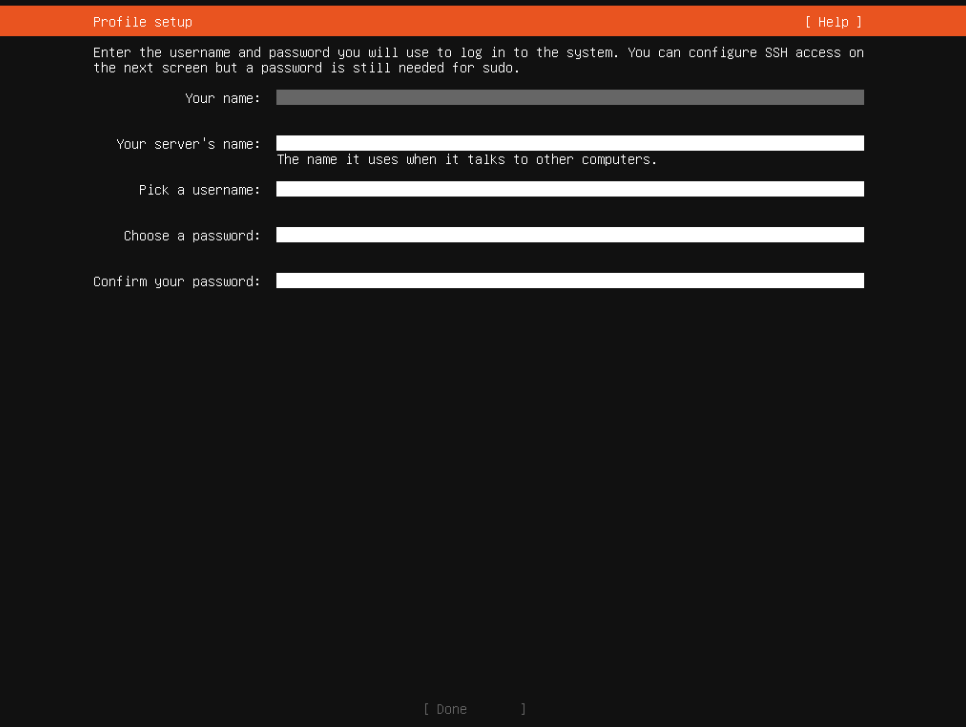
Set up your username and password.
NOTE Vonahi will never ask for these credentials.
-
Log in to Ubuntu, open a terminal, switch to root, and run the following:
1. sudo su2. cd3. apt update && apt upgrade -y4. curl -L https://app.vpentest.io/getting_started.sh | bash - Register the agent using the UUID from vPenTest.
Host requirements
Supported host types
- Desktop, laptop, or mini-PC
- Virtual machine (VMware, Hyper-V, or other full hypervisors)
- Cloud compute instance
IMPORTANT Running Ubuntu as a container is not supported, as it creates a Docker-in-Docker scenario that breaks the agent.
Installing Ubuntu 24.04
Download the ISO
- Navigate to the Ubuntu Server 24.04 download page.
- Download the Ubuntu Server 24.04 LTS ISO file.
- Boot the ISO on your selected host.
Installation steps
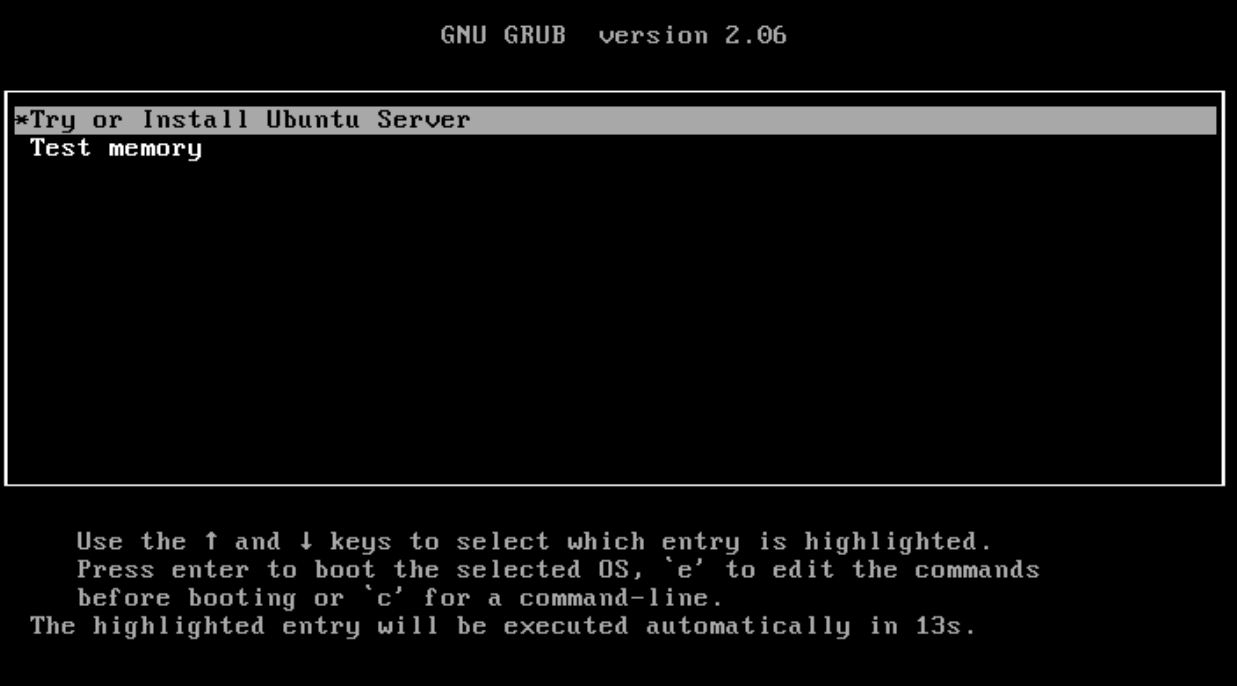
- Boot the ISO and press Enter to install Ubuntu Server.
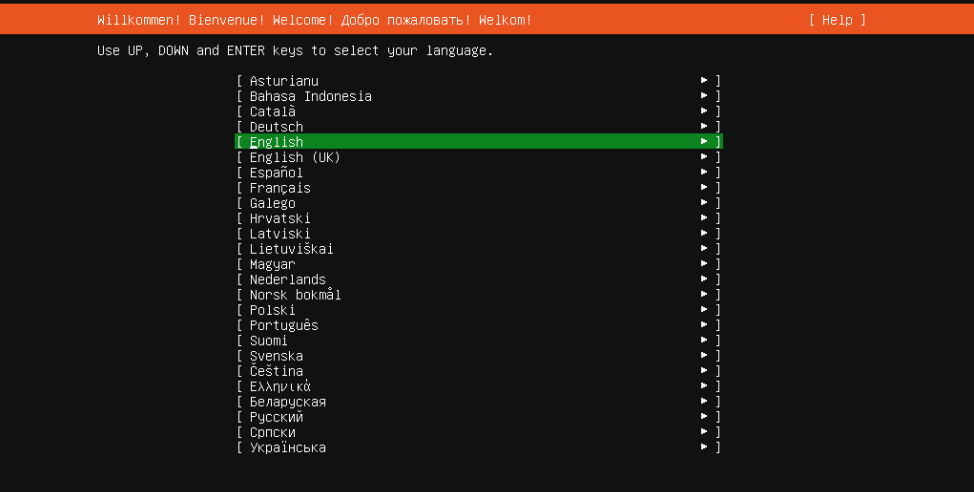
- Select your language.
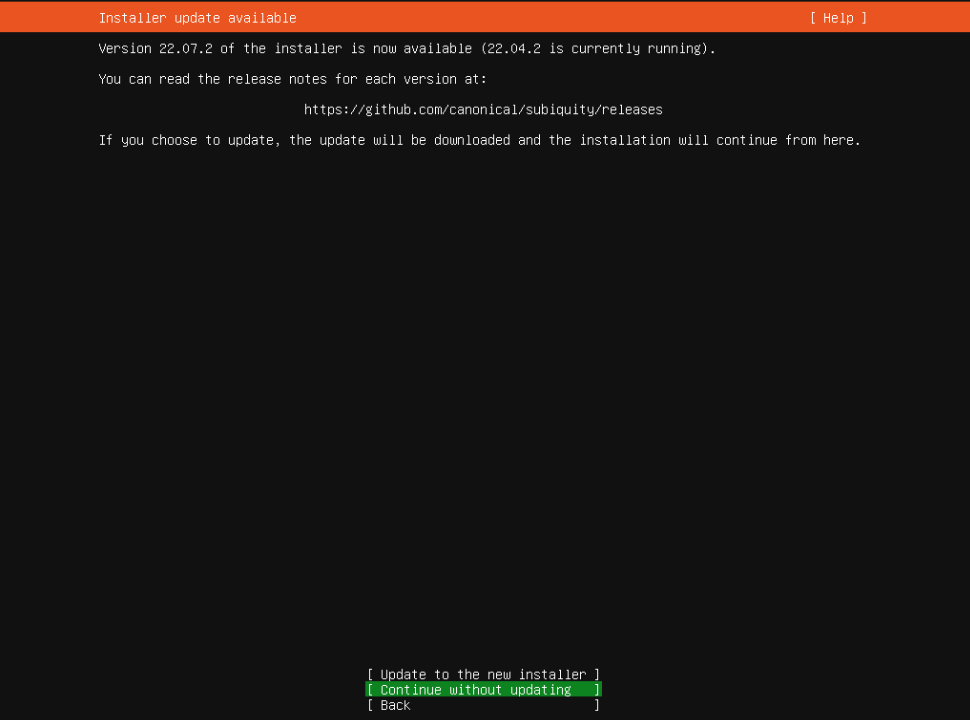
- Skip updating the installer if prompted.
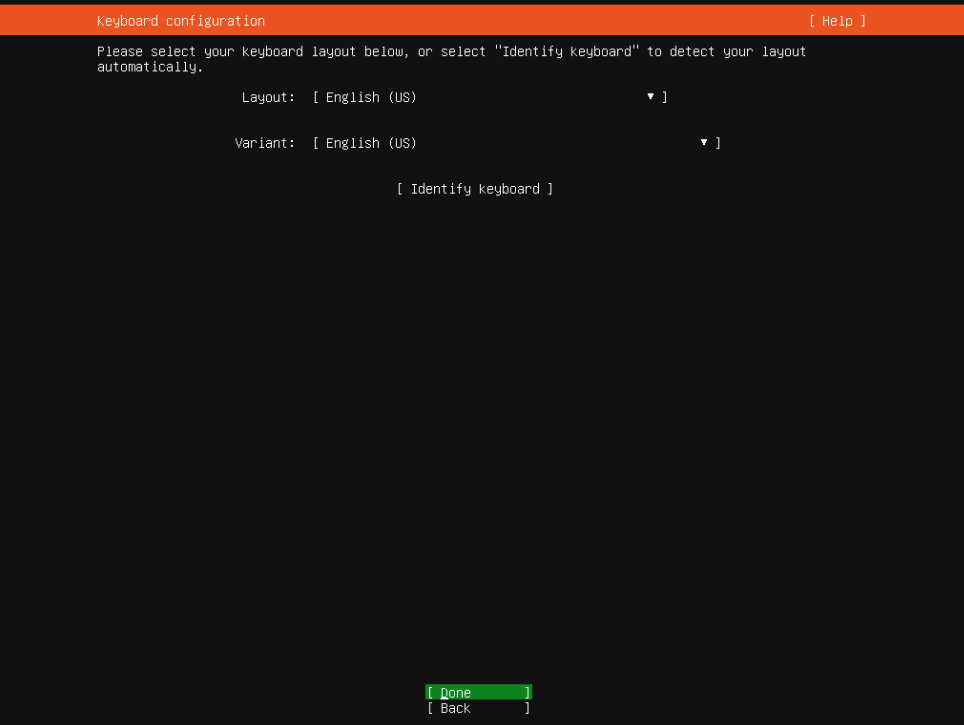
- Select your keyboard layout.
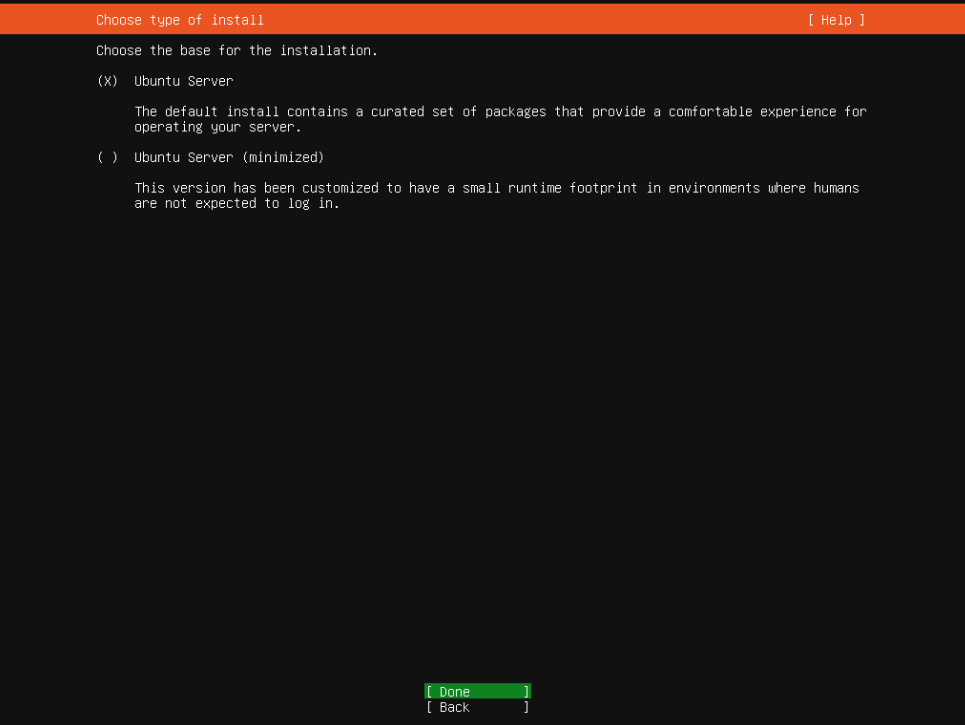
- Leave the default installation type: Ubuntu Server. Do not select Ubuntu Server (minimized).
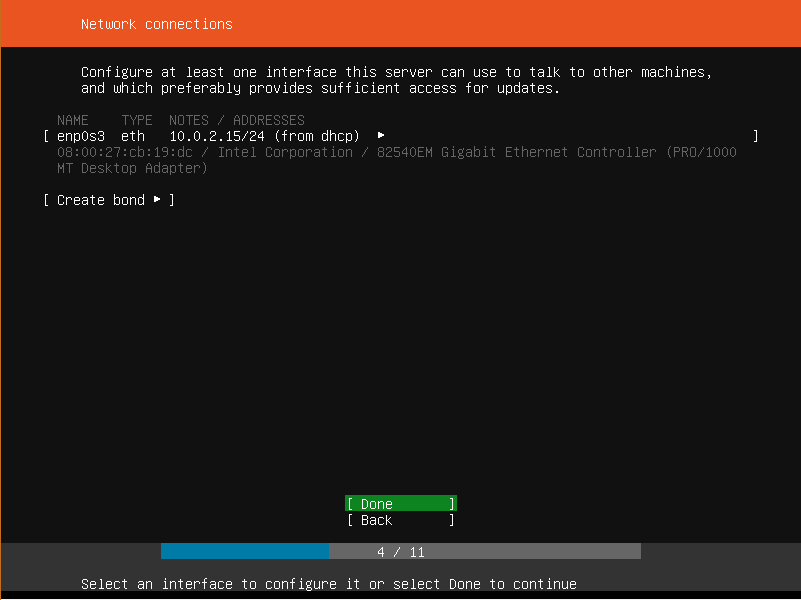
- Network connections: Use DHCP or configure a static IP.
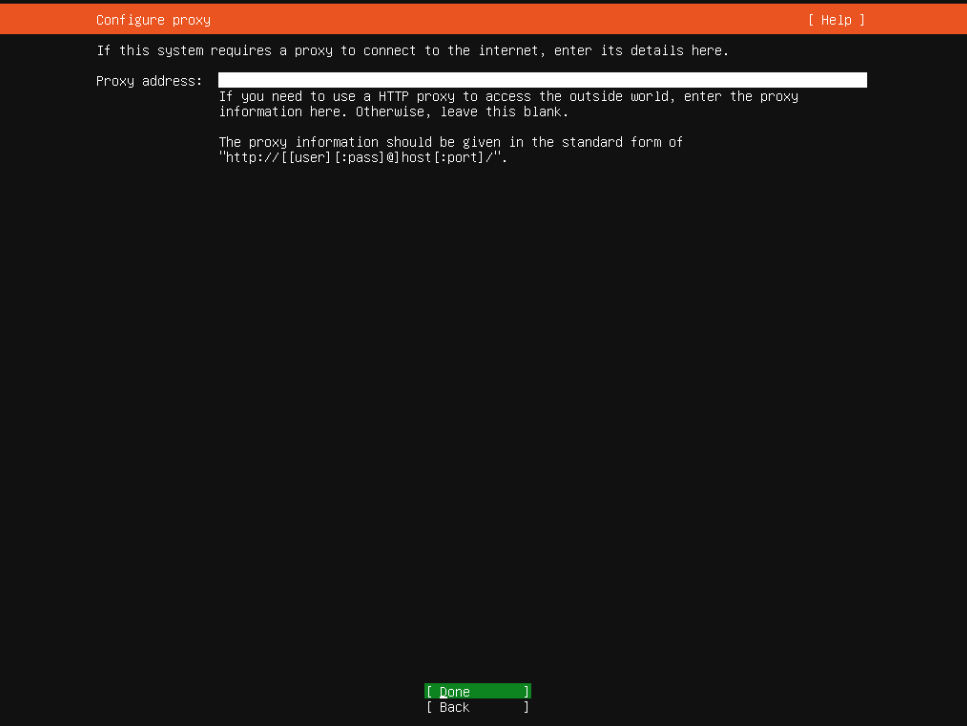
- Configure proxy: Do not use a proxy.
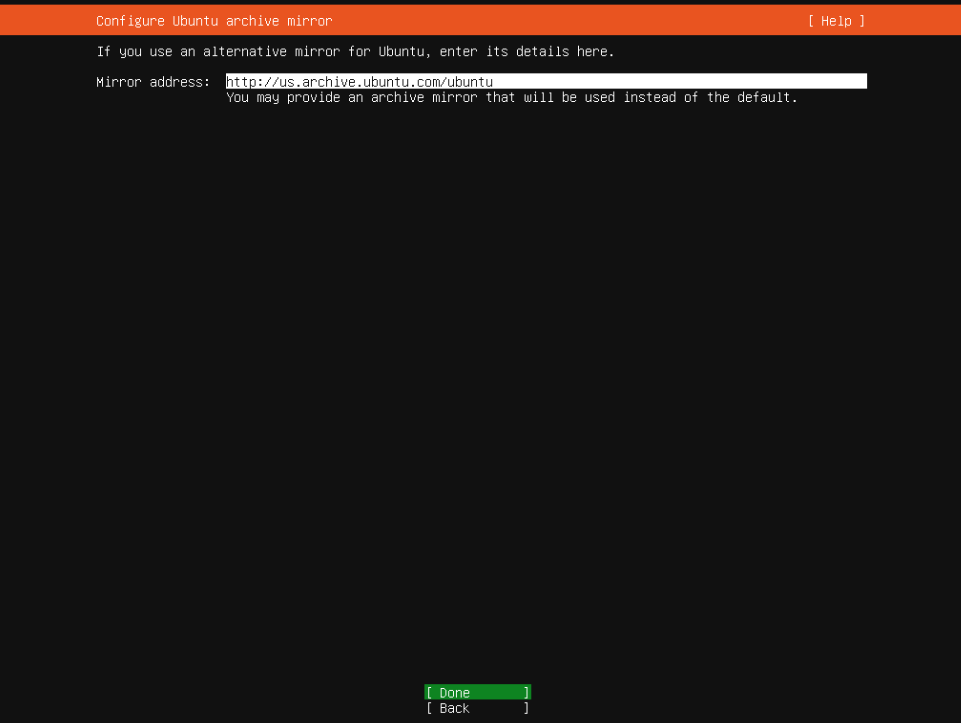
- Configure Ubuntu archive mirror: Leave default.
- Guided storage configuration: Clear Set up this disk as an LVM group.
- Storage configuration: Verify ~80 GB total disk with at least 55 GB usable.
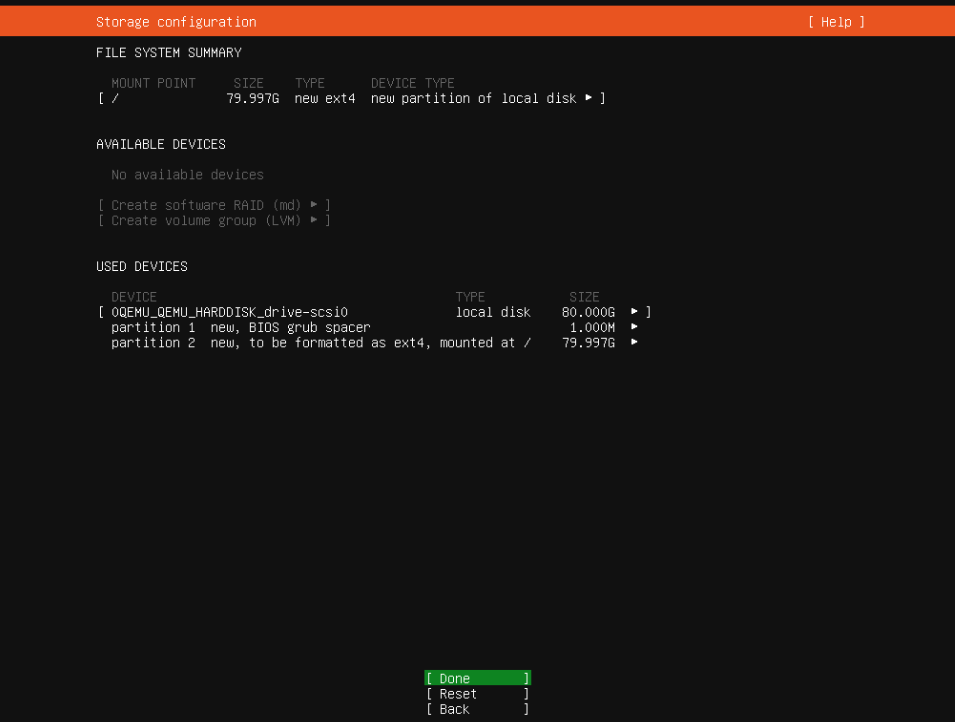
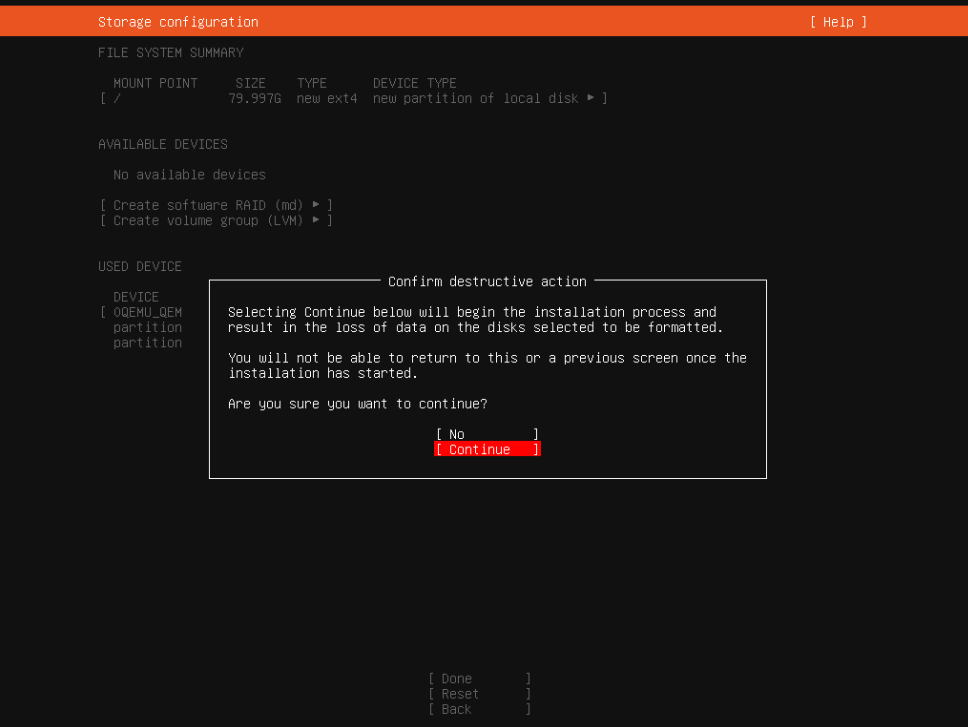
- Click Continue to format the disk.
-
Set up your account profile.
NOTE This is for your use only. We do not store your username or password.
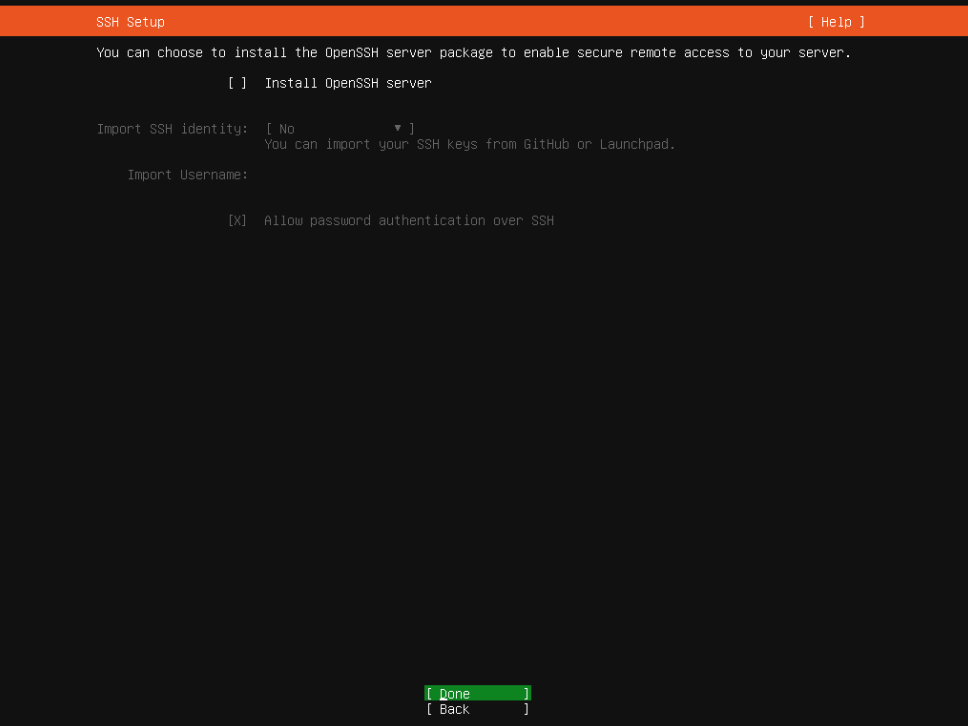
- SSH Setup: Skip and do not install OpenSSH.
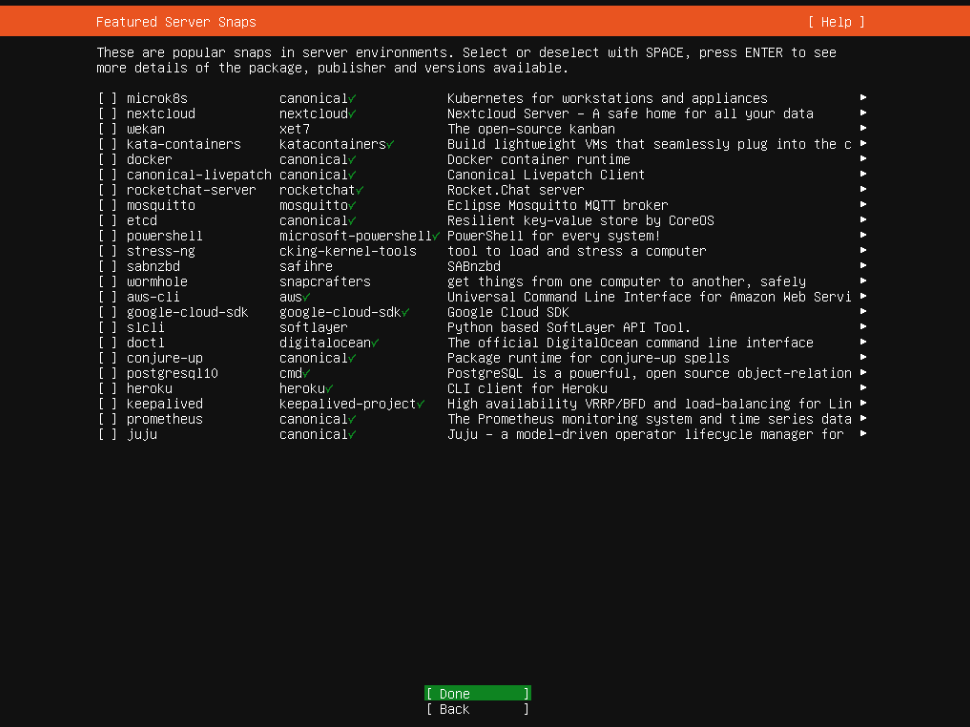
- Featured Server Snaps: Skip all optional installations.
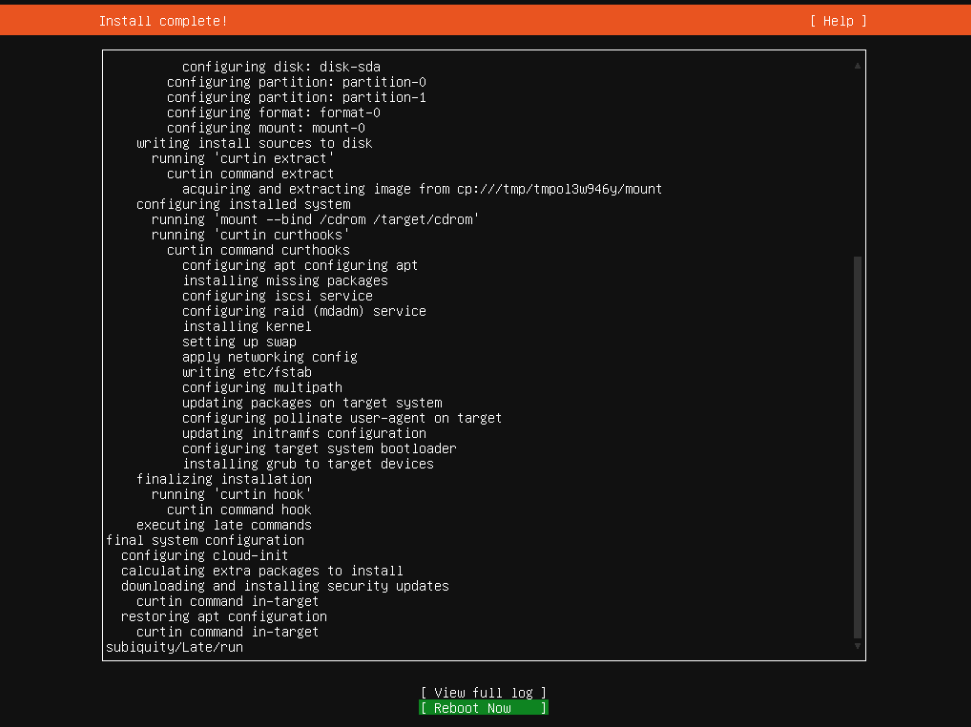
- Wait for installation to complete, and then select Reboot Now.
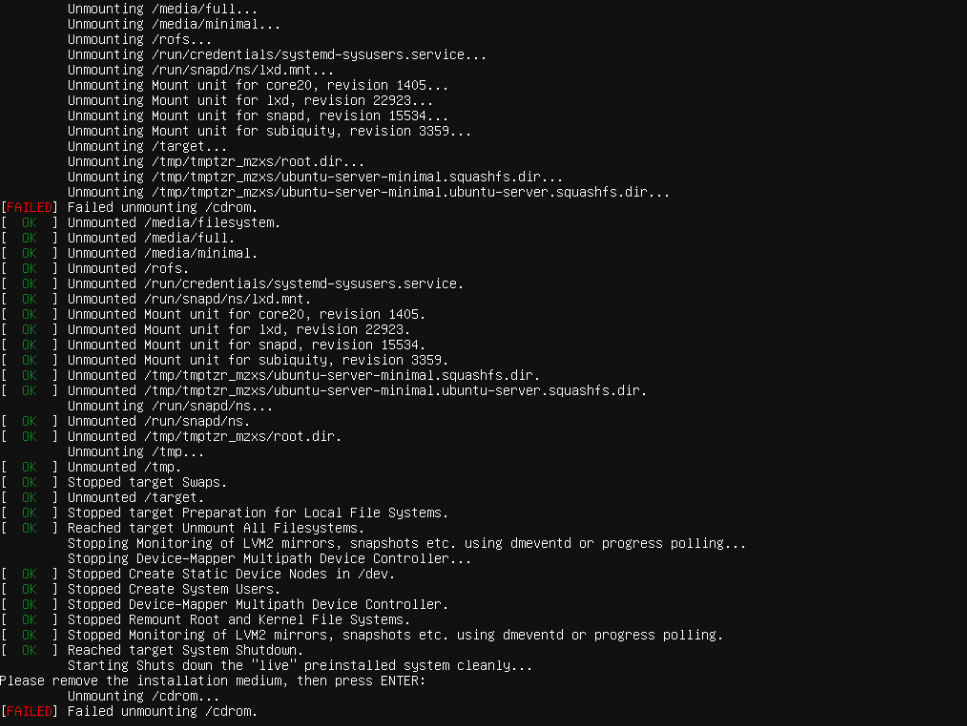
- If you see Failed unmounting /cdrom, press Enter to continue reboot.
- Once Ubuntu boots, you will see the login screen followed by cloud-init data. Press Enter to reach the login prompt.
Installing the vPenTest Agent
The agent installation takes approximately 5 to 10 minutes, depending on internet bandwidth.
NOTE If you generated the agent UUID in advance, you can use the single install command and skip manual registration.
-
Log in to Ubuntu and run the following:
1. sudo su2. cd3. apt update && apt upgrade -y4. curl -L https://app.vpentest.io/getting_started.sh | bash - The installation completes when prompted for the UUID.
- Go to app.vpentest.io and create a new agent to obtain a UUID.
- Enter the UUID in the terminal to register the agent.
- Reboot the host. The agent should appear Online in the portal.
The agent is now ready for scheduling internal pentests.


