Setting a static IP address on the Agent
Overview
When configuring your Agent, you may want to set a static IP address in the event that Dynamic Host Configuration Protocol (DHCP) is unavailable.
To accomplish this, the menu script comes pre-built with options that allow you to change your IP address, subnet mask, gateway, and DNS servers using the netplan commands. Alternatively, you can use the netplan command manually.
The instructions below include two methods to set a static IP address using two different ways.
Prerequisites: Identify your network interface card
Depending on your configuration, your interface name may be different than some of the common names, such as eth0, ens33, etc. Prior to setting your IP address information, you'll want to gather the interface name that you would like to set the IP address for.
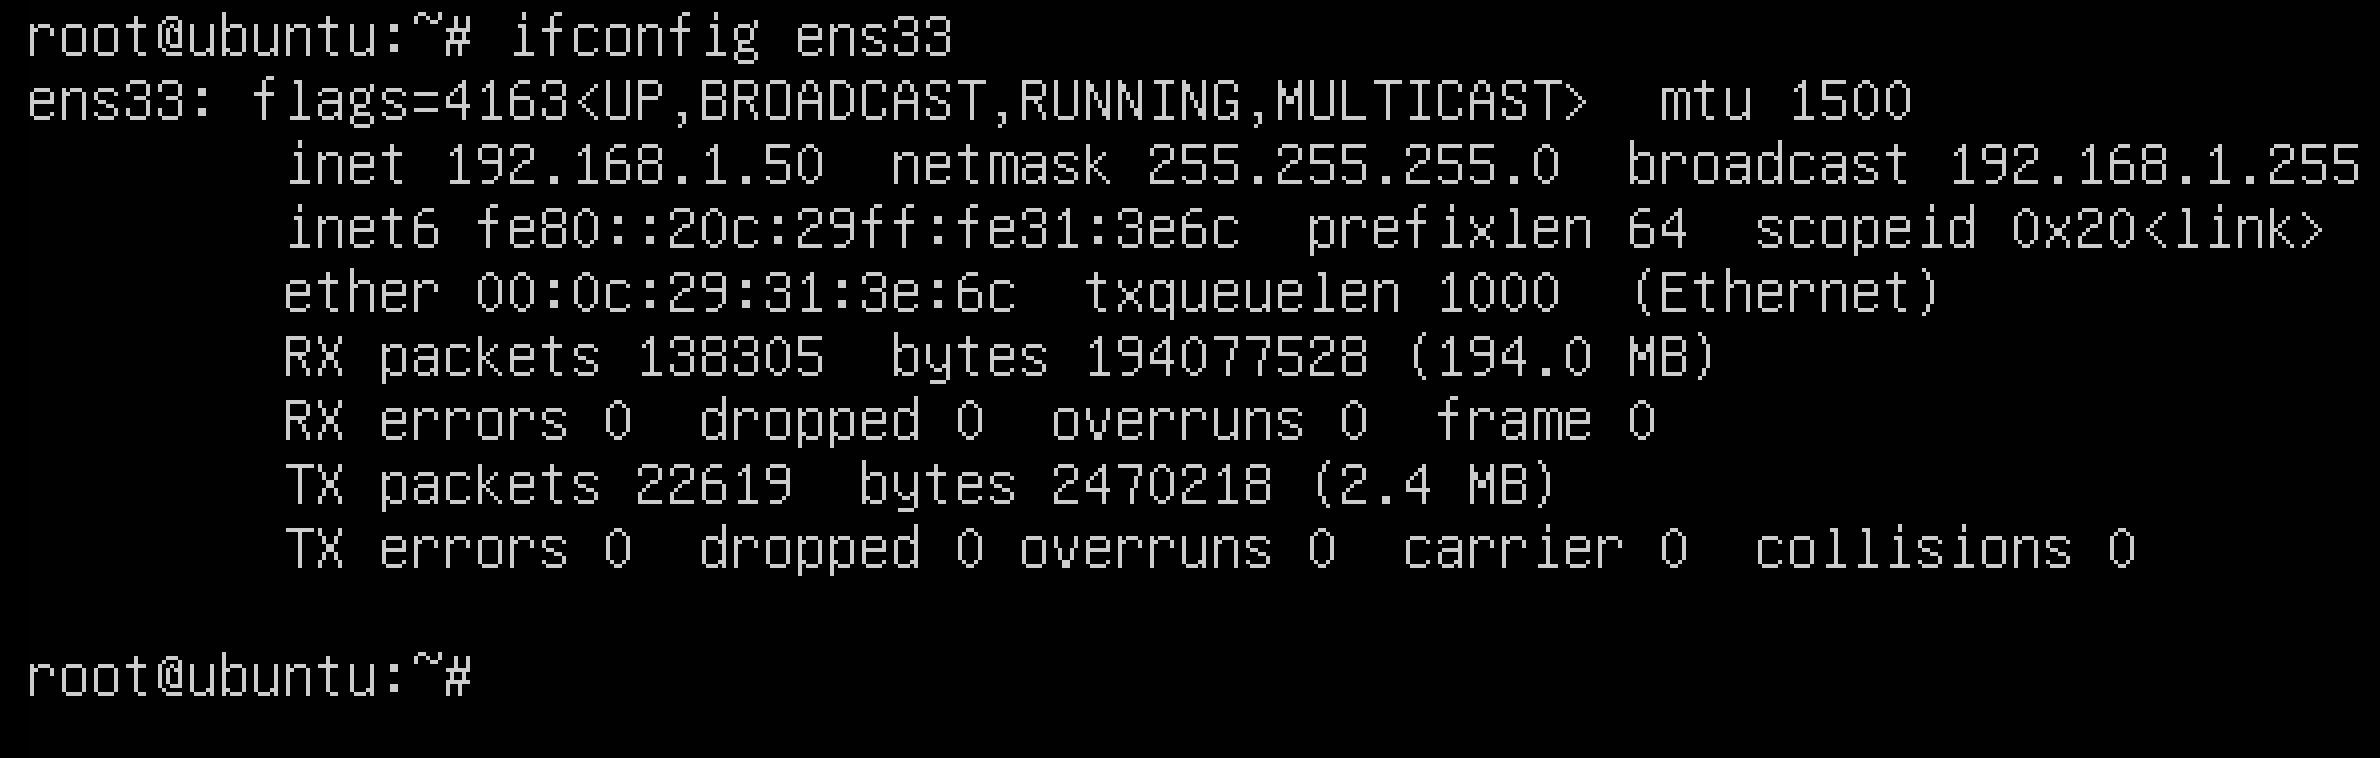
To identify which network interfaces you have, run the ifconfig command from the terminal prompt. You should see the following output:
In the above example, the primary interface is ens33. This is the network interface that we'll be using throughout the rest of this tutorial.
Setting a static IP address using the menu
- Load up the menu Agent (if it's not already loaded) by typing one of the following commands:
- vtp
- /root/vpentest.rb
- Choose option 1.
- Choose option 1.
- Press the Enter key.
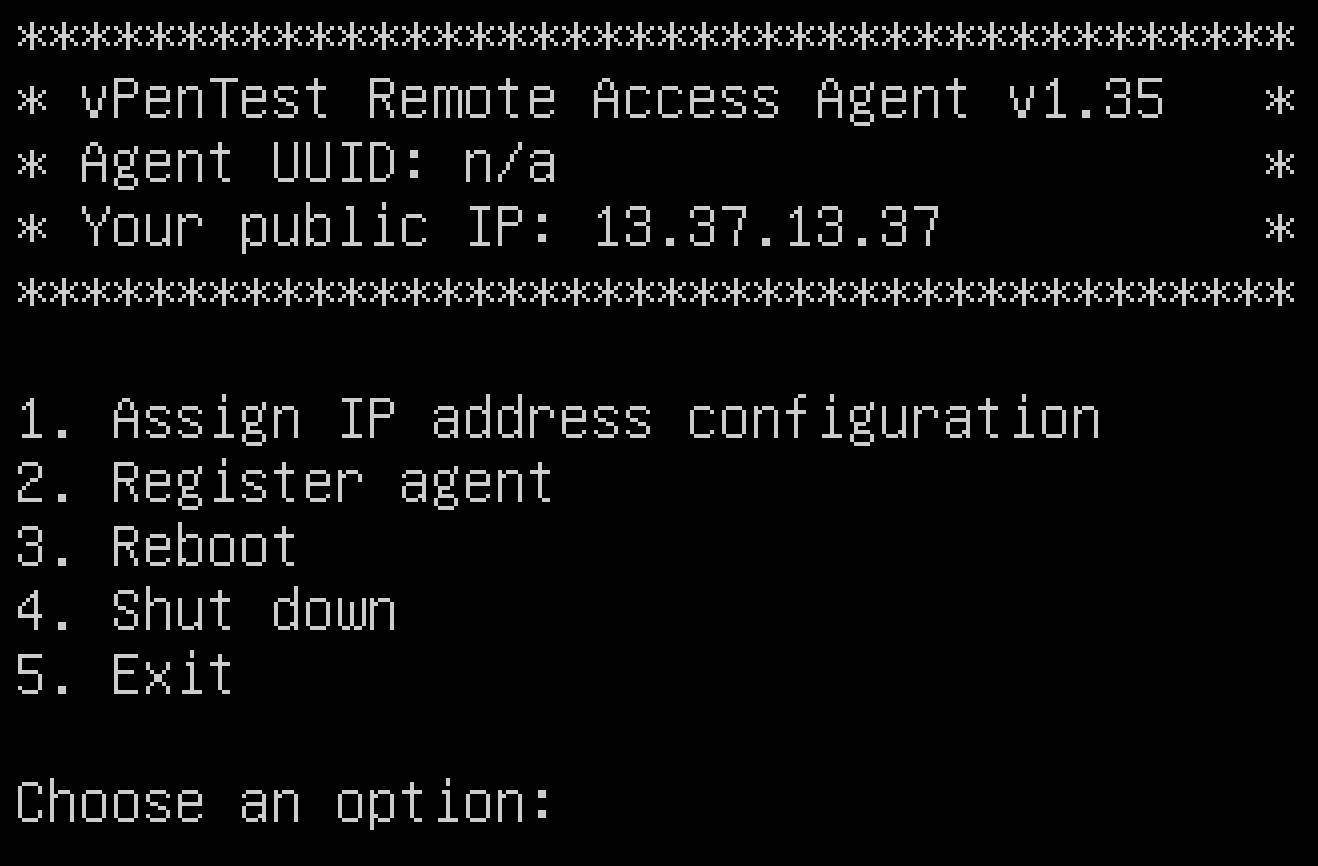
You should see the following screen after typing one of the aforementioned commands:
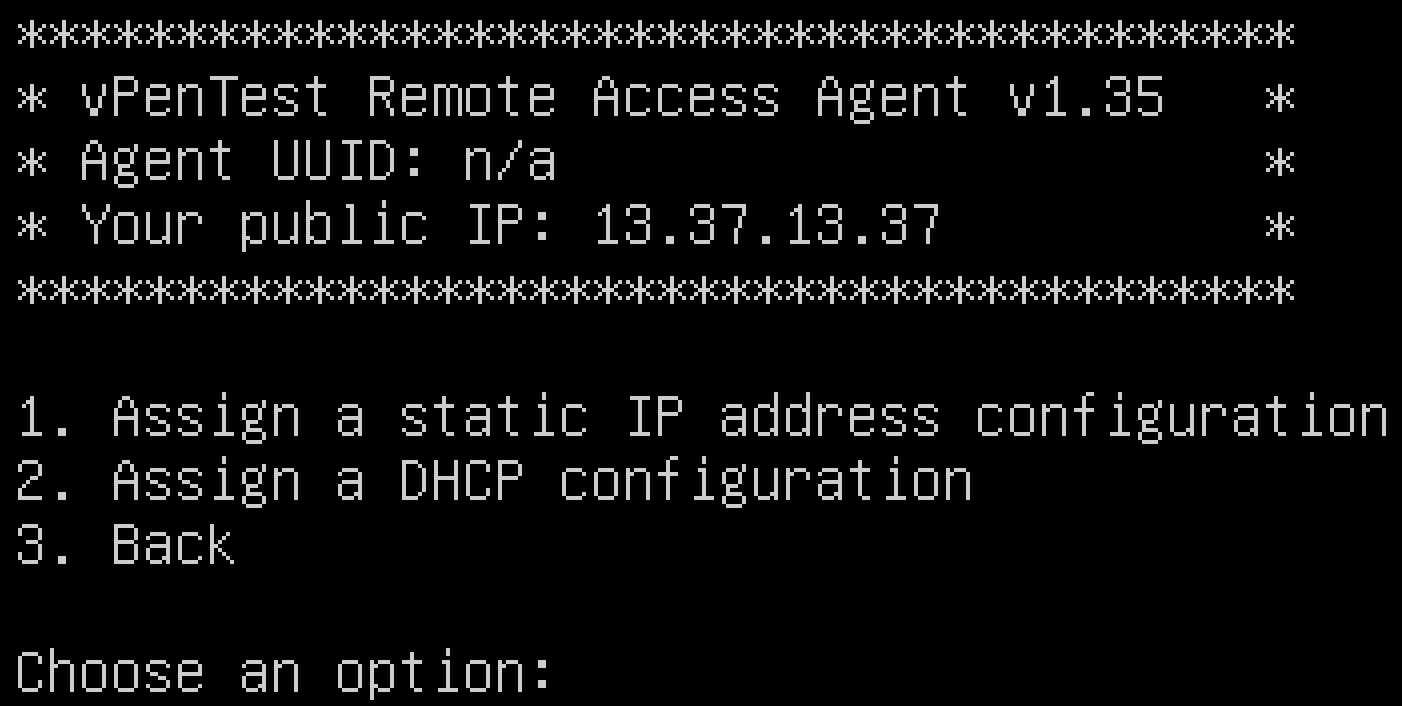
After choosing option 1 on the next screen, you will see the following screen:
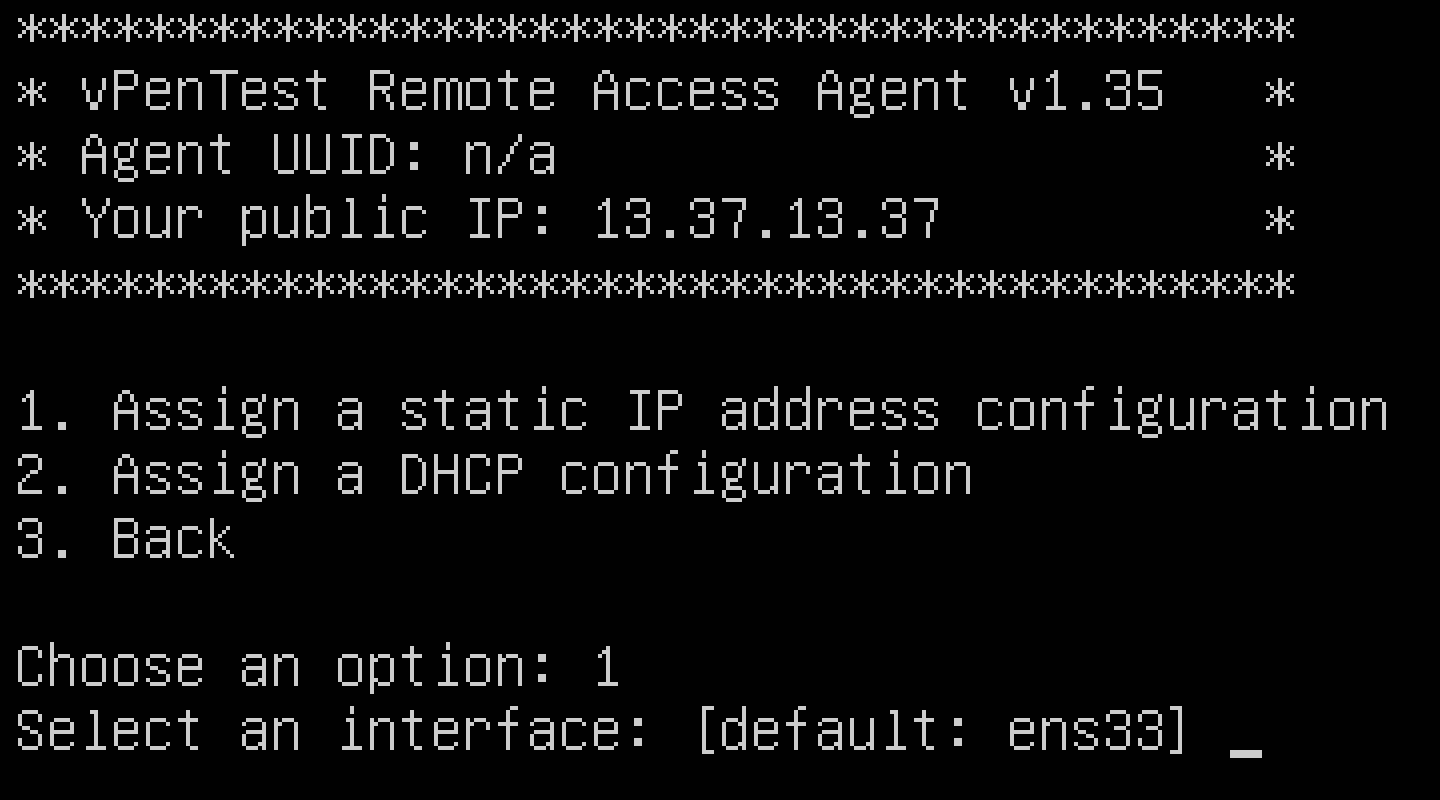
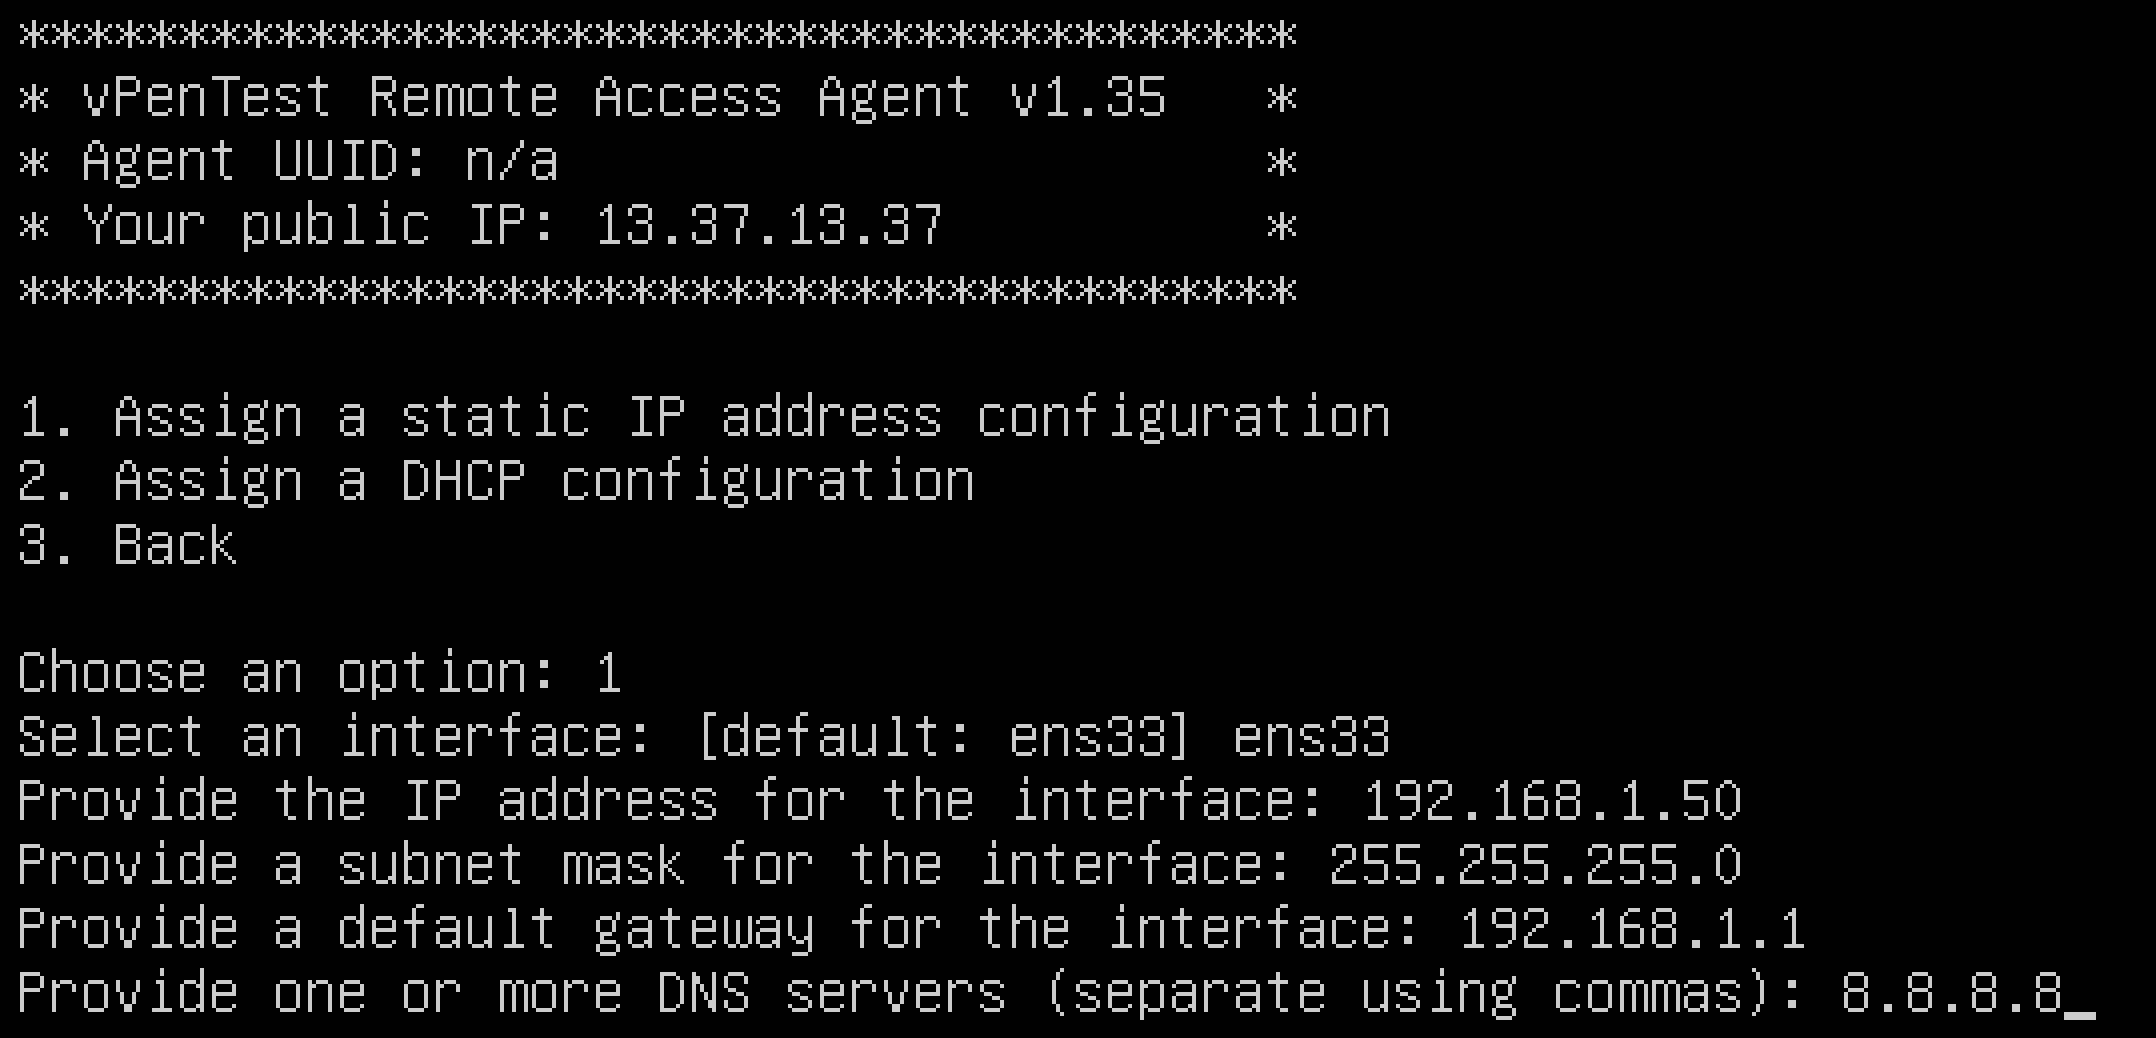
After choosing option 1 to set a static IP address configuration, you should see the following screen:
After providing the interface name that you would like to set the IP address to, you'll continue by providing your subnet mask, gateway, and DNS servers, as shown in the final output below:
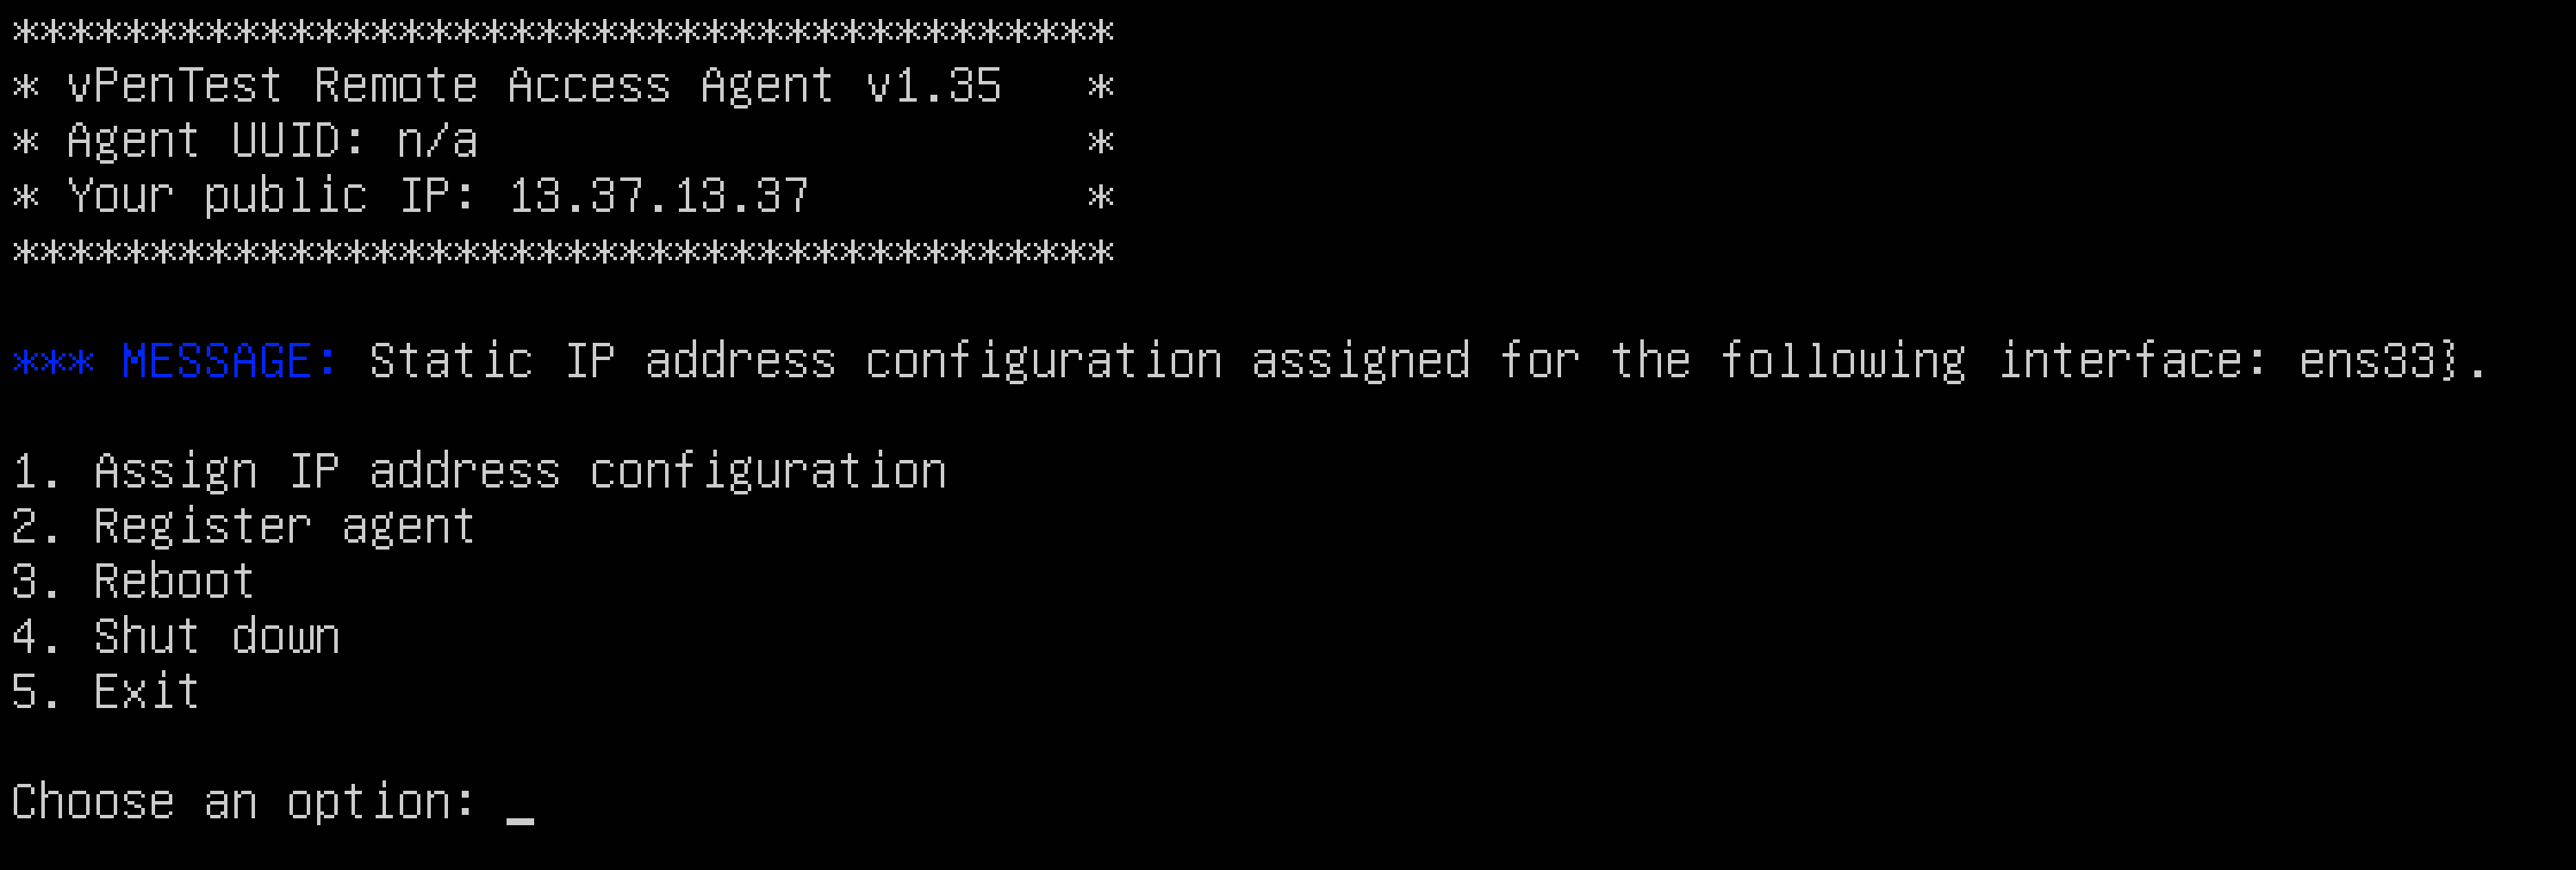
After pressing the Enter key, you'll see a confirmation screen within the Agent that looks similar to the following:
Setting a static IP address using netplan
If you prefer to set up a static IP address outside of the Agent's menu, you can use thenetplancommand. To learn more about netplan and other configurations, please visit the following URL: https://netplan.io.
To set a static IP address, perform the following steps:
- Copy a "static IP address YAML template."
- Edit the "static IP address YAML template."
Run the following command from the command line interface:
cp /usr/share/doc/netplan/examples/static.yaml /etc/netplan/static.yaml
Next, you will want to use a text editor, such as nano, vim, etc. In the example below, we're using the vim text editor. To use nano, for example, you can run the following command:
nano /etc/netplan/static.yaml
Using vim, you would run the following command:
vim /etc/netplan/static.yaml
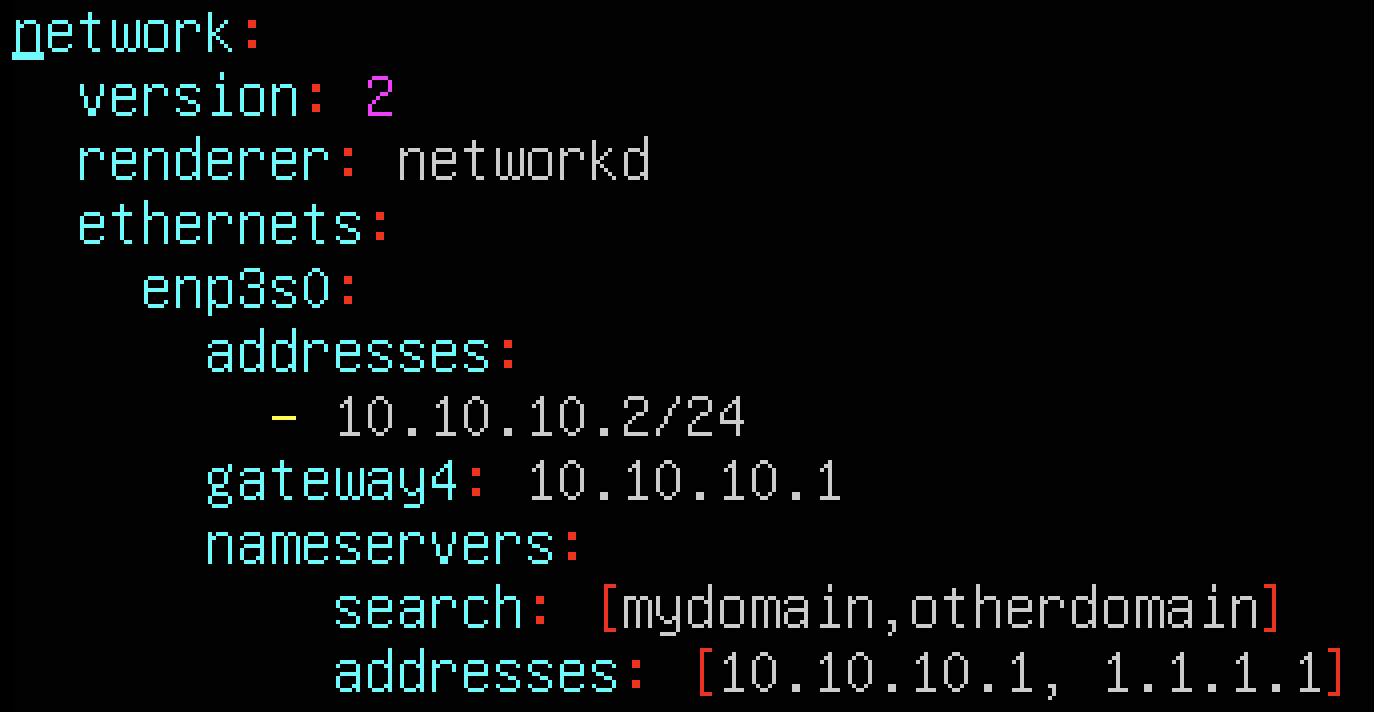
Once you've got a text editor opened, your output should look very similar to this:
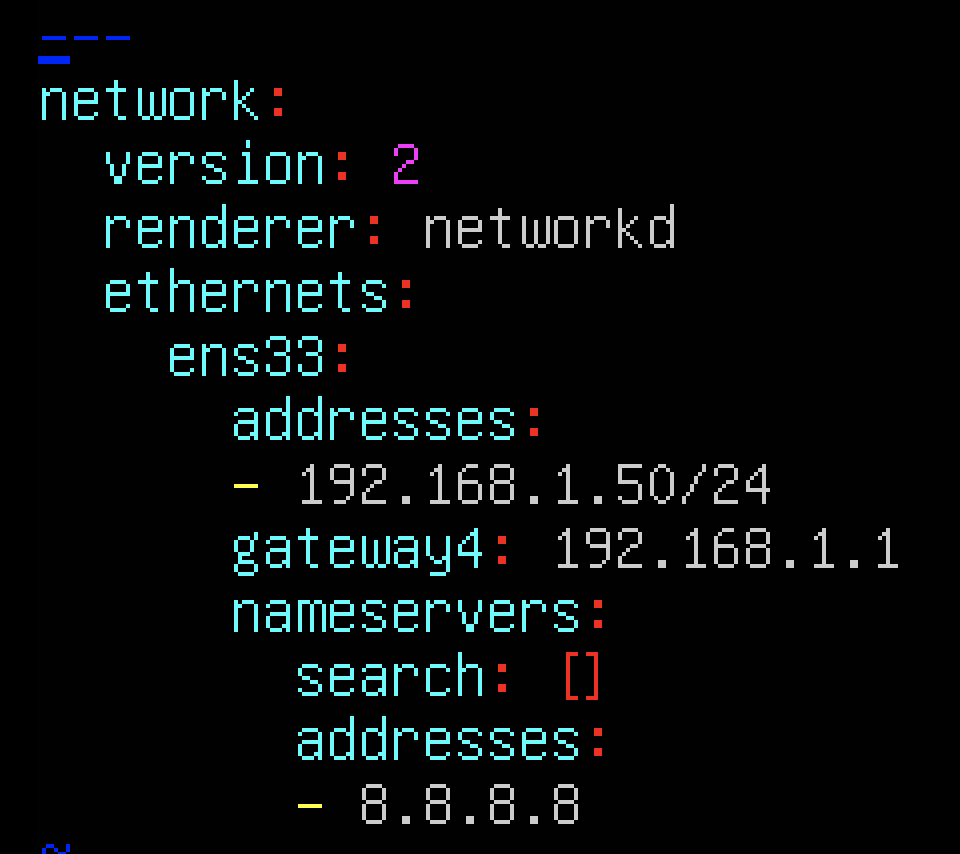
After modifying the file to your preference, your YAML file should look similar to this, with the exception of different IP address settings:
After you've completed editing your file and saving its changes, run the following command to apply the configuration settings:
netplan apply
To verify your IP address configurations per the previous settings, run the ifconfig again. As you can see below, the IP address configurations were successfully saved: