VulScan integration: Import scan results from VulScan into vPenTest
NAVIGATION Admin Settings > Integrations > VulScan
This integration allows you to add internal and external vulnerabilities and remediation steps from VulScan to your scheduled assessments in vPenTest.
Benefits
- Provides a full picture of your network security with results from both vulnerability scanning and penetration testing in one solution.
- Comprehensive third-party risk assessments.
How to...
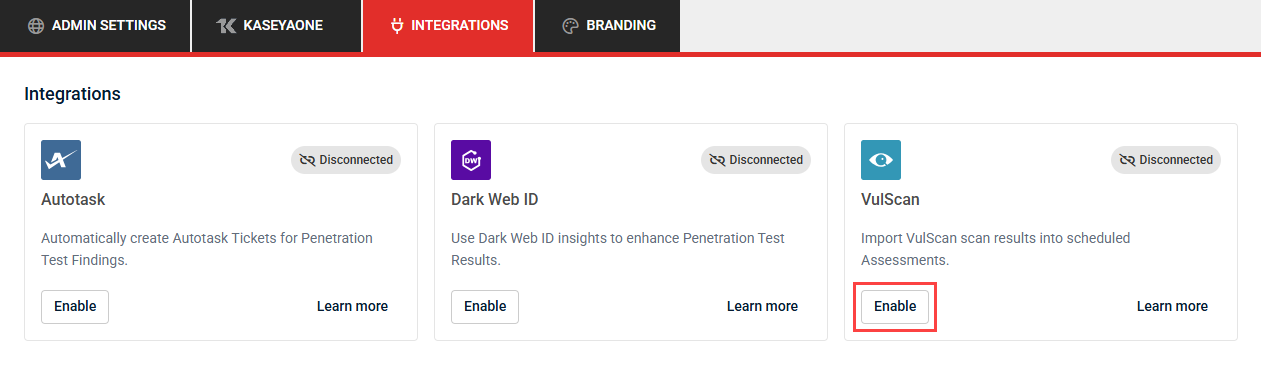
To enable the VulScan integration, complete the following steps in vPenTest:
- In the left navigation menu, click Admin Settings.
- Click the Integrations tab.
- Click Enable in the VulScan tile.
When the integration is enabled, a two-step setup form appears. You can click Save or Close at any point if you do not want to complete setup immediately.
Step 1: Details
- Enter your VulScan API key generated from the RapidFire Tools portal. Refer to the instructions for API key creation in the VulScan Help system.
- Click Test Integration.
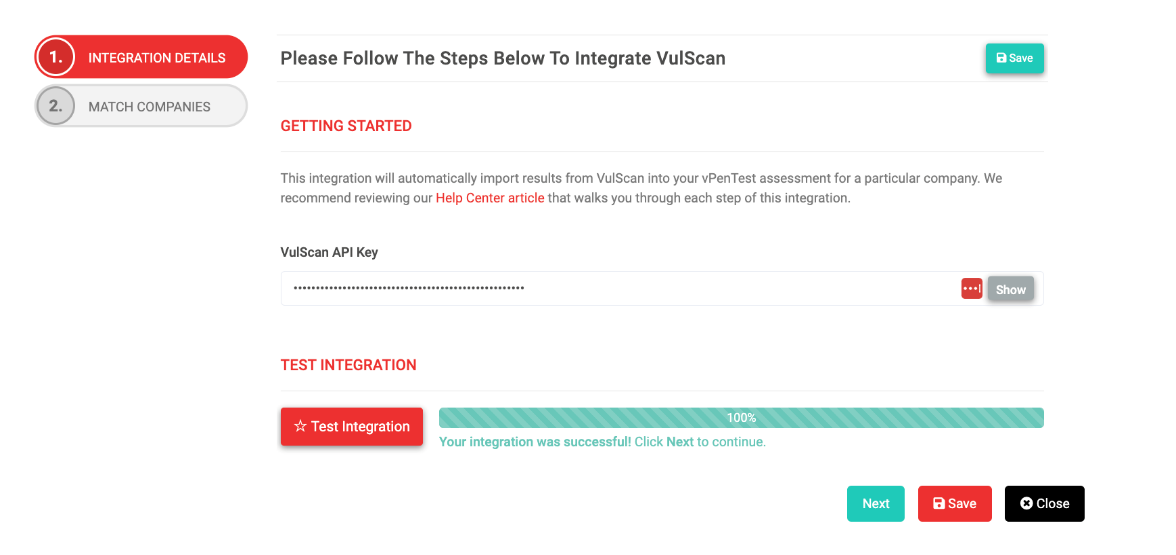
Once the authentication is validated, you can proceed to the next step.
Step 2: Mapping
This step displays all organizations available in vPenTest for the logged-in user. Refer to Creating and managing organizations. The user can map these vPenTest organizations to their corresponding VulScan organizations using the drop-down menus in the Existing Organization in VulScan column.
Once mapped, organizations show a VulScan icon on the List of Organizations page in vPenTest.
When finished, click Complete Integration.
An organization that is mapped to a VulScan organization displays a VulScan icon on the List of Organizations page. This helps you quickly identify which organizations are synced. Refer to Creating and managing organizations.
If an organization in vPenTest is mapped to a VulScan organization, the organization profile page displays the sync details. Locate the VulScan Integration row in the Details for [Organization] section in the upper-left corner of the Profile Details tab. Refer to Managing an organization profile in Creating and managing organizations.
If the organization is not already mapped and the VulScan integration is enabled, this row displays a Map to a VulScan Organization option.
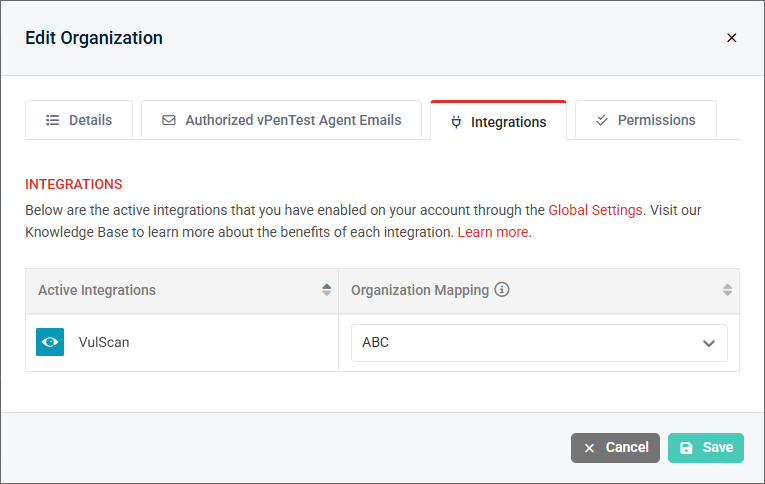
To change the mapped organization, complete the following steps:
- In the left navigation menu, click Organizations.
- Select the organization you want to update.
- Click Edit Details.
- Click the Integrations tab.
- From the drop-down menu in the Organization Mapping column, select the VulScan organization you want to sync with the vPenTest organization.
Once the integration is enabled and organizations are mapped, you can import scan results from VulScan into a new assessment via the assessment scheduling wizard. Refer to Scheduling an assessment. This option is available for the following assessment types:
- Internal Network Penetration Test
- External Network Penetration Test
The scan scope must be consistent between VulScan and vPenTest for the integration to work correctly.
- If 200 IPs are scanned in VulScan but only 100 of those IPs are scanned in vPenTest, only the 100 IPs present in both systems will be matched.
- If 200 IPs are scanned in VulScan and 300 IPs are scanned in vPenTest, only the IPs that exist in both scan results will be matched.
If the organization you are creating an assessment for is synced to a VulScan organization, the VulScan Integration section is displayed in the first step of the scheduling wizard. Complete the following steps to import scan results from VulScan as part of the assessment:
- Select the Import Results from VulScan checkbox.

- Select the applicable VulScan site.
- Proceed through the rest of the steps in the scheduling wizard.
In the Summary step, VulScan details are displayed, including whether or not the results import is enabled for the assessment.
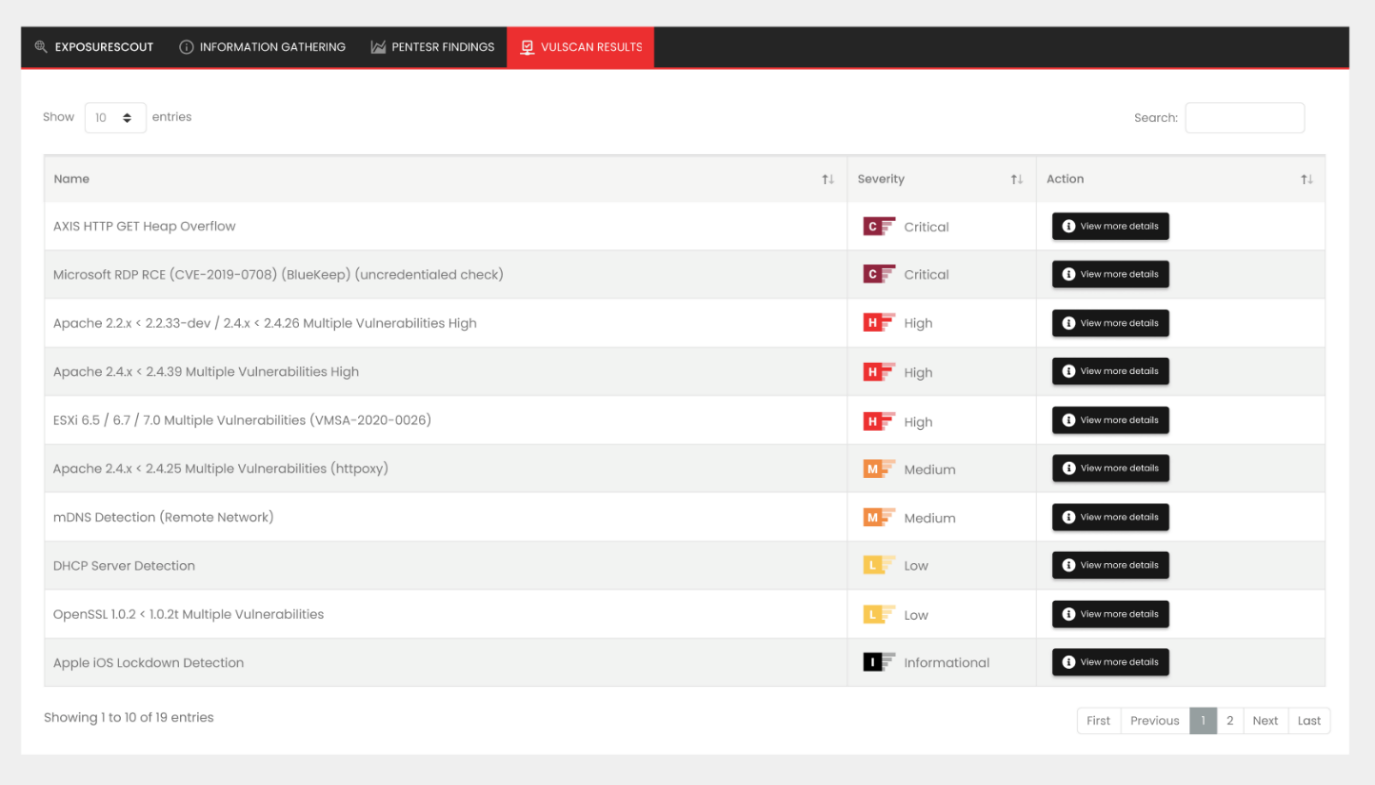
Upon import of the VulScan results into a scheduled assessment in vPenTest, you can view imported vulnerability scanning results on the Assessment Details page once the pentest kicks off.
This information is displayed in the Identified Vulnerabilities via VulScan section and VulScan Results tab.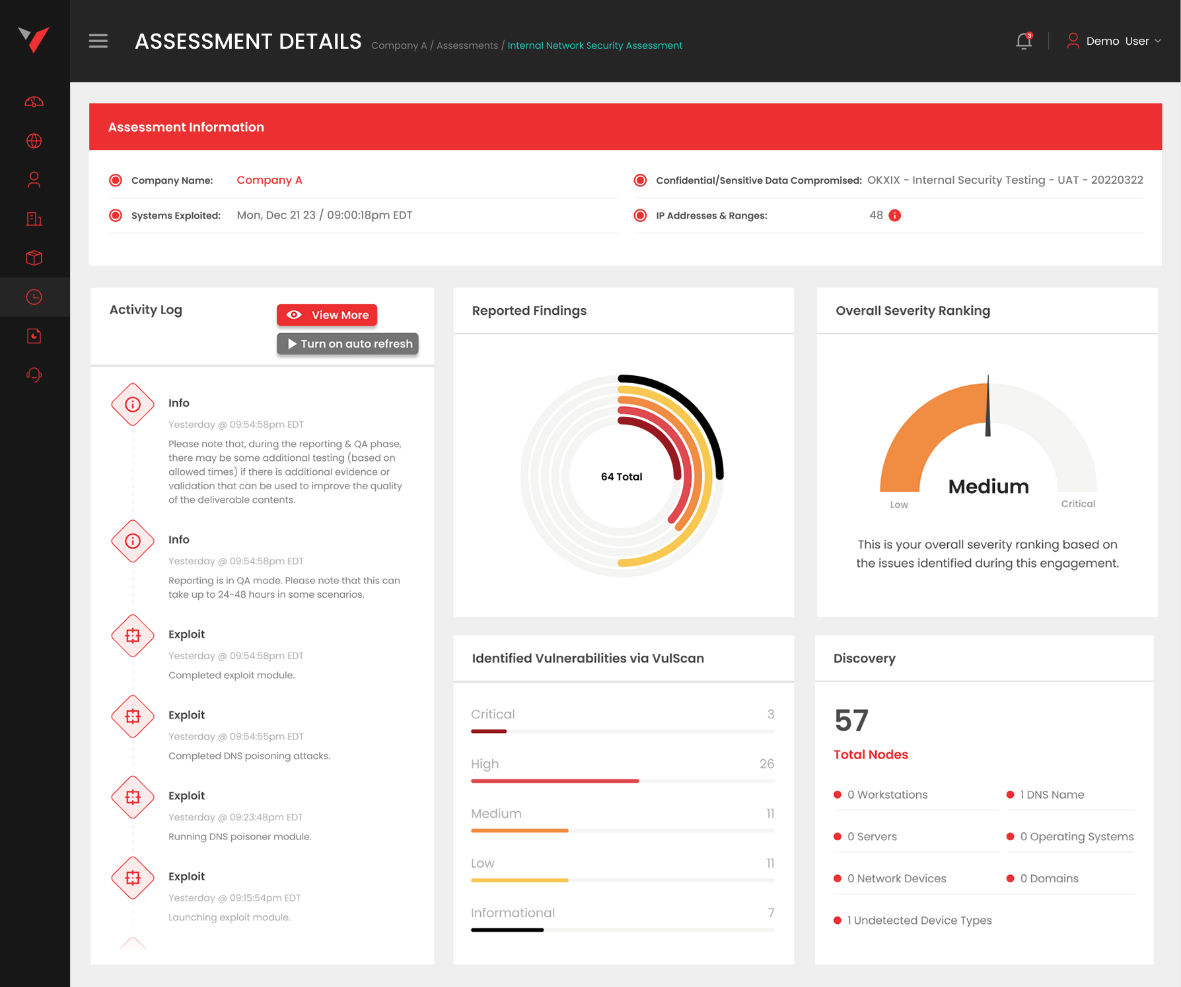
Upon completion of a scheduled internal or external network penetration test, you'll receive a summary email notification with a summary of the results from VulScan and vPenTest.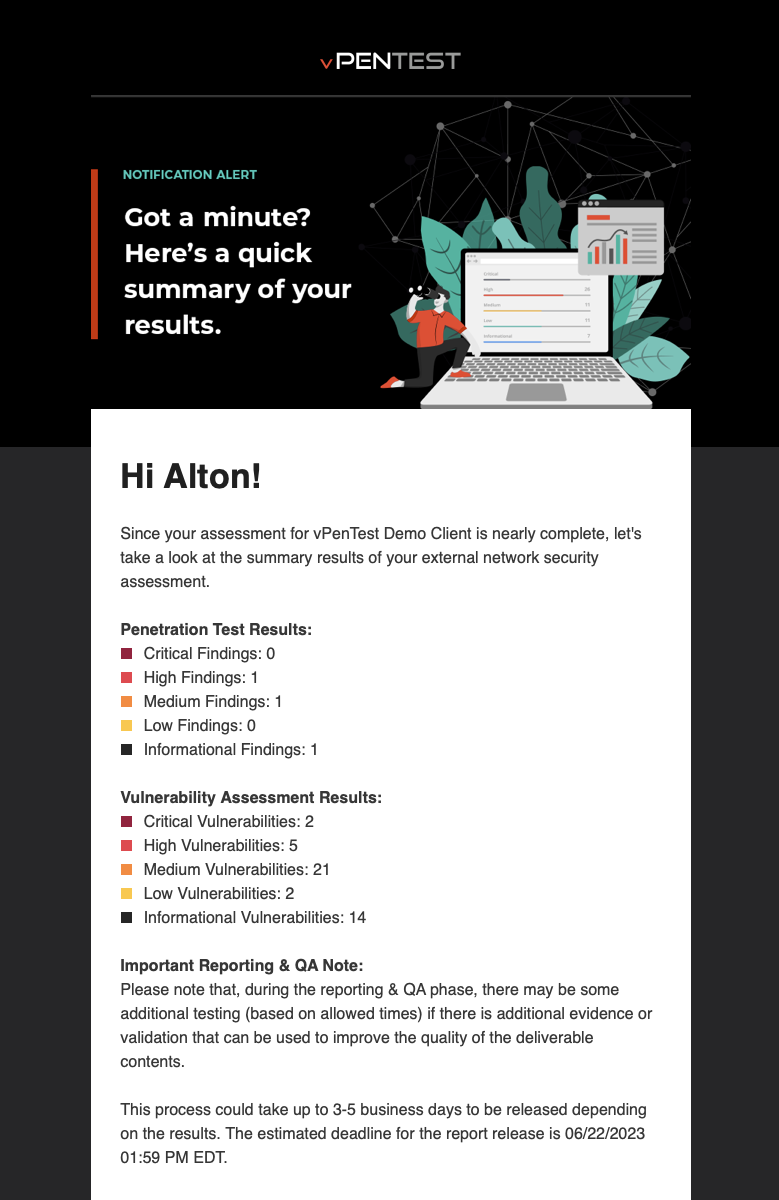
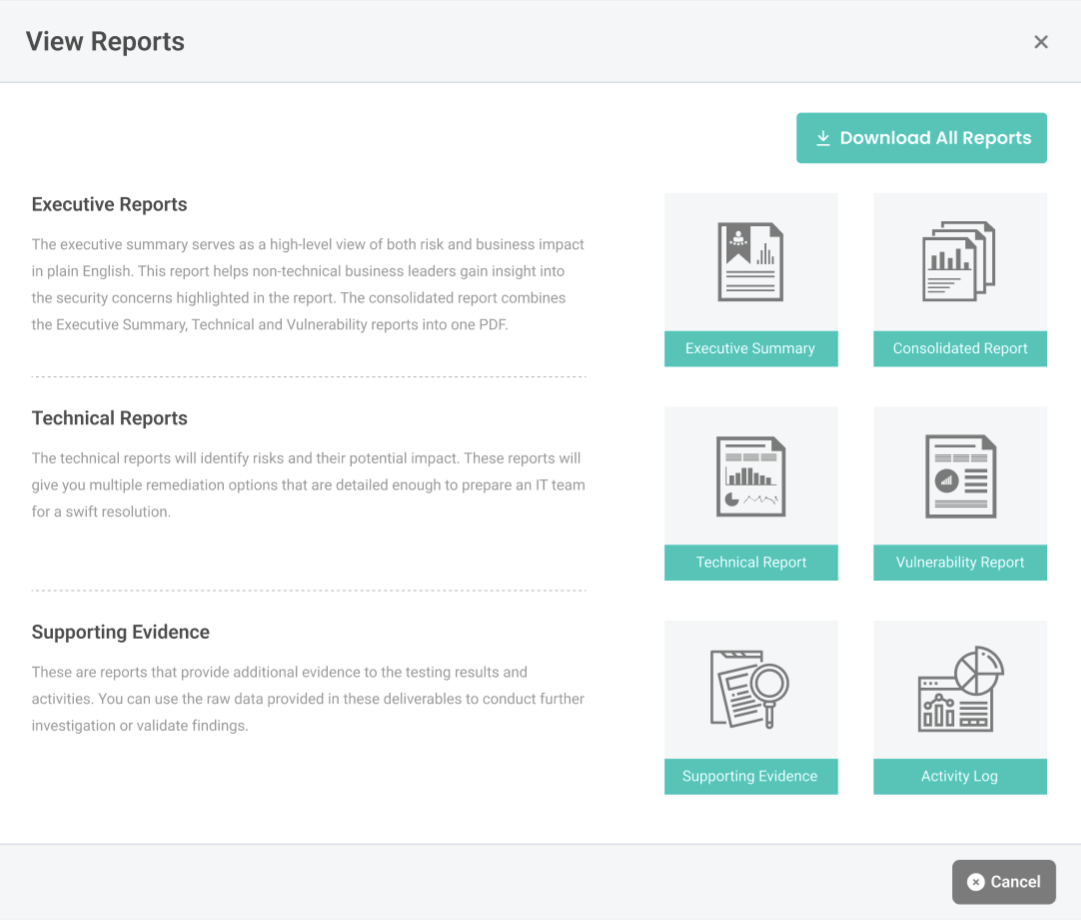
The option to download reports for mapped organizations with VulScan enabled is available on the Reports page.
The following report types are available:
To disable the VulScan integration, complete the following steps in vPenTest:
- In the left navigation menu, click Admin Settings.
- Click the Integrations tab.
- Click Disable in the VulScan tile.
- In the confirmation pop-up window, click Disable Integration to execute the disabling.
NOTE If you re-enable the integration later, previously mapped organizations remain mapped. You only need to map new organizations.


