Creating and managing internal agents
NAVIGATION Create (+) > Internal Agent
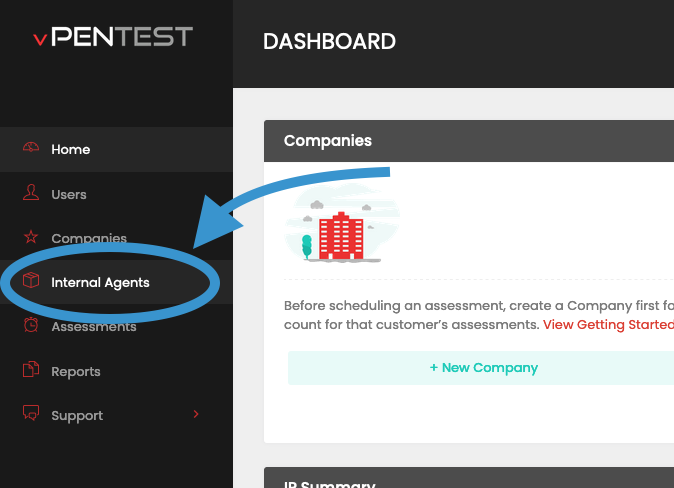
NAVIGATION Internal Agents
NAVIGATION Organizations > (select an organization) > List of Agents
What is an internal agent?
In order for Vonahi Security to perform an internal assessment, some form of access to the internal network environment must be provided (unless the goal is to perform an external penetration test that leads into an internal test).
An internal agent allows vPenTest to connect to the system internally in order to perform an internal assessment — whether it's a penetration test or a vulnerability assessment.
For more details about agents, refer to Agent in FAQs.
BEFORE YOU BEGIN To create an internal agent, you must first create an organization for the agent to associate with. Refer to Creating and managing organizations.
BEFORE YOU BEGIN If you don't already have an agent installed, refer to vPenTest Agent Installation Guide to learn how to install the VM.
Creating an internal agent
- Follow any of the navigation paths at the top of this article.
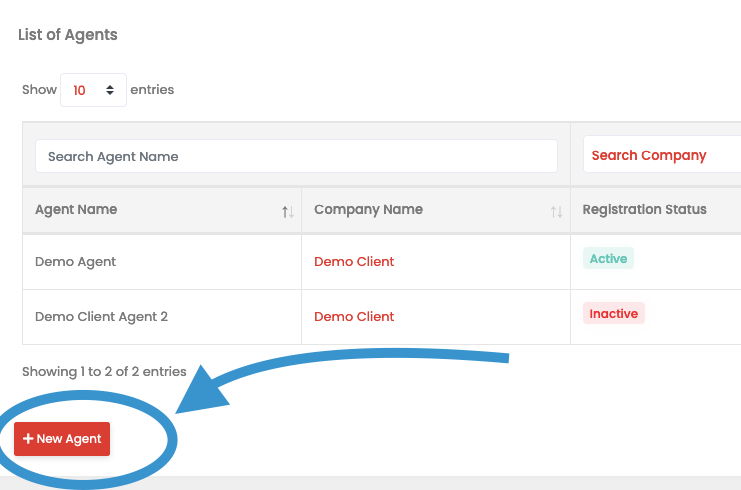
- Click New Agent.
- In the New Agent window, enter a name for the agent in the Name field.
- From the Organization drop-down menu, select the organization to associate with the agent.
- An Organization Location drop-down menu is displayed only if two or more locations are configured for the selected organization. Refer to Creating and managing locations. If applicable, select an organization location. The default location is applied by default.
- Click Save.
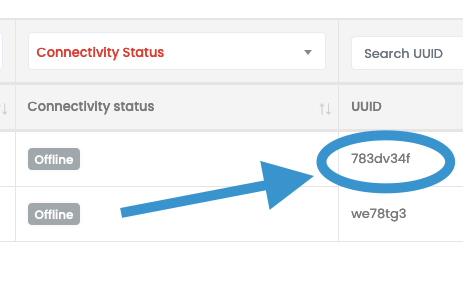
- Take note of the UUID.
- Register your internal agent. Log in to your vPenTest agent, which should provide the vPenTest agent menu to you, as shown in the following screenshot:
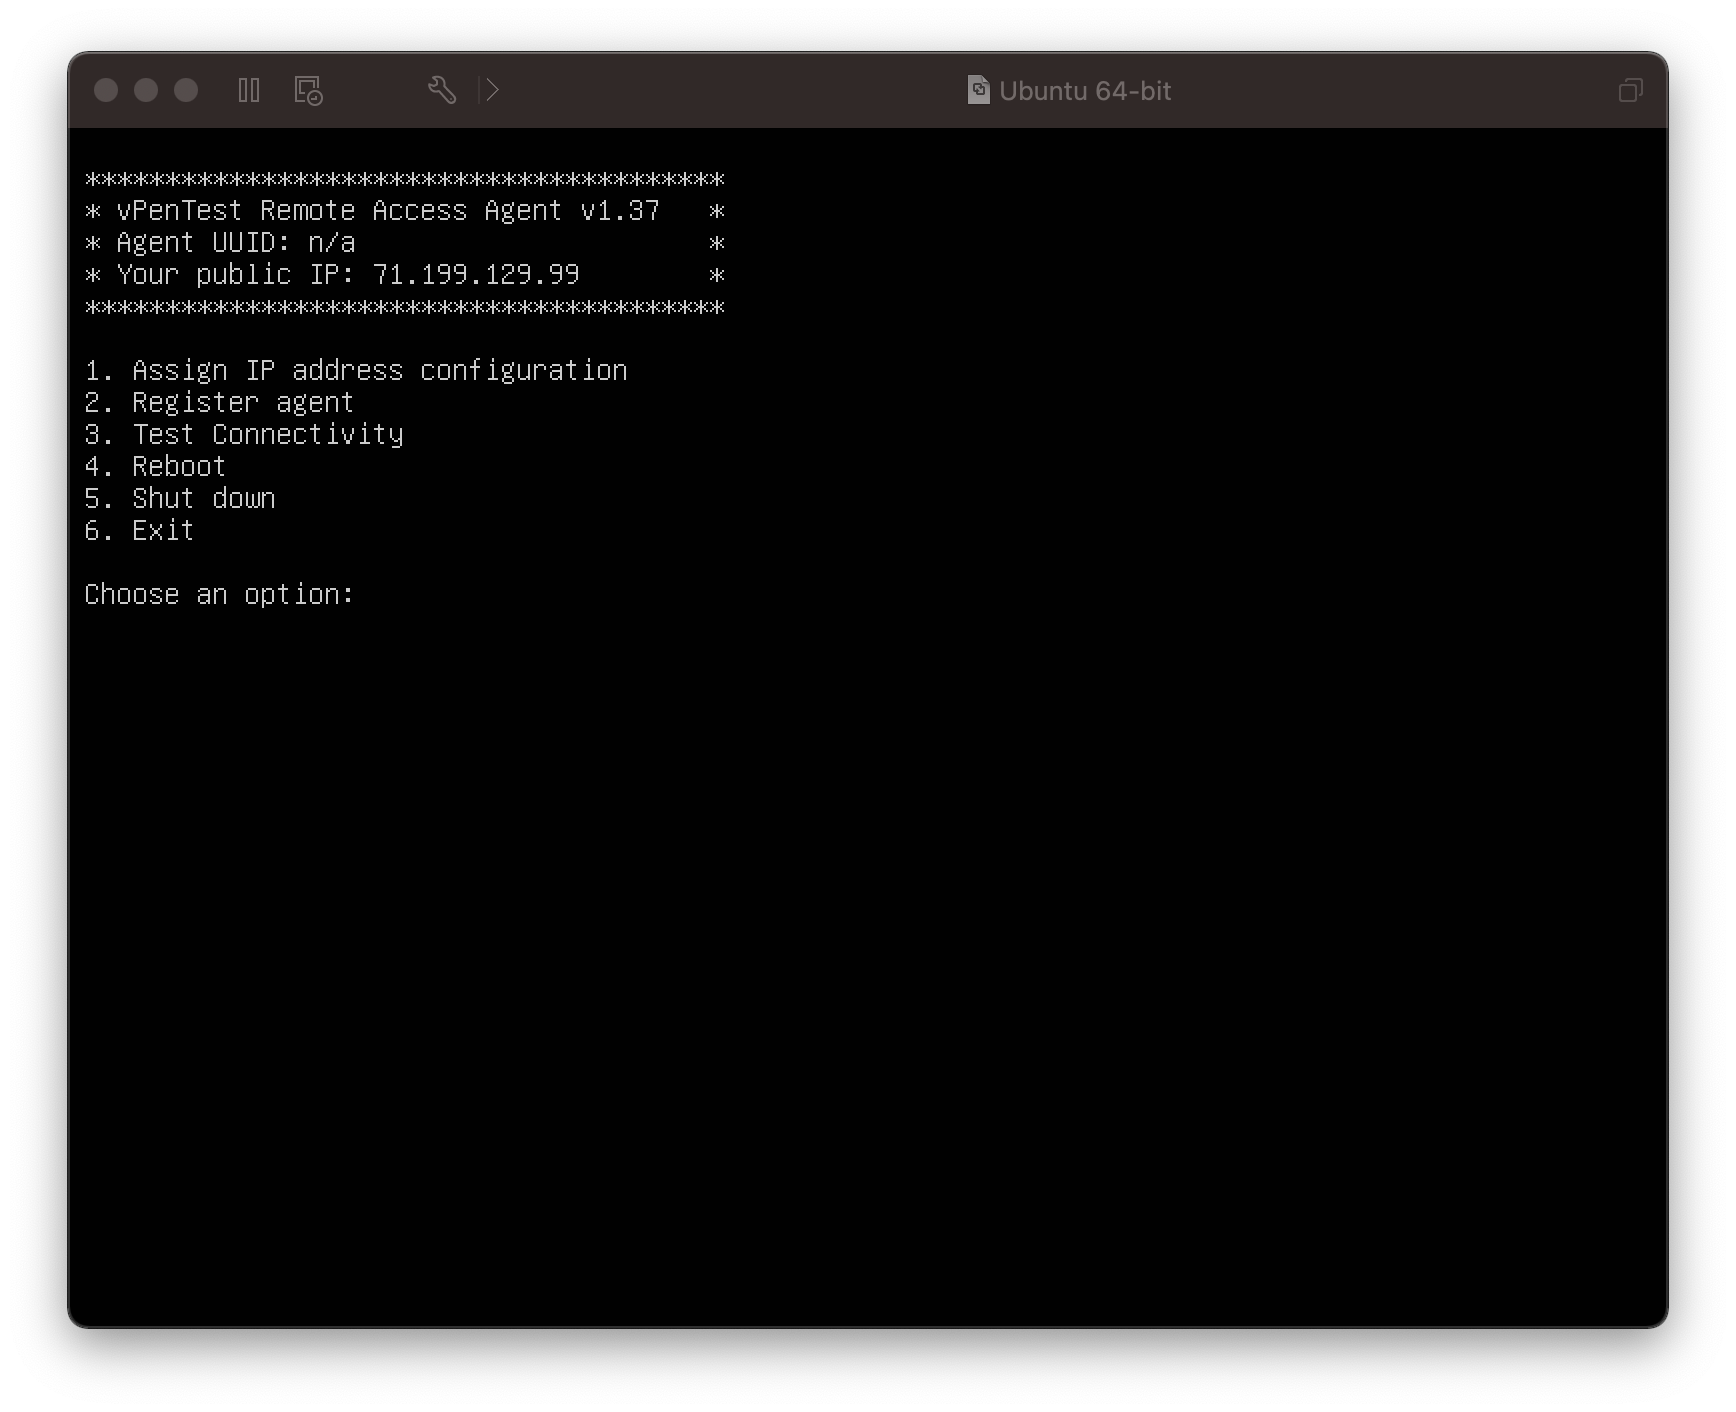
Select option 2, and provide the UUID that you observed in step 6. If you have any issues getting your VM started, logged in, connected to the internet, and so forth, refer to the following resources:
Swapping agents between organizations
You may encounter a scenario in which you want to swap agents between clients.
EXAMPLE Reassigning an agent to a different organization would allow you to ship a laptop to one customer and use the same laptop for the next client's assessment.
IMPORTANT All of the assessment data is purged upon completing an assessment, so none of the data from one client will be transferred to another client's network during this process.
Complete the following steps to swap an agent:
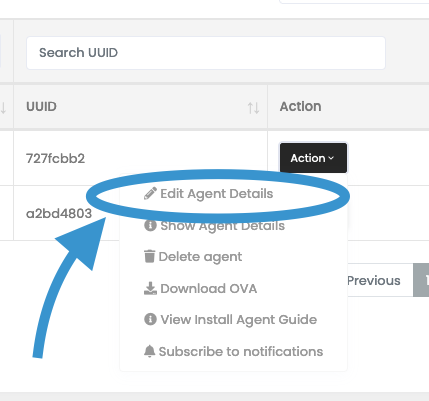
- From the left navigation menu, click Internal Agents.
- In the Action column, click the Action drop-down menu for the agent you want to swap and select Edit Agent Details.
- From the Organization drop-down menu, select the organization the agent should now belong to.
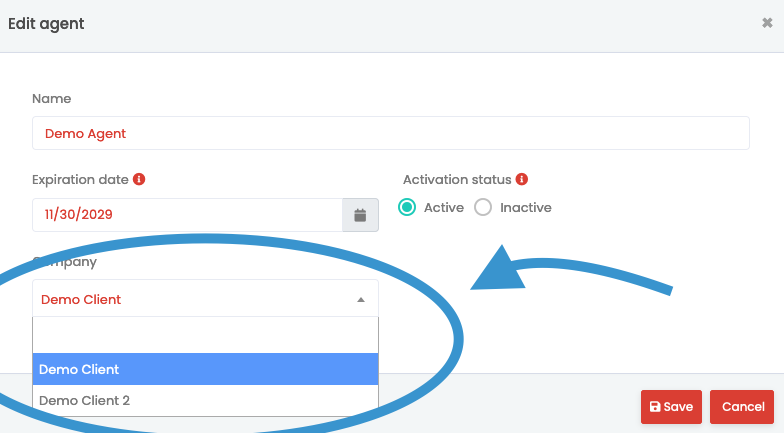
After you associate the agent with the new organization, you'll see the change in the list of agents, and you'll then be able to schedule an assessment using that agent and the organization.
Managing agents
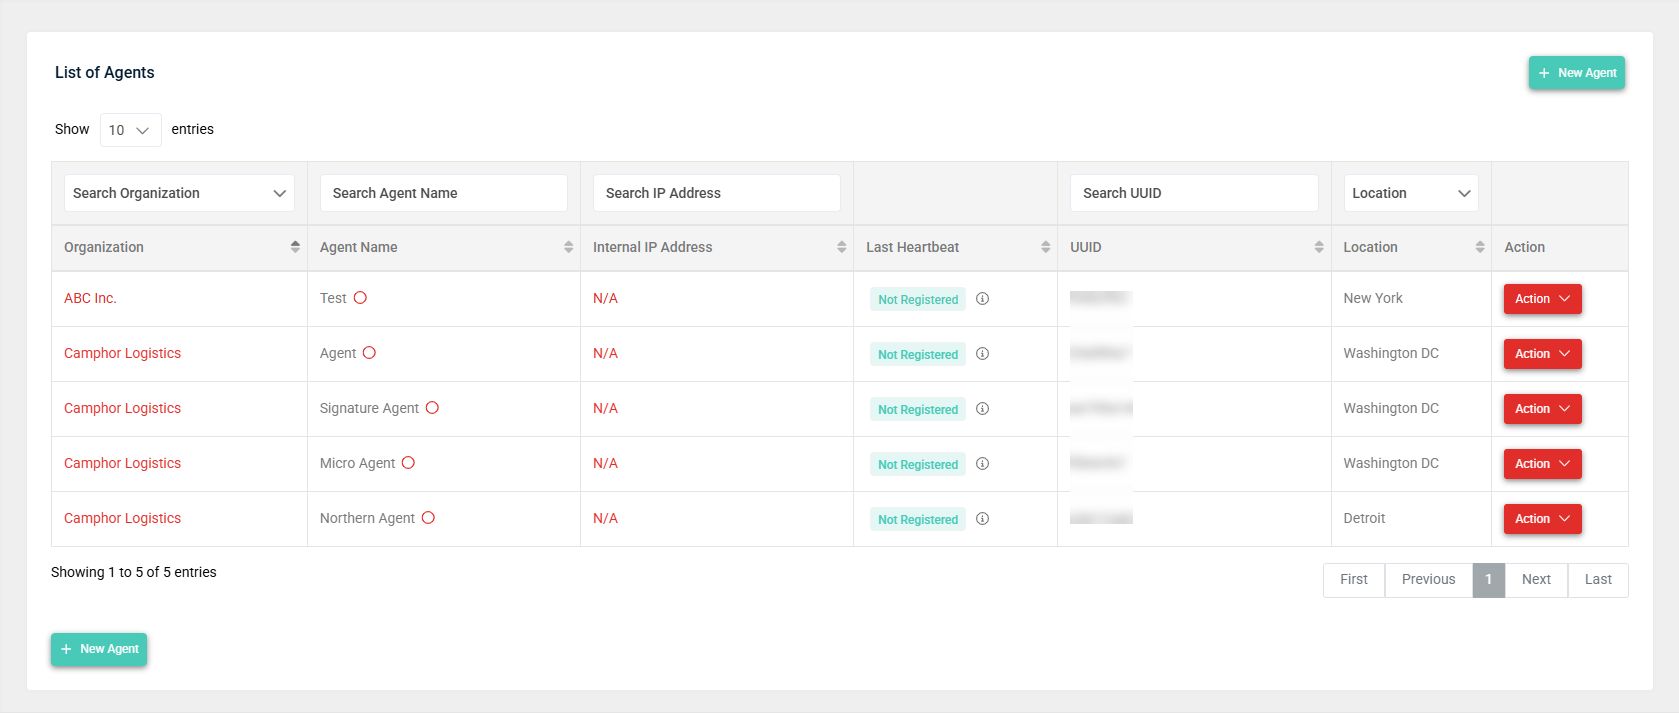
The List of Agents page, accessible by clicking Internal Agents in the left navigation menu, lists the details of all internal agents from all organizations.
To learn about adding an agent by clicking New Agent, refer to Creating an internal agent.
You have the option to search for specific agents in the list by name or IP address, select the number of entries displayed per page, and use the pagination controls to cycle through pages of entries.
Action menu
In the Action column, clicking the Action drop-down menu for an agent allows you to select from the following options:
- Edit Agent Details: Edit the agent's details.
- Show Agent Details: View full details about the agent and its logs.
- Delete Agent: Delete the agent.
- View Install Agent Guide: Open the vPenTest Agent Installation Guide.
- Subscribe to notifications: Subscribe to receive email notifications when the agent goes online or offline or encounters an error during an internal assessment.
NOTE Agent data is also available in the List of Agents tab in any organization profile. Refer to Creating and managing organizations.


