Scheduling an assessment
NAVIGATION Create (+) > Scheduled Assessment
NAVIGATION Assessments > Schedule Assessment
NAVIGATION Organizations > Schedule an Assessment
NAVIGATION Organizations > (select an organization) > Assessments > Schedule Assessment
Scheduling an assessment is the process of configuring the necessary requirements for your client’s security assessment. Assessments are scheduled via the scheduling wizard, which prompts you to configure settings in a series of steps to ultimately produce assessment results and reports.
For more details about assessments, refer to Assessments in FAQs.
BEFORE YOU BEGIN To schedule an assessment, you must first create an organization to schedule the assessment for. Refer to Creating and managing organizations.
BEFORE YOU BEGIN If you plan to schedule an internal assessment, an agent must be deployed. Refer to IP Estimator.
To schedule an assessment for an organization, open the scheduling wizard via any of the navigation paths at the top of this article.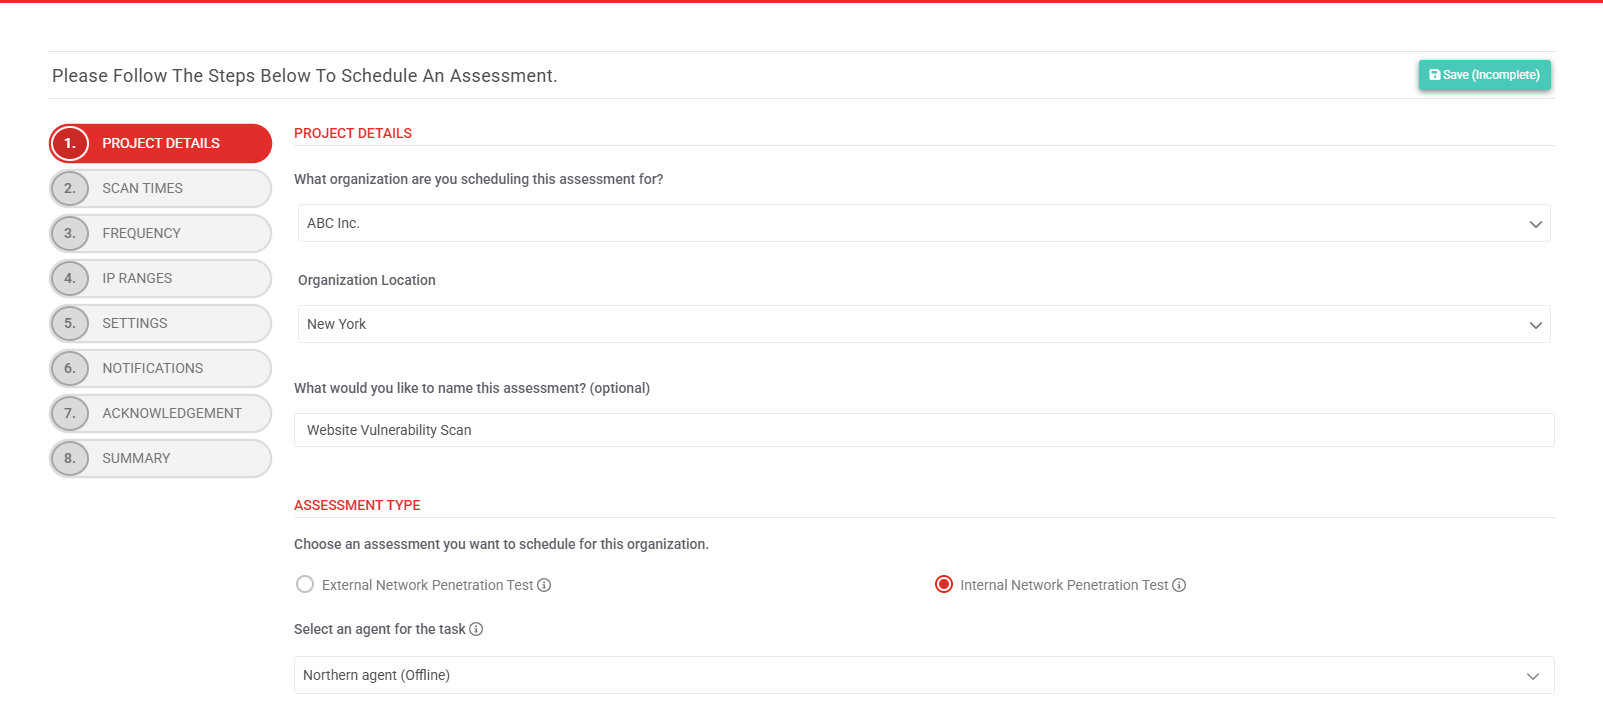
Steps in the scheduling wizard
The scheduling wizard guides you through the following steps. Click Next in the lower-right corner of each page to proceed to the next step.
NOTE Steps 5 through 8 vary depending on whether or not basic settings are enabled. For details, refer to Enabling or disabling basic or advanced assessment settings.
| Section | Instructions |
|---|---|
| Project Details | From the drop-down menu, select the organization you are configuring the assessment for. An Organization Location drop-down menu is displayed only if two or more locations are configured for the selected organization. Refer to Creating and managing locations. If applicable, select an organization location. The default location is applied by default. NOTE If only one location is configured for the organization, this field is not displayed because that location is applied by default. Enter a name for the assessment. If you leave this field blank, the name is automatically generated in the following format: MM.DD.YYY_[Organization]- [Internal or External] Penetration Test |
| Assessment Type/Assessment Details | Select either External Network Penetration Test or Internal Network Penetration Test. For full details of these assessments types, hover over the tooltips next to the types and review What's the difference between the external and internal assessments? If you selected Internal Network Penetration Test, select an agent from the drop-down menu, which must be online prior to the assessment start date. Refer to Creating and managing internal agents. If any applicable integrations are configured for this organization, configure this section based on whether or not you want to import results from this integrated product into the assessment. Refer to Integrations and Organization settings (Integrations tab). |
| Report Priority | Select a report priority based on the urgency of your report delivery date. To learn about the report quality assurance process based on your selected report priority, refer to What happens during report QA? |
| Report Branding | Select the report brand to apply to the report. To learn about adding a custom report brand, refer to Reports tab. |
Select the time zone to apply to the assessment scheduling.
By default, the assessment is permitted to run during all hours of each day of the week. Using the color key for guidance, you have the option to restrict the assessment from running during specified blocks of time.
To restrict the assessment from running on a particular day (all hours), click the day to select all hours in the day at once. To restrict the schedule from running during specific blocks of time on certain days, click and drag as many hour slots as necessary. To remove any selected restrictions, click and drag your selections again to revert them.
The following screenshot outlines the hours during which the assessment is not permitted to run: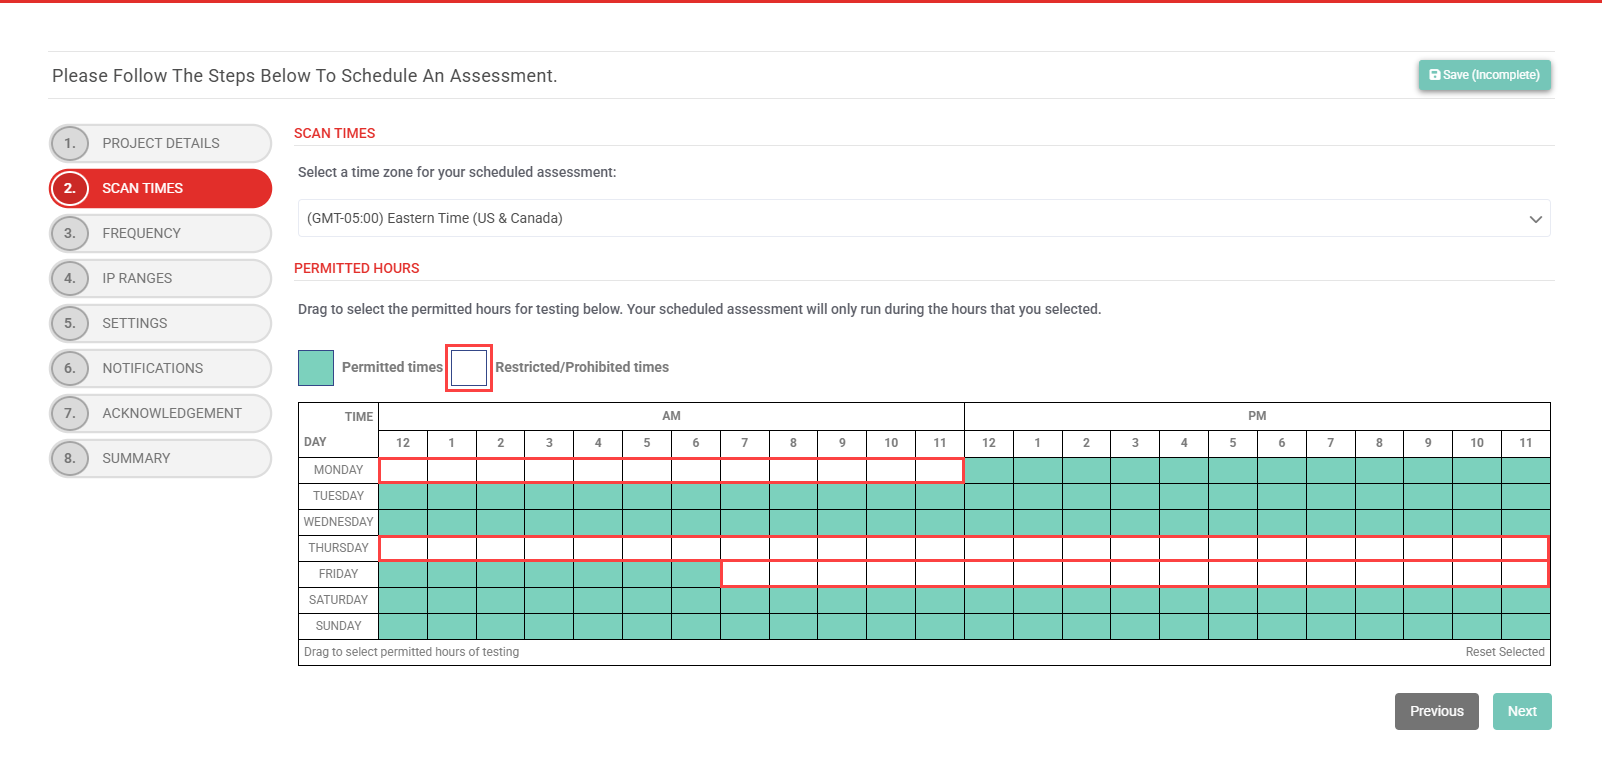
In the calendars, select the dates on which the assessment will run. Days of the week you entirely restricted in Step 2 are grayed out. To clear a selection, click Reset at the bottom of the calendar.
Enter the IP addresses to perform the assessment on (in the IPs Included text box) and any IP addresses to exclude from all testing (in the IPs Excluded text box).
Clicking Import organization IPs automatically populates relevant IP addresses configured in the organization profile. Refer to Manage IPs in Creating and managing organizations.
Provide single IP addresses or network ranges in CIDR notation or range format (for example, 192.168.1.0/32 OR 192.168.1.1-5). Separate IP addresses/ranges with commas or new lines. You may also specify domain names without the protocol or any URL paths.
NOTE Domains and sub-domains provided in the organization’s profile are used only for OSINT and not automatically included in this scope unless explicitly added.
The Settings step appears only if you have enabled basic settings or both basic and advanced settings. Refer to Enabling or disabling basic or advanced assessment settings.
If both basic settings and advanced settings are enabled, this step displays both the Basic Settings and Advanced Settings sections. These sections reflect the settings configured on the Basic Assessment Settings and Advanced Assessment Settings sections on the Admin Settings page.
If advanced settings are not enabled, only the Basic Settings section is displayed.
You can edit the settings in this step on a per-assessment basis, which will not affect the default global settings.
For details on these settings, refer to Configuring global admin settings.
In this step, you can opt to send notifications to specific recipients as the assessment progresses.
From the drop-down menus, select any number of users in the account to send the notifications to. To send notifications to users outside of the account, click Add non-registered emails and manually enter their email addresses.
The following types of notifications are available to configure recipients for:
- Assessment Activities: When each phase of the assessment kicks off and completes (for example discovery, enumeration, exploitation, and so forth), selected users will receive an email notification.
- New Report Finding Added: When a new pentest finding gets added or removed from your assessment, selected users will receive an email notification of the finding in real-time along with the severity ranking and additional info.
- Vulnerability Count Changes: When new vulnerabilities are imported into your assessment, selected users will receive an email notification with a link to track the assessment.
- Assessment Summary: An assessment confirmation email that includes a summary of everything you selected and provided for this assessment will be sent to the selected users.
Review the legal and technical conditions outlined in this step, and select each checkbox to confirm acknowledgment. Selecting each checkbox is required to proceed.
Review the finalized summary of the options you've configured for the scheduled assessment.
Click Finish to queue your scheduled assessment.
If you’ve opted to start the assessment immediately, it will start running 30 minutes after you've finished the scheduling wizard. For details, refer to How soon can I start an assessment?
Managing assessments
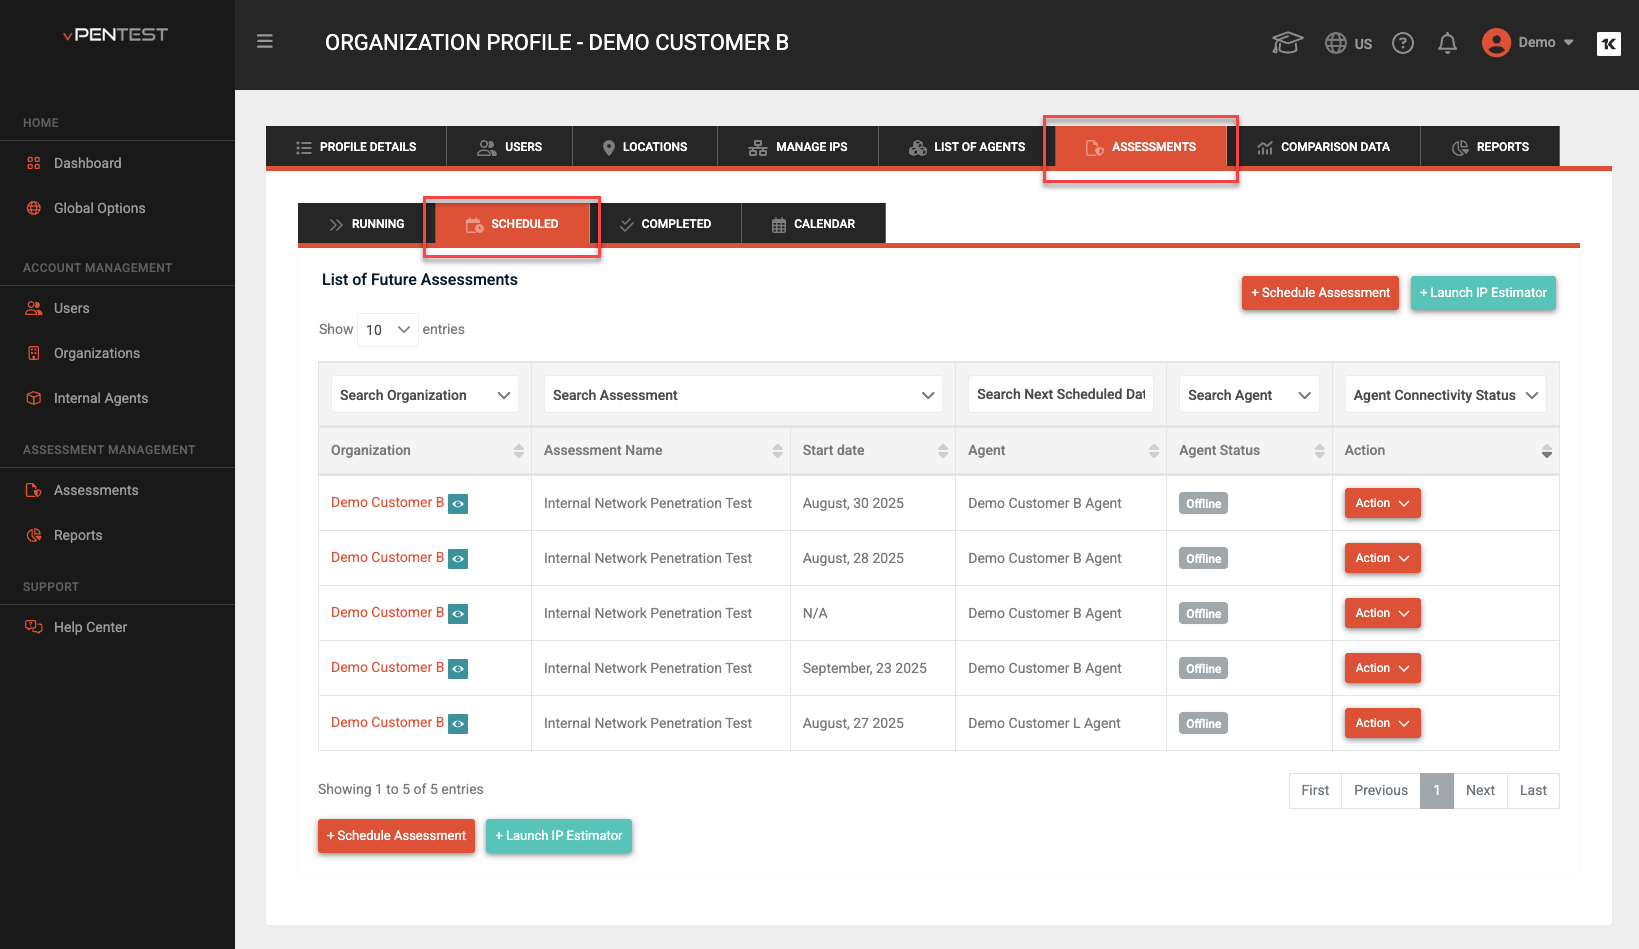
The Assessments page, accessible from the left navigation menu, lists all past and future assessments for all organizations. View the details of each assessment via the following four tabs:
Running
View the list of scheduled assessments that are currently running.
Scheduled
View the list of assessments that are scheduled to run in the future.
Completed
View the list of finished assessments that have already run.
Calendar
View all assessments in a calendar view based on their run dates. You have the option to view the calendar by Month, Week, or Day and cycle through those months, weeks, or days. To view only upcoming assessments and not previously run assessments, click Show Upcoming Assessments only.
In each tab, you can launch the scheduling wizard or IP Estimator tool, search for specific assessments in the list based on various data, select the number of entries displayed per page, and use the pagination controls to cycle through pages of entries.
NOTE Assessment data is also available in the Assessments tab in any organization profile. Refer to Creating and managing organizations.


